


Device Configuration
34
NXR-ZGW/-ZRP
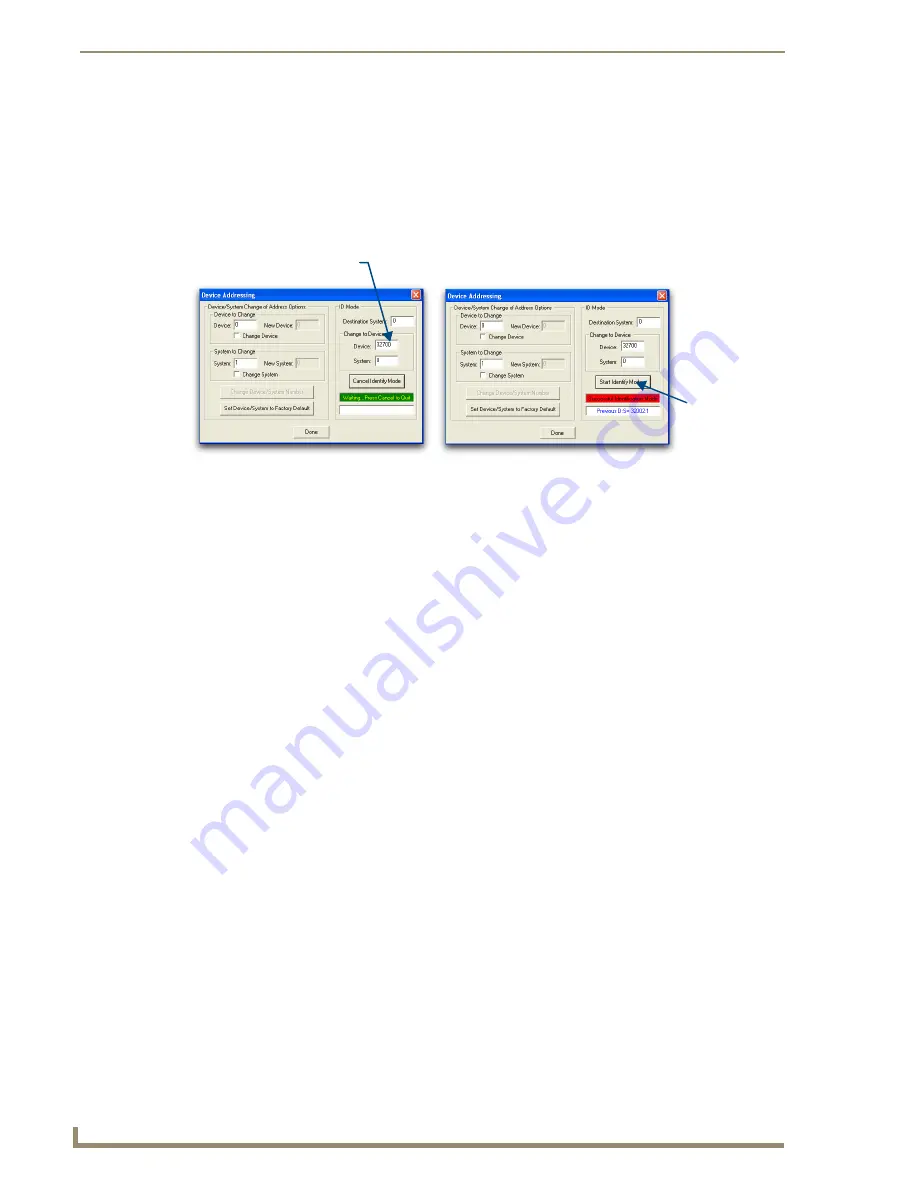
Using the ID Button to Change the NXR-ZGW’s Device
Number
1.
Launch NetLinx Studio 2.4 (default location is Start >Programs > AMX Control Disc > NetLinx
Studio > NetLinx Studio 2.4).
2.
Access the Device Addressing dialog (FIG. 18) by selecting
Diagnostics
>
Device Addressing
from the Main menu.
3.
Locate the
Device
field (
A
in FIG. 18) and enter the new value for the NXR-ZGW.
This value must fall within a range of 0 - 32767
.
4.
Press the on-screen
Start Identify Mode
button.
This action causes a previously red
*Not Active*
field to now display a green
Waiting...Press
Cancel to Quit.
field.
This green field indicates that Studio is waiting to detect the device value of the NXR-ZGW
associated with the
ID
button on the target NXR-ZGW.
5.
Press the target NXR-ZGW’s
ID
button to begin process of reading the current device value of the
NXR-ZGW and then assigning it to the new value entered in step 2.
Once the swap has been successfully made, a red
Successful Identification Made
field appears.
The previous Device value and associated System number of the targeted NXR-ZGW are then
displayed below the red field. As an example,
Previous D:S=32002:1
, where 32002 was the
previous device value of the NXR-ZGW (
D
) and 1 was the System value (
S
).
FIG. 18
Device Addressing dialog (using the ID mode to set the NXR-ZGW device value)
Enter the new NXR-ZGW value
Assign the
new value to
the NXR-ZGW
A
B
Summary of Contents for NetLinx NXR-ZGW
Page 4: ......
Page 14: ...Overview 8 NXR ZGW ZRP ...
Page 18: ...Installation 12 NXR ZGW ZRP ...
Page 20: ...Setting up a Network 14 NXR ZGW ZRP ...
Page 36: ...NXR ZGW Browser based Configuration Manager Pages 30 NXR ZGW ZRP ...


