

© 2015 Harman. All rights reserved. NetLinx, Enova, WebControl, AMX, AV FOR AN IT WORLD, and HARMAN, and their respective logos are
registered trademarks of HARMAN. Oracle, Java and any other company or brand name referenced may be trademarks/registered trademarks
of their respective companies.
AMX does not assume responsibility for errors or omissions. AMX also reserves the right to alter specifications without prior notice at any time.
The AMX Warranty and Return Policy and related documents can be viewed/downloaded at www.amx.com.
3000 RESEARCH DRIVE, RICHARDSON, TX 75082 AMX.com | 800.222.0193 | 469.624.8000 | +1.469.624.7400 | fax 469.624.7153
AMX (UK) LTD, AMX by HARMAN - Auster Road, Clifton Moor, York, YO30 4GD United Kingdom • +44 1904-343-100 • www.amx.com/eu/
93-1906-11 REV: D
Last Revised: 7/10/2015
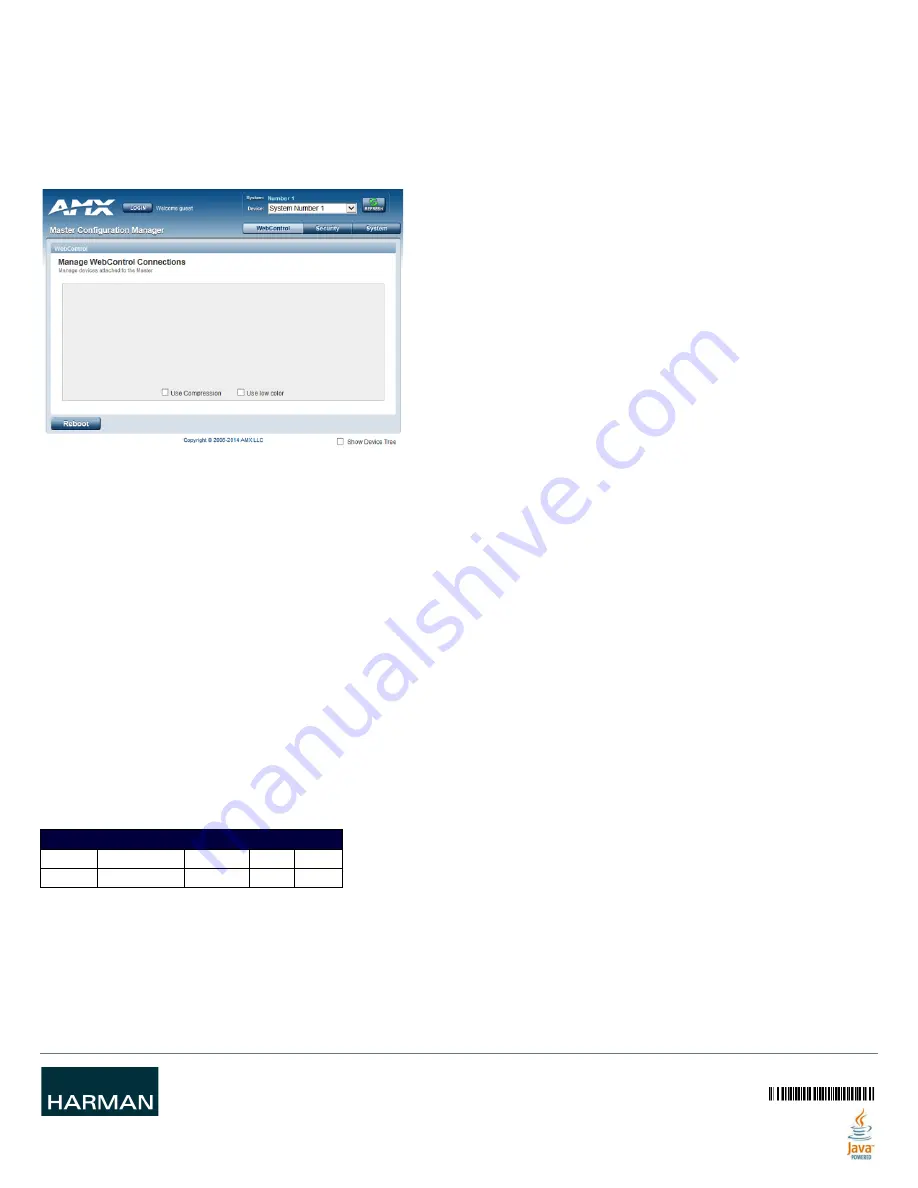
Accessing the WebConsole
The DVX has a built-in WebConsole that allows you to make various configuration
settings via a web browser on any PC with access to the device.
The WebConsole consists of a series of web pages that are collectively called the
“Master Configuration Manager”. Refer to the
NX Series NetLinx Integrated Controllers
WebConsole & Programming Guide
for details on the WebConsole.
From any PC with access to the LAN that the target DVX resides on:
1.
Open a web browser and type the IP Address of the target DVX in the Address Bar.
2.
Press
Enter
to access WebConsole for the DVX. The initial view is the WebControl
page.
FIG. 2
WEBCONSOLE (MAIN PAGE)
Enabling Security
To enable security:
1.
Select the
Security
tab on the WebConsole. The System Security Details appear.
2.
Click the
Enabled
check box to enable security and activate the Access options.
3.
Select the Access options which you want to require a login and password.
4.
Configure users and groups as necessary.
Wired 802.1x Security
The DVX supports wired 802.1x, an IEEE Standard for Port-based Network Access
Control. To enable wired 802.1x, you must load an 802.1x certificate file to your
controller using NetLinx Studio. Once you add the certificate file to your workspace,
NetLinx Studio transfers the file to the appropriate directory on the controller.
1.
Click to select (highlight) a System (in the Workspace tab of the Workspace Bar).
2.
Right-click on the
Other
folder to access the Other File Folder context menu, and
select
Add Existing Other File
.
3.
In the Add Existing Other File dialog, locate and select the certificate file (.crt) that
you want to add to the selected System. Change the Files of Type option to All
Files (*.*) to look for other file types, if necessary.
4.
Click
Open
to access the File Properties dialog, where you can view/edit general
file information for the selected file.
5.
Click
OK
to add the file to the selected System. The file should now appear in the
Other folder under the selected System.
Hardware Information
This section lists important hardware information for the DVX.
Port Numbers
The following table lists the port numbers for the all 225x-series DVX models:
Mounting the DVX into an Equipment Rack
The DVX occupies three rack units in a standard equipment rack. Install the included
rack mounting brackets using the supplied mounting screws prior to securing the unit
in the rack.
CAUTION: The DVX should not be installed in enclosed spaces. ALWAYS ensure that the
rack enclosure is adequately ventilated. Do not block any ventilation openings. It is
recommended that you leave 1 RU of space above the DVX when you install it in a rack.
DO NOT stand other units directly on top of the DVX when it is rack mounted, as this will
place excessive strain on the mounting brackets.
ALWAYS ensure that the rack enclosure is adequately ventilated. Do not block any
ventilation openings. Sufficient airflow must be achieved (by convection or forced-air
cooling) to satisfy the ventilation requirements of all the items of equipment installed
within the rack.
NOTE: Connect the LAN port to a LAN with DHCP before powering up the device.
Additional Documentation
Additional documentation for this device is available at www.amx.com.
• Refer to the
Enova DVX-325xHD/22xxHD All-in-One Presentation Switchers
Instruction Manual
for additional details on installing, wiring, and updating the
firmware for your device.
• Refer to the
NX Series NetLinx Integrated Controllers WebConsole & Programming
Guide
for detailed configuration instructions.
You can also access this Quick Start Guide online by using your mobile device to scan
the QR code located on the bottom of the DVX.
DVX-2250HD/2255HD PORT NUMBERS
RS-232
RS-422/485
IR/Serial
I/O
Relay
2-4
1
11-14
22
21


