background image

Page 1

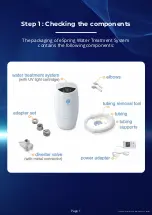
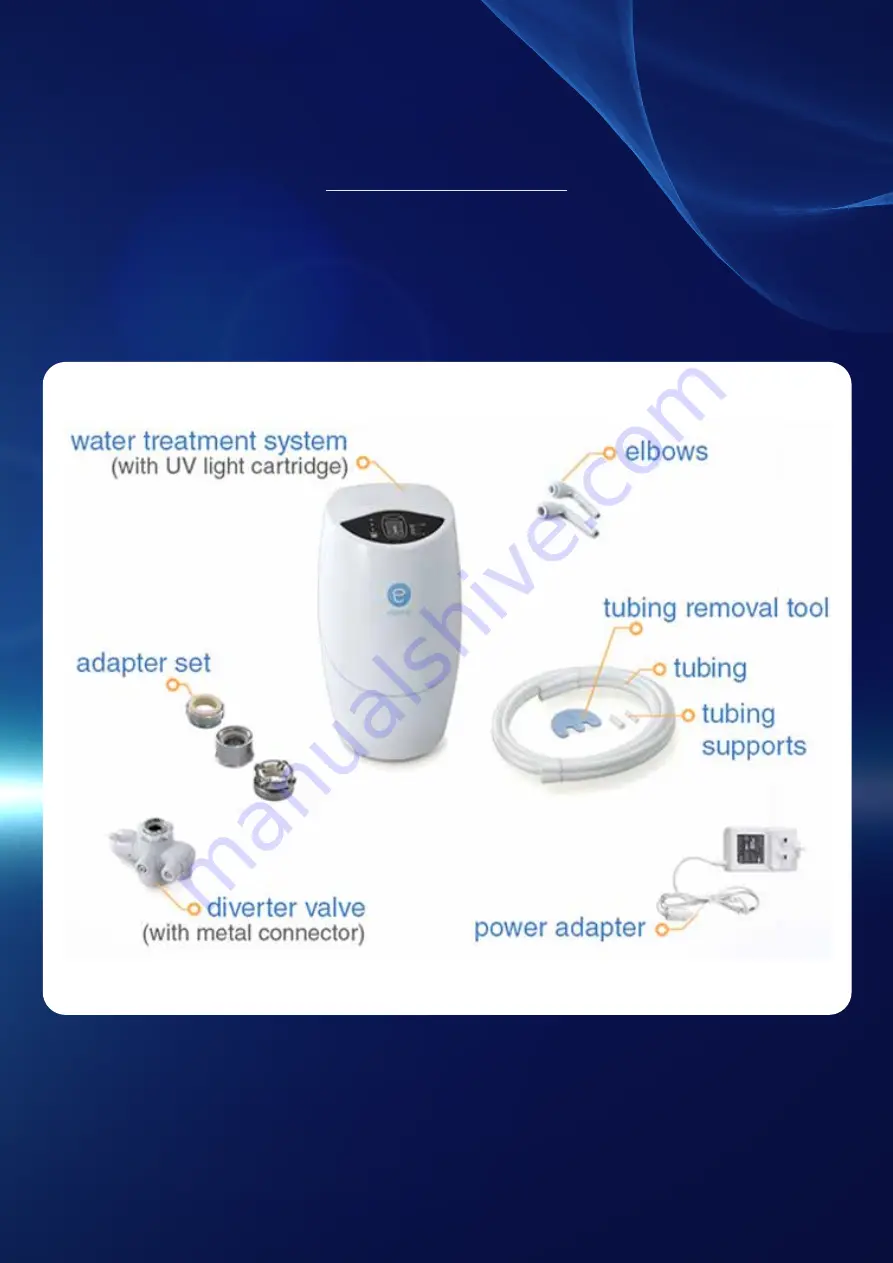
The packaging of eSpring Water Treatment System 

contains the following components:

eSpring Installation & Maintenance Guide

Step 1 : Checking the components

Summary of Contents for eSpring

Page 1: ...y Installation Guide Contents Easy Installation 5 Steps Step 1 Checking the components Step 2 Attaching the adapter diverter Step 3 Connecting the tubing Step 4 Checking for leaks Step 5 Test Exam the unit ...

Page 2: ...nstalled eSpring Water Treatment System and its components which are installed without following the standard guidelines or which have been modified may result in diminished water purifier performance and may jeopardise safety of drinking water eSpring Water Treatment System is only suitable for use in families who receive their water from a municipal water supply Should you have any queries on the ...

Page 3: ...Page 1 The packaging of eSpring Water Treatment System contains the following components eSpring Installation Maintenance Guide Step 1 Checking the components ...

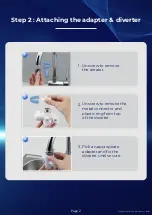
Page 4: ...ce Guide Unscrew to remove the aerator Unscrew to remove the metal connector and plastic ring from top of the diverter Pick an appropriate adapter and fix the diverter until secure Step 2 Attaching the adapter diverter Page 2 1 2 3 ...

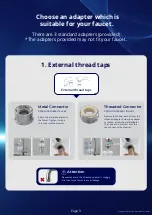
Page 5: ...dapter is snuggly attached to the faucet to avoid leakage Attention Metal Connector 55 64 diameter faucet Attach the metal adapter onto the faucet Tighten it with a coin to secure the diverter Threaded Connector 22mm diameter faucet Remove the rubber washer from the threaded adapter Screw the adapter to the tap screw the metal adapter Then use a coin to screw onto the tap and secure the diverter P...

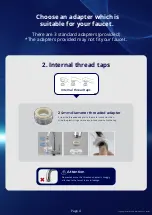
Page 6: ...n 24mm diameter threaded adapter Screw the threaded adapter to the metal connector then slide the plastic ring and use a coin to secure it onto the tap Page 4 There are 3 standard adapters provided The adapters provided may not fit your faucet Choose an adapter which is suitable for your faucet 2 Internal thread taps Internal thread taps ...

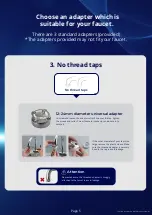
Page 7: ...he outer diameter of your tap is too large remove the plastic sleeve Make sure the threaded adapter is securely fixed to the tap to avoid leakage Page 5 Please make sure the threaded adapter is snuggly attached to the faucet to avoid leakage Attention There are 3 standard adapters provided The adapters provided may not fit your faucet Choose an adapter which is suitable for your faucet 3 No thread t...

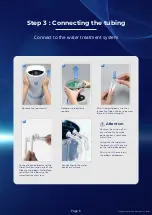
Page 8: ...dule Push tubing supports into their respective tubes Mark a line across them at the 18mm length Position the unit on a flat dry surface Make sure a power outlet is reachable within 1 5m Fully push the tubes into the bracket until the mark on the tubing disappears Push in until the mark on the elbows disappears Attention eSpring Installation Maintenance Guide Step 3 Connecting the tubing Page 6 Co...

Page 9: ...ubes Make sure to make a straight cut to form a flat end on the tubes Attach the tubings to the diverter Use a tie strap to secure the tubings Attention eSpring Installation Maintenance Guide Page 7 Step 3 Connecting the tubing Connect to the diverter ...

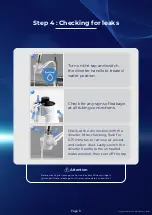
Page 10: ... Attention Step 4 Checking for leaks Page 8 Turn on the tap and switch the diverter handle to treated water position Check for any signs of leakage at all tubing connections Check at the connection with the diverter After checking flush for 5 15 minutes to remove air pocket and carbon dust Lastly switch the diverter handle to the untreated water position then turn off the tap ...

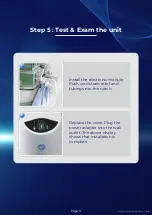
Page 11: ...Guide Step 5 Test Exam the unit Page 9 Install the electronic module Push cord strain relief and tubings into the notch Replace the cover Plug the power adapter into the wall outlet The above display shows that installation is complete ...

Reviews: