background image


24 

IV. EXPLODED VIEW 
 

Model      A240 


Fig. 38 

Car-in 
direction 

Summary of Contents for A240

Page 1: ...TWO POST LIFT Model A240 ...

Page 2: ...CONTENTS Product Features and Specifications 1 Installation Requirement 3 Steps of Installation 4 Exploded View 24 Test Run 28 Operation Instruction 30 Maintenance 30 Trouble Shooting 31 Parts List 32 ...

Page 3: ...lyethylene sliders and bronze bush Single point safety release and dual safety design Super symmetric arms design combined adapter SPECIFICATIONS Model Style Lifting Capacity Lifting Time Lifting Height Overall Height Overall Width Width Between Columns Minimum Pad Height Motor A240 Floorplate Chain drived 4 0T 9 000 lbs 45S 1825 1960mm 71 7 8 77 3 16 2742mm 108 3350mm 131 7 8 2780mm 109 1 2 100mm...

Page 4: ...2 Arm Swings View 2513mm 1270mm 814mm 683mm 1159mm Fig 2 ...

Page 5: ...IREMENT A TOOLS REQUIRED 9 Rotary Hammer Drill Φ19 9 Hammer 9 Level Bar 9 English Spanner 12 9 Wrench set 10 13 14 15 17 19 24 27 9 Pliers 9 Carpenter s Chalk 9 Screw Sets 9 Tape Measure 7 5m 9 Socket Head Wrench 4 5 6 Fig 3 ...

Page 6: ...of test strength 3 000psi 210kg cm minimum 3 Floors must be level and no cracks C POWER SUPPLY The electrical source must be 2 2Kw minimum The source cable size must be 2 5mm and in good condition of contacting with floor 安装地基示意图 III STEPS OF INSTALLATION A Location of Installation Check and insure the installation location concrete layout space size etc is suitable for lift installation B Use a c...

Page 7: ...t and open the outer packing carefully See Fig 7 3 Take off the parts from upper and inside the column then take out the parts box See Fig 8 4 Loose the bolts of the upper package stand take off the upper column and remove the package stand Fig 8 Fig 6 Fig 7 Shipment Parts list Floor cover Parts box Aluminum nameplates Control box ...

Page 8: ...e the parts and check the parts according to the shipment parts list and parts box list See Fig 9 Fig 10 7 Check the parts of the parts bag according to parts bag list See Fig 11 99 Fig 9 Fig 11 Fig 10 Parts box 99 ...

Page 9: ...according to the actual installation site Usually it is suggested to install powerside column on the front right side from which vehicles are driven to the lift Then install the top plates See Fig 12 Offside column Car in direction Powerside column Assemble topplate using M10 35 hex bolt with nut and lock washer Fig 12 ...

Page 10: ...y a Cable passes through the carriage e Pull the cable from bottom to top and pass through the cable from big pulley f The fitting of cable pass through the hole of the carriages and be screwed with two cable nuts b Push the carriages higher than chain pulley cable pass through the top of the carriages and pass through the hole of the bottom steel plate of the carriages Fig 13 ...

Page 11: ...9 2 Install cables See Fig 14 Fig 14 ...

Page 12: ...10 F Assembly oil hose assy 1 Install oil hose See Fig 15 Fig 15 81 85 81A 81 79A 80 81 81 79 ...

Page 13: ...ig 17 Check the columns plumbness with level bar and adjusting with the shims if the columns are not vertical Push the carriages to the bottom of columns 2780mm Cable and oil hose can not cross Check the columns plumbness with level bar on front and side column Fig 16 Fig 17 76 3350mm ...

Page 14: ...r drill and drill all the anchor holes and install the anchor bolts Then tighten the anchor bolts See Fig 19 Note Torque of Anchors is 117N m Minimum embedment of anchors is 90mm I Lift the carriages up by hand and make them be locked at the same level See Fig 20 75 Fig 18 Fig 19 Fig 20 90mm ...

Page 15: ...Install safety device and safety cable See Fig 21 NOTE 1 Assemble safety cable from offside safety assy 2 Pay attention to the connecting direction of safety cable Fig 21 View A View B Safety cable direction ...

Page 16: ... all the hydraulic fittings and fill the reservoir with hydraulic oil Note In consideration of Power Unit s durability and keep the equipment running in the perfect condition please use Hydraulic Oil 46 Fig 22 Locking the nut using 19 ratchet spanner 3 4 2 28 200 44 84 83 ...

Page 17: ... 90 Carriage Connecting 11 12 NC of limit switch to terminals 3 5 of control box L Install control box limit switch and chain cover See Fig 23 Fig 23 6 90B 91 92 93 7 90A Wire connection of limit switch 92 Note Adjustable screw with hook can adjust the tauts degree of the chain cover 87 89 88 3 5 15º 64 ...

Page 18: ... according to the different configurations of hydraulic power unit In general the electric current of thermal relay should equal or larger than that of motor The following table shows rated current regulation of thermal relay in case of different hydraulic power unit Hydraulic power unit PEAK SPX 220V 3HP 380V 3HP 415V 3HP 220V 3HP 380V 3HP Rated current of thermal relay 16A 12A 12A 18A 12A Fig 24...

Page 19: ...1 M2 M3 are connected to the three wires in the motor Turn on the power push UP button if motor run but lift does not work please change the wires connection This point shows the present rated current value Using cross screwdriver to adjust rated current value of thermal relay Fig 25 Power wire Wire of hydraulic solenoid valve Wire of limit switch Wire of motor Fig 26 Earth wire ...

Page 20: ... Code Specification 1 Power Switch QS 380V AC 7 Alarm Lamp R 220V White 2 Fuse FU1 25A 8 Push Button Down Single 3 Fuse FU2 3A 9 Motor M Three phase 4 AC Contactor KM 24V AC 10 Transformer TC 24V AC 5 Hydraulic Solenoid Valve Y 24V AC 11 Limit Switch SQ 10A 6 Push Button UP Single Earth wire M3 M2 M1 Fig 27 Fig 28 3 phases ...

Page 21: ...n the control box See Fig 29 4 2 220V Wire connection of hydraulic power unit See Fig 30 Motor wire M1 M2 are separately connected to two wires in the motor Earth wire M2 M1 Fig 29 Fig 30 Earth wire Power wire Wire of hydraulic solenoid valve Wire of limit switch Wire of motor ...

Page 22: ...tion Item Name Code Specification 1 Power Switch QS 380V AC 7 Alarm Lamp R 220V White 2 Fuse FU1 25A 8 Push Button Down Single 3 Fuse FU2 3A 9 Motor M Single 4 AC Contactor KM 24V AC 10 Transformer TC 24V AC 5 Hydraulic Solenoid Valve Y 24V AC 11 Limit Switch SQ 10A 6 Push Button UP Single Fig 31 Single phase ...

Page 23: ...p of installing protective cover Fig 32 1 Screw the head cup bolt M6 40 Wire of hydraulic solenoid valve Wire of motor Wire of limit switch Oil hose for power unit 2 Install the protective cover and tight up the head cup bolt Wind around wire wind around wire 98 ...

Page 24: ...22 Protective Rubber set 21A O Install floor cover protective rubber and lifting arms See Fig 33 Fig 33 Floor Cover ...

Page 25: ...en use the 17 ratchet spanner to loose the nut See Fig 35 3 Adjust the arm lock as arrow direction See Fig 36 4 Adjust the moon gear and arm lock to make it to be meshed then tighten bolts of arm lock See Fig 37 Moon gear use the 17 ratchet spanner to loose the nut Fig 34 Fig 35 Arm lock Tighten the bolts Fig 36 Fig 37 ...

Page 26: ...24 IV EXPLODED VIEW Model A240 Fig 38 Car in direction ...

Page 27: ...25 Cylinders Control Box Fig 39 Fig 40 ...

Page 28: ...26 SPX ELECTRIC POWER UNIT 220V 50HZ single phase PEAK ELECTRIC POWER UNIT 220V 50HZ 1Phase 380V 50HZ 3Phase Fig 42 Fig 41 ...

Page 29: ...K hydraulic power unit a SPX Electric power unit 220V 50HZ 1 phase See Fig 43 Fig 43 b PEAK electric power unit 220V 50HZ 1 phase See Fig 44 Capacitor Oil return port Auxiliary hole Oil Outlet Solenoid valve Check valve Relief valve Auxiliary hole ...

Page 30: ...he cable nut Make sure two cables are in the same tension so that two lifting carriages can work synchronously Fit the plastic hole cover on the lifting head If the carriage does not Synchronize when lifting please tighten the cable nut of lower side carriage 2 Adjust safety cable Lifting the carriage and lock at the same height strain the safety cable and then release a little and then tighten th...

Page 31: ...ve adjustment test running the lift with load Run the lift in low position for several times first make sure the lift can rise and lower synchronously the safety device can lock and release synchronously And then test run the lift to the top completely If there are anything improper repeat the above adjustment NOTE It may be vibrated when lifting at start please lifting it with load for several ti...

Page 32: ...to the safety position The vehicle is ready to repair To lower vehicle 1 Be sure clear of around and under the lift only leaving operator in lift area 2 Press the button of UP to raise the vehicle slightly and then release the safety device press the button DOWN to lower lift 3 Open the arms and position them to the shortest length 4 Drive away the vehicle 5 Turn off the power VII MAINTENANCE SCHE...

Page 33: ...or runs in reverse rotation 2 Gear Pump out of operation 3 Release Valve in damage 4 Relief valve or check valve in damage 5 Low oil level 1 Reverse two power wire 2 Repair or replace 3 Repair or Replace 4 Repair or replace 5 Fill tank Lift does not stay up 1 Release valve out of work 2 Relief valve or check valve leakage 3 Cylinder or fittings leaks Repair or replace Lift raises slowly 1 Oil line...

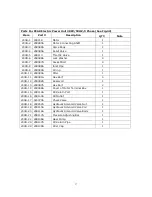
Page 34: ...16 209012 Hair Pin 8 17 203015 Safety Block Main Side 1 18 209079 Cup Head Bolt 5 19 203115 Protective cover 2 20 205002 Floor Cover 1 21A 203054 Rubber Pad Assy 4 21 201060 O Ring 8 22 203024 Adjustment Adapter 4 23 203042 Lock washer 8 24 203025 Adjustment Screw 4 25 203041 Lock washer 4 26A 203026 Rubber Pad Frame 4 26B 203043 Rubber pad for combined adapter 4 26C 420043 Socket bolt 8 27 209057...

Page 35: ...er Arm Front 2 52 209038 Hex Bolt 6 53 209039 Lock Washer 14 54 205023 Offside Carriage 1 55 201039C Lifting Arm Rear 2 55A 201050 Outer Arm Rear 2 55B 201051B Inner Arm Rear 2 56 209035 Moon Gear 4 57 209033 Washer 16 58 209034 Lock Washer 12 59 209032 Socket Bolt 12 60 209031 C Snap Ring 4 60A 209030A Arm Pin 4 61 205025 Connecting Bar 2 62 209043 Hex Bolt 4 63 209046 Hex Bolt 4 64 205006 Top pl...

Page 36: ...Plastic stop plate 2 90B 420018 Nylok nut 4 91 206123 Control Box 1 92 420045 Washer 2 93 209145 Cup Head Bolt 2 94 420168 White bobbin 1 95 203037 Wire for Hydraulic Solenoid Valve 1 96 203120 Wire for Limit Switch 1 97 205019 Motor Wire 1 98 620059 Wire Protect Ring 1 99 205501A Parts Box 1 Parts For Hydraulic Cylinder See Fig 39 30 1 201027 Piston Rod 2 30 2 201028 Piston 2 30 3 206069 O Ring 2...

Page 37: ...50HZ 1 Phase See Fig 41 200 1 209082 Motor 1 200 2 209083 Motor Connecting Shaft 1 200 3 209084 Valve Body 1 200 4 209085 Relief Valve 1 200 5 209086 Lock Washer 4 200 6 209087 Socket Bolt 4 200 7 209088 Inlet Pipe 1 200 8 209089 O ring 1 200 9 209090 Filter 1 200 10 209091 Hex Bolt 4 200 11 209092 Reservoir 1 200 12 209093 Cup Head Bolt 2 200 13 209094 Cover for Capacitor 1 200 14 209095 Capacito...

Page 38: ...ex Bolt 4 200A 1 2 209092A Reservoir 1 200A 1 3 209093A Cup Head Bolt 4 200A 1 4 209094A Cover for Capacitor 2 200A 1 5 209095A Start Capacitor 1 200A 15 A 209095B Run Capacitor 1 200A 1 6 209096A Rubber Gasket 2 200A 1 7 209097A Hex Bolt 2 200A 1 8 209098A Cover of Motor Terminal Box 1 200A 1 9 209110A Oil Return Port 1 200A 2 0 209100A Oil Outlet 1 200A 2 1 420070A Check Valve 1 200A 2 2 209162A...

Page 39: ... 9 209089A O ring 1 200B 10 209090A Filter 1 200B 11 209091A Hex Bolt 4 200B 12 209092A Reservoir 1 200B 13 209097A Hex Bolt 2 200B 14 209098A Cover of Motor Terminal Box 1 200B 15 209110A Oil Return Port 1 200B 16 209100A Oil Outlet 1 200B 17 420070A Check Valve 1 200B 18 209162A Hydraulic Solenoid Valve Nut 1 200B 19 209115A Hydraulic Solenoid Valve Coil 1 200B 20 209116A Hydraulic Solenoid Valv...

Page 40: ... 38 72225302 01 2014 ...

Reviews: