background image

ADJ Produc

t

s, LLC  -  www.adj.com  - Event Bar Pro Instruction Manual Page 15

ADJ Produc

t

s, LLC  -  www.adj.com  - Event Bar Pro Instruction Manual Page 14

Universal DMX Control: 

This  function  allows  you  to  use  a 

Elation® universal DMX-512 controller to create unique programs tai-

lored to your individual needs. 

1.  The Event Bar Pro has five different DMX channel modes. To set  

  the DMX channel mode see page 9. See pages 16-21 for the    

  DMX modes & traits.

2.  To control your fixture in DMX mode, follow the set-up procedures  

  on pages 5-7 as well as the set-up specifications that are includ- 

  ed with your DMX controller. 

3.  Use the controller’s faders to control the various DMX fixture traits.

4.  This will allow you to create your own programs.

5.  Follow the instructions on page 9 to set the DMX address. 

6.  For longer cable runs (more than a 100 feet) use a terminator on  

  the last fixture.

7.  For help operating in DMX mode consult the manual included   

  with your DMX controller.

 Event Bar Pro 


       Universal DMX Control

 Event Bar Pro 


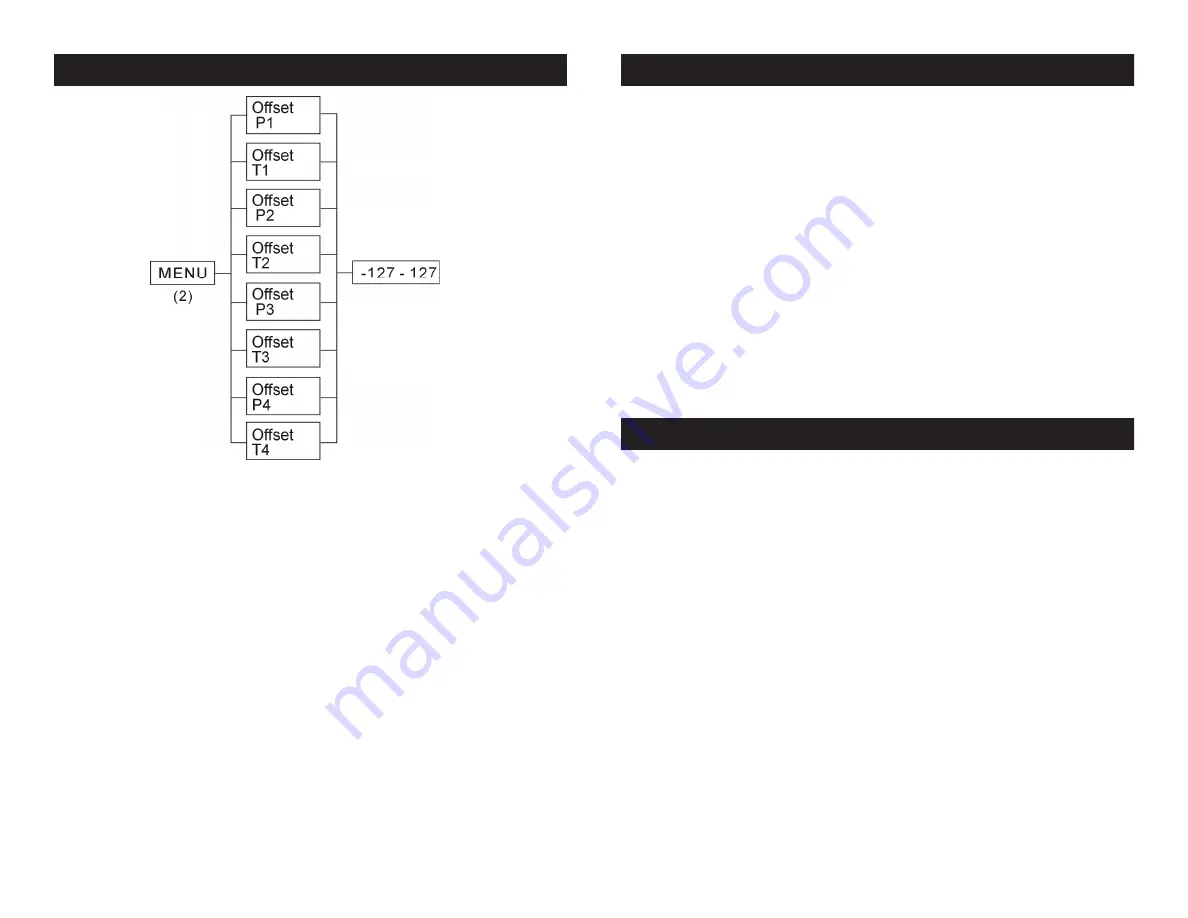
                  Home Position Adjust

With this function you can adjust and set the fixtures home 

position. 


1. Press the ENTER button for at least 3 seconds to enter into 

offset mode. 
2. Press the UP or DOWN buttons until you find the moving 

head you would like to adjust, and press ENTER. The display 

will begin to flash.
3. Press the UP or DOWN buttons to adjust to your desired 

home position. Once you have found your desired position 

press the ENTER button to set and save, or press the MENU 

button to return to return to offset functions without any 

changes. If you do not press any buttons for 8 seconds the 

fixture will return to the offset functions automatically.


Master-Slave Configuration:


This function will allow you to link up 

to 16 units together and operate without a controller. The units will 

be sound activated. In Master-Slave operation one unit will act as the 

controlling unit and the others will react to the controlling units pro-

grams. Any unit can act as a Master or as a Slave.

1.  Using approved DMX data cables, daisy chain your units together  

  via the XLR connector on the rear of the units. Remember the   

  Male XLR connector is the input and the Female XLR connector is 

  the output. The first unit in the chain (master) will use the female  

  XLR connector only - The last unit in the chain will use the male  

  XLR connector only. For longer cable runs we suggest a termina- 

  tor at the last fixture.

2.  Set the Master unit to the Master setting following the instructions  

  on page 9. After you have designated the Master, set the unit to  

  your desired operating mode.

3.   On the slave units press the MENU button until “Slave Mode” is  

  displayed, and Press ENTER. Choose either “Slave 1” or “Slave  

  2” and press ENTER. See page 9 for more info.

4.   The slave units will now follow the Master unit.

 Event Bar Pro 


          Master-Slave Configuration

Summary of Contents for EVENT BAR PRO

Page 1: ...nds and product names are trademarks or registered trademarks of their respective companies ADJ Products LLC and all affiliated companies hereby dis claim any and all liabilities for property equipmen...

Page 2: ...ase keep this manual with the unit for future reference Event Bar Pro General Instructions ADJ Products LLC www adj com Event Bar Pro Instruction Manual Page 2 Event Bar Pro General Information Unpack...

Page 3: ...be purchased at almost all pro fessional sound and lighting stores Your cables should be made with a male and female XLR con nector on either end of the cable Also remember that DMX cable must be dai...

Page 4: ...ot 2 Cold 2 Cold 3 Hot XLR Female Socket Pin 3 Data True positive Pin 2 Data Compliment negative Pin 1 Ground Special Note Line Termination When longer runs of cable are used you may need to use a ter...

Page 5: ...ENTER 2 X Chan will now be displayed X represents the displayed DMX channel mode Press the UP or DOWN buttons to find your desired Channel mode 3 Press ENTER to confirm Slave Mode This will let you s...

Page 6: ...e DMX signal is lost Master Slave If the DMX signal is lost or power is applied the unit will automatically go into Master Slave mode ADJ Products LLC www adj com Event Bar Pro Instruction Manual Page...

Page 7: ...utton to exit Pan Invert Pan Inversion 1 Press the MENU button until Pan Invert is displayed press ENTER Either Normal or Inverse will be displayed 2 To activate the Pan inversion press the UP or DOWN...

Page 8: ...Press the UP or DOWN buttons to adjust to your desired home position Once you have found your desired position press the ENTER button to set and save or press the MENU button to return to return to o...

Page 9: ...48 254 RANDOM SHOW 255 SOUND ACTIVE 2 SHOW SPEED SOUND SENSITIVITY 0 255 SHOW SPEED SLOW FAST 0 255 SOUND SENSITIVITY LEAST MOST When the Channel 1 values are between 8 254 Channel 2 will control the...

Page 10: ...7 0 255 PAN FINE HEAD 4 18 0 255 TILT HEAD 4 19 0 255 TILT FINE HEAD 4 20 0 255 HEAD 4 DIMMER 0 100 Event Bar Pro 20 Channel Mode Channel Value Function 1 0 255 PAN HEAD 1 2 0 255 PAN FINE HEAD 1 3 0...

Page 11: ...hannel Value Function 1 0 255 PAN HEAD 1 2 0 255 PAN FINE HEAD 1 3 0 255 TILT HEAD 1 4 0 255 TILT FINE HEAD 1 5 0 255 HEAD 1 DIMMER 0 100 6 0 255 PAN HEAD 2 7 0 255 PAN FINE HEAD 2 8 0 255 TILT HEAD 2...

Page 12: ...before plugging the unit back in Event Bar Pro Fuse Replacement First unplug the power Locate and remove the unit s power cord Once the cord has been removed located the fuse holder located inside th...

Page 13: ...l expenses for warranty service and repair labor by reason of defects in material or workmanship The sole responsibility of ADJ Products LLC under this warranty shall be limited to the repair of the p...

Page 14: ...MX Channel Modes 2 Channel Mode 17 Channel Mode 20 Channel Mode 22 Channel Mode 25 Channel Mode Sound Active Yes Working Position Any Safe Secure Position Warranty 2 Year 730 days Auto Sensing Voltage...

Reviews: