17
Below is a description of the items listed in this menu.
Menu
In this section you can view the home page icons and any currently open functions in the
software. Click the
Add
button to add a function icon to the top pane.
Settings Menu
This menu allows you to Search, Add, Delete, or Import, and Export settings of devices
connected to your network.
All Devices
This menu allows you to view all added devices associated with the software.
Adding Devices into Amcrest Surveillance Pro
To provide the highest efficiency and security when adding a device into the Amcrest Surveillance Pro software it is
highly recommended to add the device using a direct IP address as opposed to using a P2P connection. Using a direct
IP provides a direct connection to your device without the use of utilizing a P2P server.
Direct IP Connection
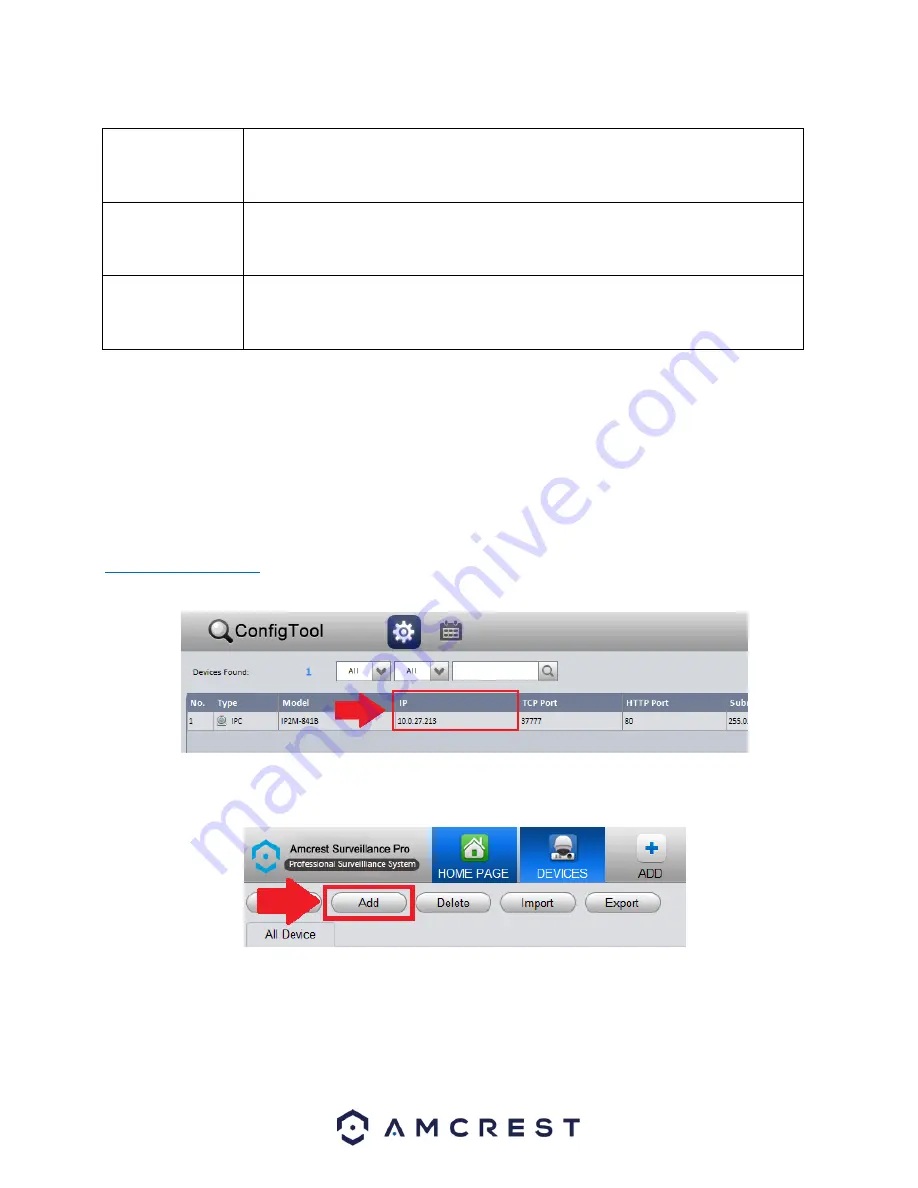
To begin adding a camera, you will need the IP address of the device. To obtain the IP address for your device, it is
recommended to download the Amcrest IP Config tool. To get the Amcrest IP Config tool, go to
and click on the IP Config software link for either PC/Windows or Mac OS. Launch the IP
Config tool and locate the IP address for your device. The IP address will be listed in the
IP
field of the software.
After locating the IP address in the Amcrest IP Config tool for the device, return to the Amcrest Surveillance Pro
software and click on the
Add
button.
In the add menu, enter a name you would like to assign to your device. In this example, we are using
“Front Door
Camera”. Next, in the
Method to add
menu, use the default setting “
IP/Domain”
, then enter the IP address and port
number of the device being added. As a reminder, the IP and port number of the device can be located in the IP
Config software. The group name will then be applied as
Default Group
, then enter the user name and password for
your device. If this is the first time using your device, the default username and password will be
admin
. Click the
Save and Continue
or
Add
buttons to proceed.


