Amcrest IP4M-1055E User Manual Download Page 51


51  


5.2.5 System  

This menu section allows the user to change general settings for the camera.  

5.2.5.1 General  

This menu controls where general settings are configured. There are 2 tabs in this menu: General and Date & Time.  

5.2.5.1.1 General  

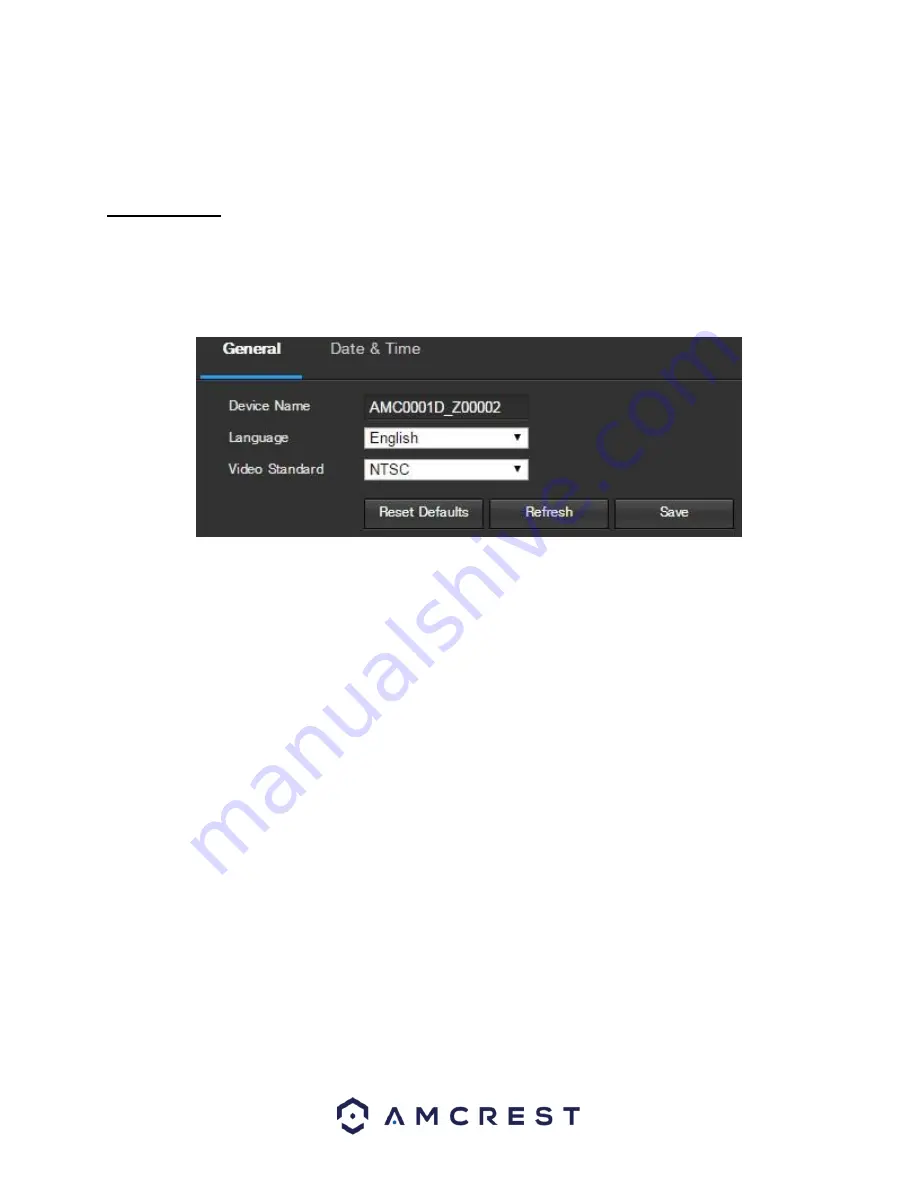
This tab is where the user can configure some basic camera settings. Below is a screenshot of the General tab:   


Below is an explanation of the fields on the General settings tab:  

• 

Device Name

: This field 

allows the user to change the device’s name.


• 

Language

: This dropdown box allows the user to change the language used in the camera.  

• 

Video Standard

: This dropdown box allows the user to select either the NTSC or PAL video standard.  

To reset to default settings, click the Reset Defaults button. To refresh the page, click the Refresh button. To save 

the settings, click the Save button.  


5.2.5.1.1 Date & Time  

This tab is where the user can configure the date and time settings for the camera. Below is a screenshot of the 

Date & Time tab:   

Summary of Contents for IP4M-1055E

Page 1: ...1 IP4M 1055E User Manual...

Page 2: ...2 IP4M 1055E...

Page 3: ...iew 7 1 2 Features 7 2 Device Overview 8 3 Connection Installation 9 3 1 Connection Guide 9 3 2 Installation Guide 9 4 Camera Access Setup 11 4 1 Default Username and Password 11 4 2 How to Setup the...

Page 4: ...ccess Setup AmcrestView com 19 4 8 Remote Web Access Setup 20 4 4 1 UPnP DDNS Remote Web Access Setup 20 4 4 2 Port Forwarding Remote Web Access Setup 21 4 10 NVR Access 22 5 Operation and Interface 2...

Page 5: ...2 2 8 SNMP 41 5 2 2 9 Bonjour 41 5 2 2 10 Multicast 42 5 2 2 11 WiFi Not Available on Amcrest POE cameras 42 5 2 2 12 802 1x 43 5 2 2 13 QoS 43 5 2 3 Event 44 5 2 3 1 Video Detection 44 5 2 3 2 Abnor...

Page 6: ...ort 58 5 2 5 5 Auto Maintain 59 5 2 5 6 Upgrade 59 5 2 6 Information 60 5 2 6 1 Version 60 5 2 6 2 Log 60 5 2 6 3 Online Users 61 5 3 Alarm 61 5 4 Logout 61 6 FAQs Troubleshooting 62 Glossary of Terms...

Page 7: ...893 8956 USA 888 212 7538 Canada 437 888 0177 UK 203 769 2757 Email Amcrest Customer Support support amcrest com Important Security Warning In order to keep your Amcrest camera secure and prevent unau...

Page 8: ...ating 6 Operation and Maintenance Do not touch the camera sensor or lens directly To clean dust or dirt off of the lens use an air blower or a microfiber cloth 7 Accessories Be sure to use only the ac...

Page 9: ...events when they occurred Lastly Amcrest POE cameras can support video enlargement of certain zones within a stream Advanced Network Protocol Support Amcrest POE cameras are UPnP compatible and also...

Page 10: ...lled wall or ceiling 2 Drill 3 holes through the holes on the installation sticker 3 Open the accessories bag and take out the expansion bolt and insert it into the holes 4 Open accessories bag and ta...

Page 11: ...efault Username and Password To login to the system for the first time use one of the following default username password combinations Once you ve successfully logged in it is highly recommended to ch...

Page 12: ...ge for your first camera Please follow the instructions as outlined on section 4 XXX Cloud Access to sign up for our Amcrest Cloud service and get 4 hours of free storage 4 2 4 For Quick Web Access To...

Page 13: ...e or Amcrest View Pro app from the app store 3 Open the app and tap the icon in the top right hand corner to view connected devices Or tap the menu icon on the top left and select Device Manager 4 Tap...

Page 14: ...your camera s QR code 7 Point the phone s camera at the QR code on the bottom of the camera Make sure the QR code fits inside of the clear box in the center of the phone screen Try to move the camera...

Page 15: ...S N that is found on the bottom of the camera Note Picture below for reference only The camera s QR code sticker will differ 8 Enter a name for the camera then enter the Username and Password used to...

Page 16: ...lease contact us at www amcrest com or give us a call at 1 888 212 7538 Step by step video tutorials available at www amcrest com videos 4 4 Desktop Access Setup Access your camera and all its feature...

Page 17: ...se contact us at www amcrest com or give us a call at 1 888 212 7538 Step by step video tutorials available at www amcrest com videos 4 6 Amcrest Cloud Setup Amcrest POE cameras are able to sync with...

Page 18: ...lation of the plugin will require all web browsers to close 4 Log in to your account To add a camera click the Add Device button Give the camera a name enter the UID found on the bottom of your camera...

Page 19: ...left hand menu pick QUICK DDNS from the drop down box click the checkbox next to Server Type and then click the Save button on the bottom right 8 To set a custom DDNS name fill out the Domain Name fi...

Page 20: ...nu and write down the TCP UDP and HTTP port number It is recommended to ensure that these port numbers are at least 5 digits long to prevent any port conflicts If need be change each of these port num...

Page 21: ...rnational Callers Outside of US 1 713 893 8956 USA 888 212 7538 Canada 437 888 0177 UK 203 769 2757 Email Amcrest Customer Support support amcrest com 4 10 NVR Access The camera supports connecting to...

Page 22: ...lection function This allows the user to use the mouse to select a zone to zoom in on Snapshot Click this button to take a screenshot of the live feed The picture is saved at the path specified in Set...

Page 23: ...eam fluency There are 3 options Realtime reduces delay and decreases fluency and Fluency has a larger delay but the video stream becomes more fluid Section 4 This section of the Live tab shows the pic...

Page 24: ...on tab in the Configuration menu item Below is an explanation for each of the fields on the Configuration tab in the Configuration menu item Profile This dropdown box allows the user to select which p...

Page 25: ...are Auto Low Noise Low Motion Blur and Manual When low noise is selected an additional option to specify a gain range appears below this box When low noise is selected an additional option to specify...

Page 26: ...Full Time and Schedule Normal means that the system can automatically alternate between night and day based on the profiles for each Full Time means that the system sticks to one profile the entire ti...

Page 27: ...e from 1f s to 25f s in PAL mode and 1f s to 30f s in NTSC mode Bit Rate Type This dropdown box allows the user to select a bit rate type The system supports two bit rate types CBR and VBR In VBR mode...

Page 28: ...ize is the same size as the video feed s resolution Image Quality This dropdown box allows the user to select image quality Quality is adjusted on a scale of 1 6 Snapshot Frequency This is to set snap...

Page 29: ...gs click the Save button 5 2 1 2 4 Path Below is a screenshot that shows the Path tab in the Video menu item Below is an explanation for each of the fields on the Path tab in the Video menu item The L...

Page 30: ...t Configuration Protocol and this enables the camera to automatically obtain an IP address from another network device such as a server or more commonly a router When the DHCP function is enabled the...

Page 31: ...abled by default Status This field displays the status of the P2P connection Once the camera is connected to a device this field should display the word Online UID This field displays the Token ID for...

Page 32: ...r Datagram Protocol UDP port number The default value is 37778 HTTP Port This field designates the Hypertext Transfer Protocol HTTP port number The default value is 80 RTSP Port This field designates...

Page 33: ...ave button 2 4 DDNS DDNS stands for Dynamic Domain Name Server This technology is used to automatically update name servers in real time in order to help the camera maintain a persistent address despi...

Page 34: ...s to the camera This feature helps make the camera more secure by limiting remote access only to approved users Below is a screenshot of the IP Filter screen Below is an explanation of fields on the I...

Page 35: ...with the SMTP username Sender This field allows the user to enter the sender email address This email address will be the one that sends out all emails pertaining to the alerts and alarm emails sent...

Page 36: ...ave been remapped by the UPnP protocol o The first column shows the checkboxes to enable the corresponding service on the table o The second column shows the name of the services To edit this double c...

Page 37: ...field shows which SNMP community has read access Write Community This field shows which SNMP community has write access Trap Address This field allows the user to write in a trap address Trap Port Th...

Page 38: ...5 2 38...

Page 39: ...ctionality Multicast Address This field allows the user to enter a multicast address Port This field allows the user to enter a multicast port To reset to default settings click the Reset Defaults but...

Page 40: ...user to enter in a priority value for command packets The range is between 063 Open the WMM This checkbox allows the user to open the WiFi MultiMedia WMM options To reset to default settings click the...

Page 41: ...he buzzer tour snapshot record channel functions will begin another 10 seconds while the screen prompt alarm upload email will not be activated again After 10 seconds if system detects another alarm s...

Page 42: ...rm is triggered Alarm Delay This field specifies in seconds how long the delay between alarm activation and Relay alarm activation should be Send Email This checkbox allows the user to enable the came...

Page 43: ...triggered Alarm Delay This field specifies in seconds how long the delay between alarm activation and Relay alarm activation should be Send Email This checkbox allows the user to enable the camera to...

Page 44: ...to default settings click the Reset Defaults button To refresh the page click the Refresh button To save the settings click the Save button 5 2 3 2 2 Illegal Access This tab allows the user to set th...

Page 45: ...Schedule settings screen Below is an explanation of the fields on the Record Schedule settings tab Record Type These checkboxes allow the user to select which recording type they want to configure on...

Page 46: ...Record Type These checkboxes allow the user to select which snapshot type they want to configure on the schedule There are 3 types of snapshots o Regular Regular means that the camera will take snapsh...

Page 47: ...ich recording type they want to configure on the schedule There are 2 types of recordings o Record This checkbox is referring to video recording o Snapshot This checkbox is referring to snapshot recor...

Page 48: ...ge click the Refresh button To save the settings click the Save button 5 2 4 2 2 FTP This tab is where the user can change FTP settings Below is a screenshot of the FTP tab Below is an explanation of...

Page 49: ...o refresh the page click the Refresh button To save the settings click the Save button 5 2 4 3 Record Control This menu is where general recording settings are configured Below is a screenshot of the...

Page 50: ...50 To reset to default settings click the Reset Defaults button To refresh the page click the Refresh button To save the settings click the Save button...

Page 51: ...elds on the General settings tab Device Name This field allows the user to change the device s name Language This dropdown box allows the user to change the language used in the camera Video Standard...

Page 52: ...select whether DST is based on the week or a specific day Start Time This dropdown box and field allow the user to enter in the start time for DST End Time This dropdown box and field allow the user...

Page 53: ...vailable on the camera No This column shows the user s number on the user list User Name This column shows the usernames of the different accounts on the camera Group Name This column shows the group...

Page 54: ...reen Below is an explanation of the fields on the Auto Maintain screen Auto Reboot This checkbox allows the user to enable the auto reboot function The dropdown box and field to the right of this chec...

Page 55: ...6 Information This menu section allows the user to view information about the camera for reference purposes 5 2 6 1 Version This screen allows the user to see various information about the camera s s...

Page 56: ...r log and click search To backup the log click the Backup button To clear the log click the Clear button 6 3 Online Users This screen allows the user to see which users are online Below is a screensho...

Page 57: ...ing the logout button will log out the user 6 FAQs Troubleshooting 1 The camera does not boot up properly Below are a few possible reasons why this may be occurring The power input is not correct volt...

Page 58: ...be occurring The camera s firmware is incompatible with the recorded video The recorded files have been overwritten The recording function has been disabled 5 Playback video is distorted Below are a...

Page 59: ...isabled The PC is not using DirectX 8 1 or higher Upgrade to a more recent version of DirectX The camera is having network connection errors Web access may be setup incorrectly The username or passwor...

Page 60: ...s why this may be occurring The alarm is not setup correctly The alarm cable is not connected correctly The alarm input signal is not correctly configured There are two loops connected to one alarm de...

Page 61: ...system time 17 How do I change my video stream resolution On the Amcrest View app the live stream is set by default to Standard Resolution not HD to enable quick connection To enable HD tap the resol...

Page 62: ...n to flip the image horizontally and tap the flip icon to flip the image upside down 19 How to I setup motion detection on my camera To set up motion detection you have to access the camera through de...

Page 63: ...a network Main Stream Main Stream is the main streaming protocol for the camera Main stream uses more bandwidth and attempts to keep quality and fluency high NO NC Normally Open and Normally Closed ar...

Page 64: ...otocol Internet Protocol and it is the language protocol that allows communication between internet connected devices whether on a local network or a on the Internet at large Threshold Threshold is th...

Page 65: ...centration of the hazardous substance of at least one of all homogeneous materials in the parts is above the relevant threshold of the SJ T11363 2006 standard During the environmental friendly use per...

Page 66: ...designs and software here are subject to change without prior written notice All trademarks and registered trademarks mentioned are the properties of their respective owners To contact Amcrest support...

Reviews: