background image

For more information about this product, go to

www.AlturaPhoto.com and search

the keyword: "Wireless Flash Trigger."

12

Summary of Contents for 702168588511

Page 1: ...DUAL WIRELESS FLASH TRIGGER SET USER S MANUAL www alturaphoto com ...

Page 2: ...mote Control Flash Trigger Kit Please refer to the instructions below to properly understand the functionality of these items USER GUIDE 1 TRANSMITTER 1 2 3 4 5 1 Shutter release test button 2 Indicator light 3 Trigger point 4 Battery cover 5 ACC1 socket ...

Page 3: ...RECEIVER 1 2 3 4 5 6 1 Hot shoe socket 2 Mode switch 3 Indicator light 4 Hot shoe socket 5 Battery cover 6 ACC2 socket 2 ...

Page 4: ...t use the product in the presence of flammable gas Do not expose the product to high temperatures FEATURES The Altura Photo series 3 in 1 Wireless Flash Trigger Remote Control is a versatile and reliable control kit These units have the ability to trigger external flash units and studio lights from up to 100 feet 30 meters away 3 ...

Page 5: ...line of sight alignment because radio waves will pass through solid barriers such as walls and floors NOTICE The Altura Photo Trigger does not transmit TTL settings Therefore it is recommended that you use a flash or light unit with full manual control You need to set the power output manually Wireless Frequency System 433MHz Operating Distance up to 30 meters 100 feet 16 Selectable Channel Combinat...

Page 6: ...ss Remote Control for DSLR camera with remote socket 3 Wireless Flash Trigger for camera speedlite or studio light Weight Transmitter 30g without battery Receiver 42g without battery Dimensions Transmitter 62 6 x 39 2 x 27 1mm Receiver 79 9 x 37 8 x 33 2mm FUNCTIONS 5 ...

Page 7: ...set the channel There are 16 Channel combinations for the transmitter and receiver Please make sure both the transmitter and receiver are on the same channel CHANNEL SETTING ON DIP 1 2 3 4 ON DIP 1 2 3 4 REPLACING TRANSMITTER BATTERIES 1 Slide out the battery cover from the transmitter 2 Remove the battery 23A battery 3 Insert one 1 23A fresh battery 6 ...

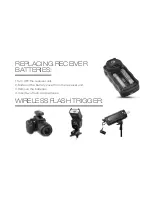
Page 8: ...REPLACING RECEIVER BATTERIES 1 Turn OFF the receiver unit 2 Slide out the battery cover from the receiver unit 3 Remove the batteries 4 Insert two fresh AAA batteries WIRELESS FLASH TRIGGER 7 ...

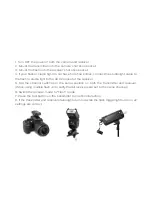
Page 9: ... the flash or studio light to the ACC2 socket of the receiver 5 Set the channel switches to the same position on both the transmitter and receiver When using multiple flash units verify that all receivers are set to the same channel 6 Switch the receiver mode to Flash mode 7 Press the test button on the transmitter to confirm interaction 8 If the transmitter and receiver status lights turn red while ...

Page 10: ... socket of the transmitter and to the remote input on the camera body 3 Turn the camera ON 4 Press the test button on the transmitter 5 Half press the transmitter s button for autofocus and fully press for shutter release WIRED SHUTTER RELEASE WIRELESS SHUTTER RELEASE 9 ...

Page 11: ...n both the receiver and transmitter When using several camera units make sure all receivers are set to the same channel settings 4 Turn the camera ON and switch the receiver to Camera mode 5 Press the button on the transmitter to confirm interaction 6 Half press the transmitter s button for autofocus and fully press for shutter release 7 If the transmitter and receiver status lights turn red while ...

Page 12: ...antees that this product will not contain any defects caused by manufacturing processes workmanship or materials for one 1 year This guarantee starts from the date of purchase Altura Photo will at its discretion either repair or replace prepaid returned equipment free of charge ONE YEAR LIMITED WORLDWIDE WARRANTY 11 ...

Page 13: ...For more information about this product go to www AlturaPhoto com and search the keyword Wireless Flash Trigger 12 ...

Page 14: ......

Reviews: