®
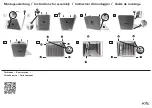
Note: An additional upper bench support has been provided if extra support is desired. Simply fasten the bench support to the face to the upper
bench using the predrilled holes.
After the sauna has been installed, sweep down the inside to remove any sawdust and wood shavings, and then vacuum completely. Using
a damp cloth with warm water, wipe down the entire sauna including the benches to remove any remaining dirt, dust and debris.
Step 11. Heater Installation
Please consult your heater manual for all heater installation information. All electrical connections must be done by a qualified licensed
electrician.
TRADITIONAL SAUNA USE
Congratulations! You are ready to enjoy your sauna! You may use your sauna in a wet or dry fashion. A dry sauna means you do not sprinkle any
water onto the stones, while wet means you increase the humidity of the room by sprinkling water on the stones. Please note that not much
water is needed to achieve a wet sauna experience.
The sauna as we know it originates in Finland. The typical sauna experience follows the steps below, but you may enjoy your sauna in any way
you like!
• Set your heater so your sauna achieves the desired temperature. This is typically 150 -170+ degrees F. Please note, novice sauna users should
begin at the lower end of that range and increase their high temperature over time.
• Take a quick shower or a quick dip in a hot tub or pool.
• Step into the sauna and enjoy for 5-15 minutes, bringing a towel to sit or lay on. Leave the sauna once you are perspiring freely.
• Take a plunge in a pool, shower, snowbank, lake - anything that will cool you down! After that, relax and cool down for 10-20 minutes.
• Step into the sauna again. During this visit, you may wish to sprinkle small amounts of water onto the stones to create bursts of steam. If
water spills through the heater to the floor, you are using too much water, though this will not hurt the heater or the sauna.
• Continue repeating this process. After your final visit to your sauna, relax for at least 20 minutes. Shower with warm water initially, finishing
with cool water to close your skin pores.
• Prepare to feel refreshed for the day or to have an amazing night’s sleep!
Whatever your sauna routine, it is imperative that you STAY HYDRATED!
BRIDGEPORT | BRAXTON SAUNA INSTALLATION MANUAL
page 7


