Freestanding Infrared Multi Touch Screen with Dual OS User’s Manual
Page 3
Quick Start Guide
(connecting to an external PC/Media Player)
This section of the guide is to allow rapid set up and use of the unit. Please refer to the main part
of the User Guide for full information on use of the unit.
Please follow the steps detailed below:
1.
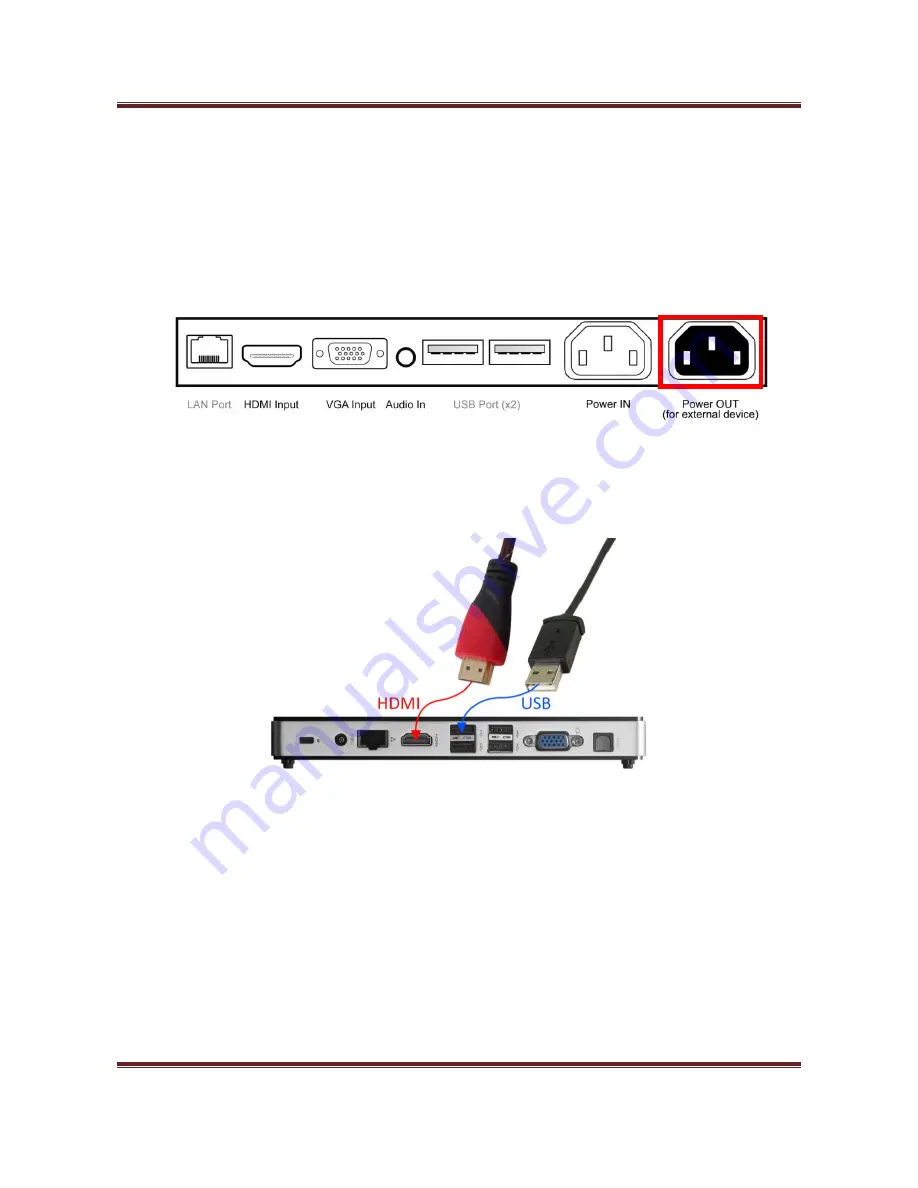
Insert the female end of the C14 to C6/C13 Y Power Splitter into the female power OUT socket
inside the locker door:
2.
Connect your PC to the male end of this splitter; either via the C6 or C13 connection (please
ensure you have a mouse connected to your PC).
3.
Connect the screen to the PC via the USB cable hanging from the left hand side of the inputs.
4.
Connect the screen to the PC via the HDMI cable provided:
5.
Plug the screens power cable into the mains which should power on both the screen and the
PC.
6.
Access the display options from your Control Panel or right-click on your Desktop and choose
“Screen resolution”.
7.
Select the “Orientation” dropdown menu then click on “Portrait (flipped)”.
8.
Click “OK” and your screen contents and operations will now be rotated 90° clockwise.
9.
You may be asked “Do you want to keep these display settings?” click on “Keep changes”.
10.
The screen should now be acting as a monitor and allowing you to use your finger as a mouse
on the screen displaying the PC’s contents.
11.
If the screen does not display the signal from the PC then connect press the “SOURCE” button
on the remote control and navigate to “HDMI” and press “PLAY”.