


Freestanding Infrared Multi Touch Screen with Dual OS User’s Manual
Page 16
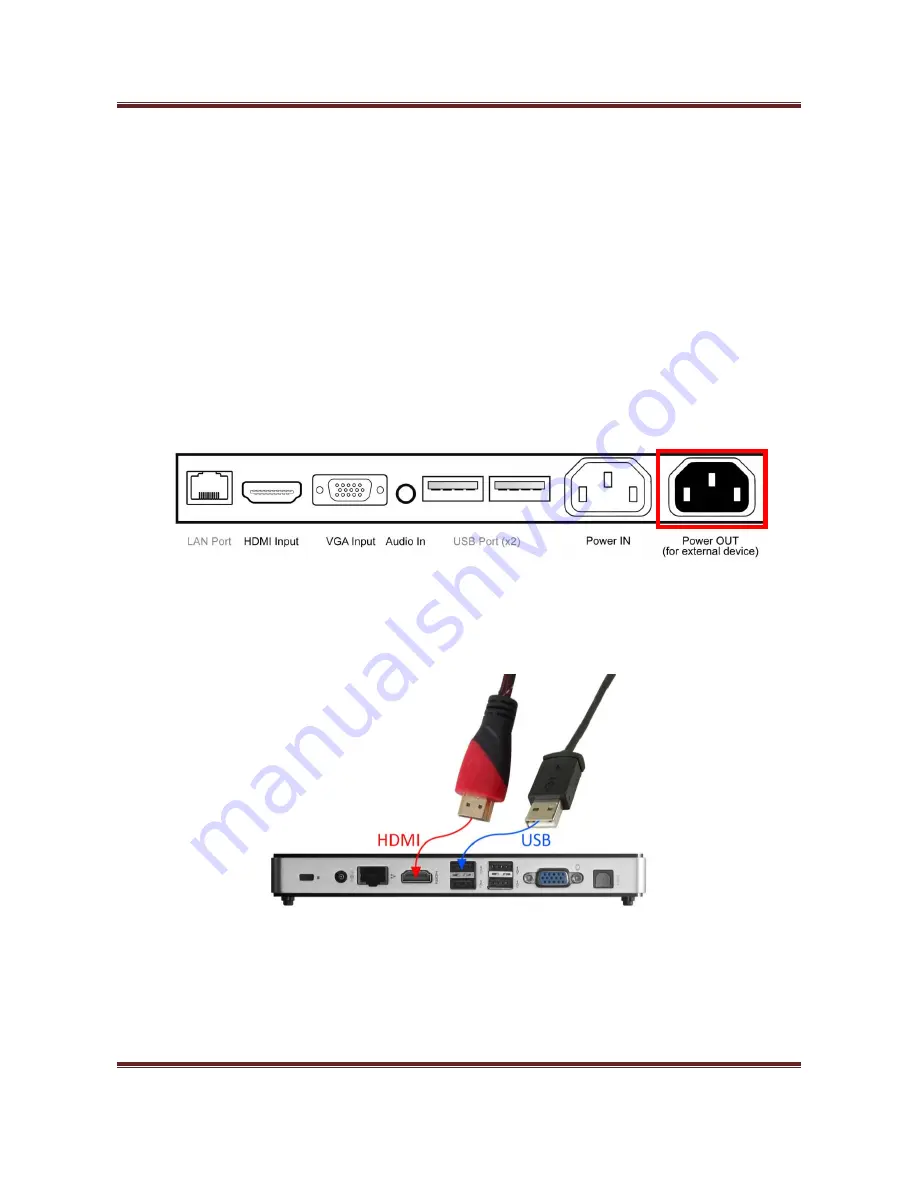
2.3 Connecting to PC
The touch screen must be connected to the PC in two ways: visually and interactively. The
recommended visual connection is via the HDMI Cable (included) meaning that the display acts like
a monitor for the PC. The touch function is achieved by linking the Infrared touch sensors around
the screen to the PC via the USB Cable (included).
This section of the guide is to allow rapid set up and use of the unit. Please refer to the main part
of the User Guide for full information on use of the unit.
Please follow the steps detailed below:
1.
Insert the female end of the C14 to C6/C13 Y Power Splitter into the female power OUT socket
inside the locker door:
2.
Connect your PC to the male end of this splitter; either via the C6 or C13 connection (please
ensure you have a mouse connected to your PC).
3.
Connect the screen to the PC via the USB cable hanging from the left hand side of the inputs.
4.
Connect the screen to the PC via the HDMI cable provided:
5.
Plug the screens power cable into the mains which should power on both the screen and the
PC.
6.
Access the display options from your Control Panel or right-click on your Desktop and choose
“Screen resolution”.
7.
Select the “Orientation” dropdown menu then click on “Portrait (flipped)”.


