


4
www.observint.com
© 2017 Observint Technologies. All rights reserved.
FOCUS (and ZOOM) menu
Move the cursor to FOCUS, and press the menu button to enter the FOCUS sub menu. Move the cursor to
adjust the camera lens by the FOCUS+, FOCUS-, ZOOM+ and ZOOM-.
LANGUAGE
The OSD can be displayed in either English or Chinese.
EXPOSURE
Exposure describes the brightness-related parameters. You can adjust the image brightness by the
BRIGHTNESS, EXPOSURE MODE, GAIN, DWDR and ANTI-FLICKER in different light conditions.
•
BRIGHTNESS:
Brightness refers to the brightness of the image. You can set the brightness value from
1 to 10 to darken or brighten the image. The higher the brightness value, the brighter the image.
•
EXPOSURE MODE:
You can set EXPOSURE mode as GLOBAL or BLC.
—
GLOBAL
: GLOBAL refers to the normal exposure mode, used when adjusting for unusual lighting
distribution, variations, non-standard processing, or conditions of under exposure to get an
optimum image.
—
BLC
(Backlight Compensation): BLC compensates light to the object in the front to make it clear,
while compensating for over-exposure of the background where the light is strong. The level can
be adjusted from 0 to 8.
•
GAIN
: Optimizes the clarity of image in poor light. GAIN level can be set to HIGH, MIDDLE, and LOW.
Select OFF to disable the GAIN function. Noise is amplified when GAIN is on.
•
DWDR
(Digital Wide Dynamic Range) DWDR helps the camera provide clear images even with bright
or dark backlight conditions. When both very bright and very dark areas simultaneously exist in the
image, DWDR balances the brightness level of the whole image to provide clear images with details.
Setting DWDR to ON to improve the image quality of images with extreme bright
and
dark areas. Set
the DWDR as OFF to disable the function.
•
ANTI-FLICKER
Set the ANTI-FLICKER as ON to prevent the image from flicker.
WHITE BALANCE
White balance is the white rendition function of the camera to adjust the color temperature according to
the environment. It can remove unrealistic color casts in the image. You can set WB mode as either ATW
or MWB.
•
ATW
: In ATW mode, white balance is adjusted automatically according to the color temperature of the
scene illumination.
•
MWB
: In MWB mode, you can set the R GAIN/B GAIN value from 1 to 255 to adjust the shades of red/
blue color of the image.
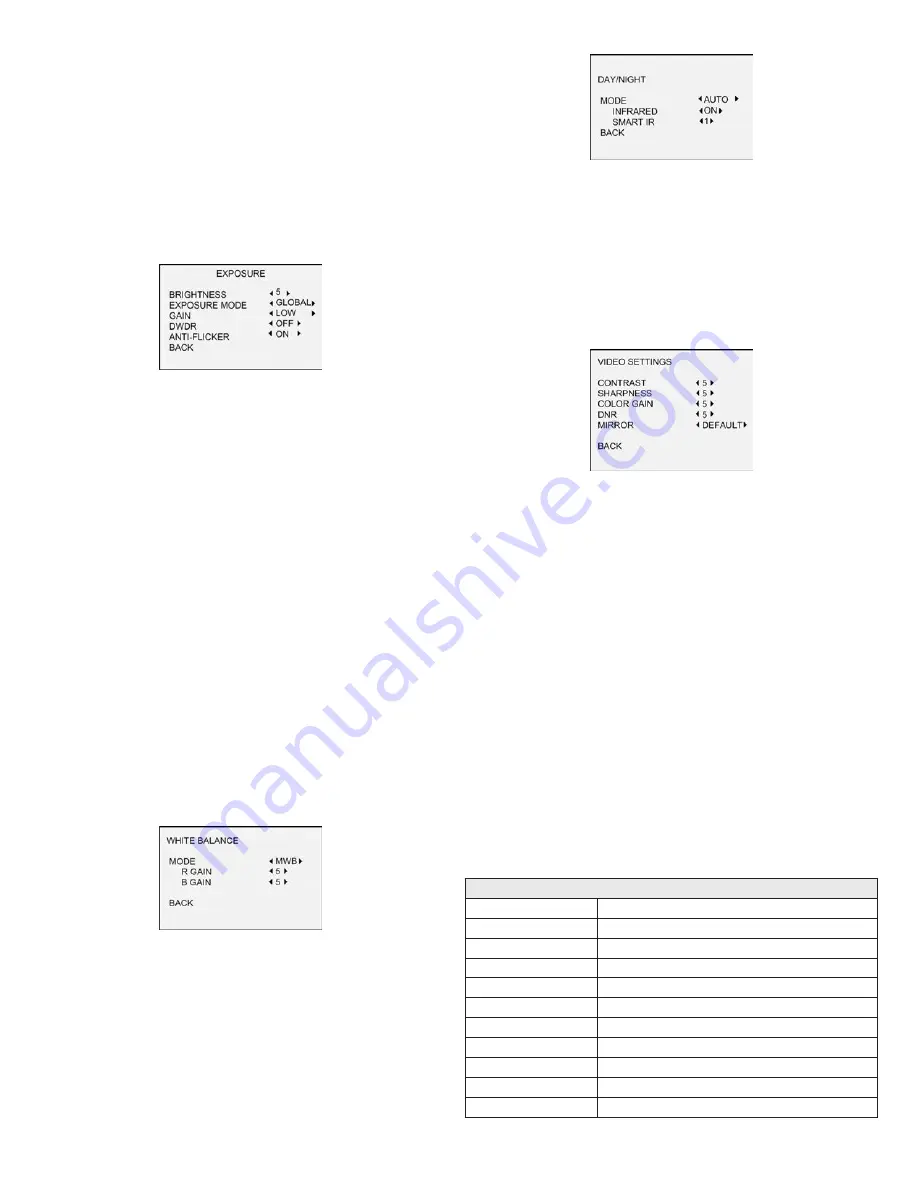
DAY-NIGHT
Color, B/W, and AUTO are selectable for DAY and NIGHT switches.
•
COLOR
: The image is colored in day mode all the time.
•
B/W
: The image is black and white all the time, and the IR LED turns on in the low-light conditions.
•
AUTO
: Automatically switch COLOR or BW (Black and White) according to actual scene brightness.
You can turn on/off the INFRARED and set the value of SMART IR in this menu.
—
INFRARED
: Select this option to turn on/off the IR LED in response to the light level in the field
of view.
—
SMART IR
: Use the Smart IR feature is to adjust the light to its most suitable intensity, and to
prevent the image from over exposure. The SMART IR value can be adjusted from 1 to 3. The
higher the value, the more obvious the effects are.
VIDEO SETTING Menu
Move the cursor to VIDEO SETTING and press the confirm button to enter the submenu. In this menu you
can adjust CONTRAST, SHARPNESS, COLOR GAIN, DNR and MIRROR settings.
•
CONTRAST
: This feature enhances the difference in color and light between parts of an image. You
can set the CONTRAST value from 1 to 10.
•
SHARPNESS
: Sharpness determines the amount of detail an imaging system can reproduce. You can
set the SHARPNESS value from 1 to 10.
•
COLOR
GAIN
: Adjust this feature to change the saturation of the color. The value ranges from 1 to 10.
•
DNR
(Digital Noise Reduction): The DNR function can decrease the noise effect, especially when
capturing moving images in low light conditions and delivering more accurate and sharp image
quality. You can set the DNR value from 1 to 10.
•
MIRROR
: DEFAULT, H, V, and HV are selectable for mirror.
—
DEFAULT
: The mirror function is disabled.
—
H
: The image is reflected horizontally.
—
V
: The image is reflected vertically.
—
HV
: The image is reflected both horizontally and vertically.
RESET
Reset all the settings to the default.
SAVE &EXIT
To save your new settings, move the cursor to SAVE &EXIT and click OK (
Iris+
) to save the setting and exit
the menu.
Specifications
Camera
Image Sensor
5 MP CMOS image sensor
Effective Pixels
2560 (H) × 1944 (V)
Min. illumination
Color: 0.008 Lux @ (F1.2, AGC ON), 0 Lux with IR
Shutter Time
1/25 s to 1/50,000 s
Lens
Motorized VF lens: 2.8 ~ 12 mm, horizontal field of view 102
˚
~ 31
˚
Lens Mount
φ14
Day & Night
ICR
Angle Adjustment
Pan: 0° ~ 360°; Tilt: 0° ~ 75°; Rotate: 0° ~ 360°
Synchronization
Internal Synchronization
Video Frame Rate
2560 × 1944 @ 20 fps
HD Video Output
1 Analog HD output


