


2
www.observint.com
Cable channel (2)
7.
Connect the camera drop cable to video and power extension cables.
8.
Reattach the camera to the mounting plate.
u
Position the camera assembly onto the mounting plate such that the lip on the black ring
attached to the enclosure slips under the tabs on the mounting plate.
Mounting plate
u
Tabs
Cable channel
v
Slide the clip plate out.
v
y
x
Clip Plate
Mounting plate
Enclosure
Push the enclosure into the mounting plate until it is fully seated.
x
Slide the clip plate in so that it catches the lip of the black ring on the encloser.
y
Tighten the clip plate screw until it is just snug.
9.
Connect the far end of the video extension cable to a 5 MP HD-TVI compatible digital video recorder
(DVR).
10. Connect the far end of the power extension cable to a power supply, then apply power to the
camera through the power extension cable.
11. While observing video from the camera on a monitor, aim the camera at your surveillance target.
See the figure below for adjustment ranges.
Rotation
adjust
0° ~ 360°
Pan adjust
0° ~ 360°
Tilt adjust
0° ~ 75°
NOTE
When adjusting the turret rotation, ensure that the “
UP
” label is positioned at the top.
Open the OSD menu
The On Screen Display (OSD) provides configuration options for refining the performance of the camera.
It also can be used to block sensitive portions in the field of view (Privacy). You can open the OSD menu
system from either an ALIBI HD-TVI DVR Live View display or through remote login to the ALIBI recorder.
−
Opening the OSD Menu through the HD-TVI DVR
To open the OSD menu on the HD-TVI DVR monitor:
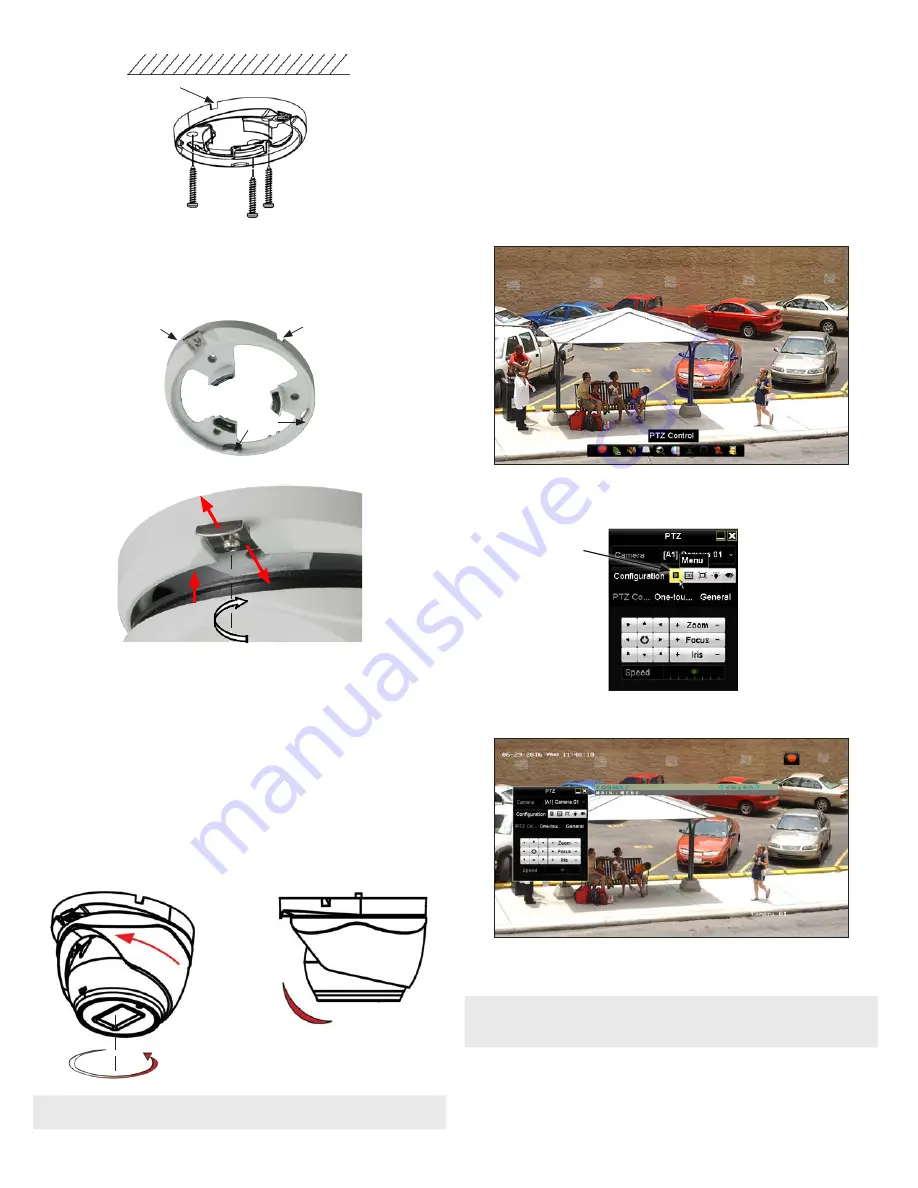
1.
Open the HD-TVI DVR Live View screen, and then click inside the screen where the PTZ camera video
image is displayed. See below.
2.
Click the
PTZ Control
icon in the Quick Setting Toolbar. The PTZ camera Live View window will
expand to full screen and the pop-up window shown below will open.
Menu
icon
3.
In the
PTZ Control
panel pop-up window, click the
Menu
icon on the
Configuration
line.
4.
Drag the PTZ Control window to a position where it doesn’t cover the OSD menu (such as the left
side).
NOTE
The PTZ Control window direction buttons and the
Iris +
and
Iris
-
keys are used to navigate the
OSD menu and set configuration options in the camera. See “OSD Definitions: On-screen Display
(OSD) menus” on page 3.
−
Opening the OSD Menu through remote login to the HD-TVI DVR
To open the OSD menu during a remote login to the recorder:
1.
After logging into the HD-TVI DVR, open the camera in a single Live View window.
© 2017 Observint Technologies. All rights reserved.


