


3
www.observint.com
© 2018 Observint Technologies. All rights reserved.
2.
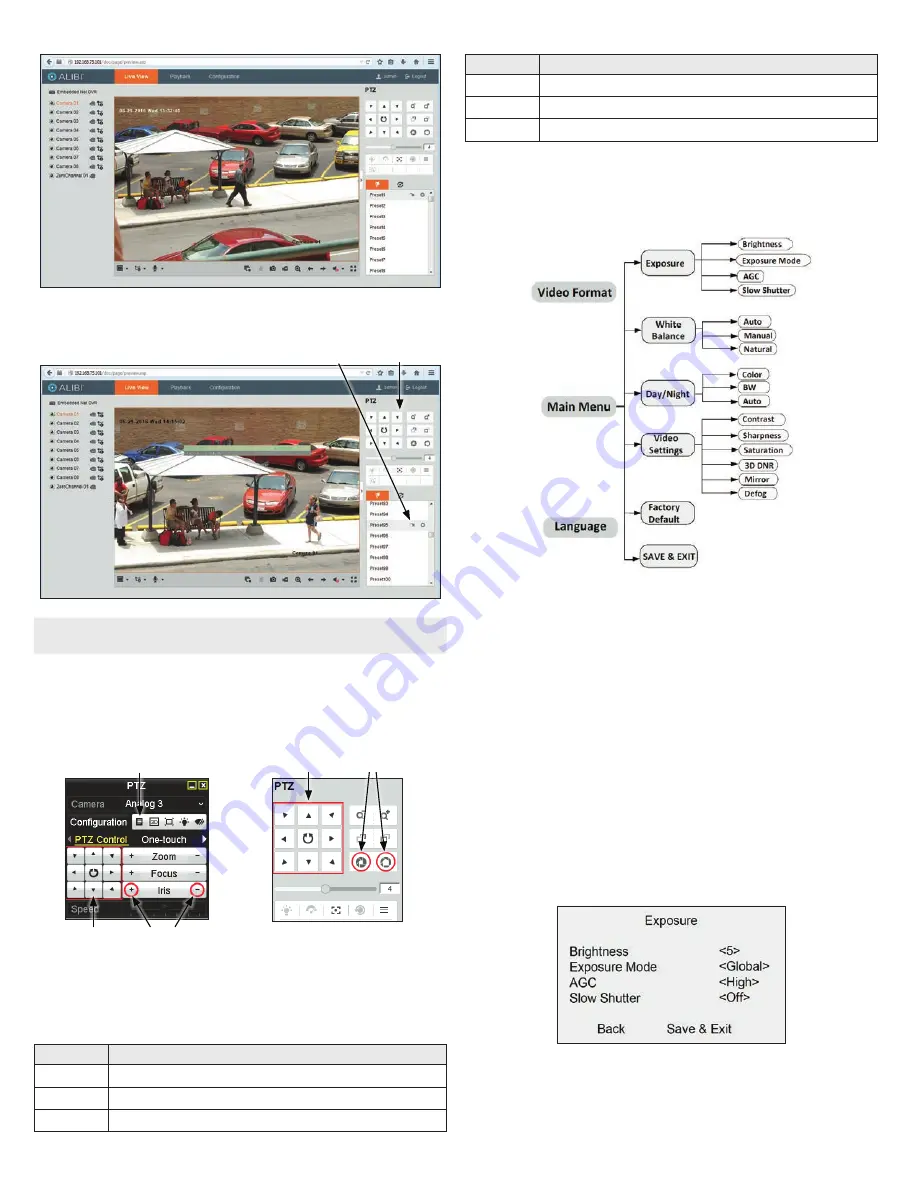
In the PTZ control panel, scroll down the Preset list to
Preset95
, click the entry to highlight it, and
then click the
Call
icon. See below. The OSD
MAIN MENU
screen will open.
PTZ control panel
Preset95
Call
icon
NOTE
The PTZ control panel direction buttons and the
Iris +
and
Iris -
keys are used to navigate the OSD
menu and set configuration options in the camera.
OSD menu navigation
For the ALIBI Recorder
: Navigation and settings in the OSD are made through direction keys and the
Iris
+
and
Iris -
buttons in the recorder PTZ Control panel. See below.
Direction keys
Click to open OSD menu
Iris+ Iris–
Iris+ Iris–
Direction keys
ALIBI QVR PTZ Control panel
ALIBI QVR remote access PTZ control panel
For remote access to the ALIBI QVR
: Navigation and settings in the OSD are made through direction
keys and the
Iris +
and
Iris -
buttons in the ALIBI QVR PTZ control panel. See above.
The function of the directional keys and Iris buttons are defined in the table below.
Keys
Function
p
Move up in the parameter list
q
Move down in the parameter list.
t
Move to previous page, field, or move the camera left.
Keys
Function
u
Move to next page, field, or move field right.
Iris+
(OPEN)
Set parameter value, or open sub-menu
Iris–
(CLOSE)
Cancel change of parameter.
OSD Definitions: On-screen Display (OSD) menus
After the camera is installed on a compatible recorder, you can open the OSD menu by clicking the PTZ
Control icon on the Quick Setting Toolbar.
To navigate the OSD menu and select options:
•
Click the up/down (
p
/
q
) direction buttons to select the menu item.
•
Click the left/right (
t
/
u
) direction buttons to adjust the value of the selected item.
•
Click the
Iris+
key to confirm a selection.
Video Format
You can set frame rate as 8 MP @ 12.5 fps, 8 MP @ 15 fps, 5 MP @ 20 fps, 4 MP @ 25 fps, 4 MP @ 30 fps,
1080p @ 25 fps, or 1080p @ 30 fps.
Language
The OSD supports English only.
Main Menu
Exposure submenu
Use the Exposure submenu to adjust the Brightness, Exposure Mode, AGC (Automatic Gain Control), and
Slow Shutter.
Brightness
: Brightness refers to the average brightness of the image. You can set the brightness
value from 1 (darkest) to 10 (brightest).
Exposure Mode
: You can set the Exposure Mode to Global, BLC, HLC, or WDR. Click the left/right
(
t
/
u
) direction buttons to show your selection.