


8
www.observint.com
© 2020 Observint Technologies. All rights reserved.
a.
Click the
Max. Size
button, and then drag a rectangle across the video image to represent
the maximum size of objects to detect. The rectangle will be labeled with
Max
.
b.
Click the Min. Size button, and then drag a rectangle across the video image to represent
the minimum size of objects to detect. The rectangle will be labeled with
Min
.
6.
Set the following options:
a.
Open the
Direction
drop down list and select the direction of line crossing detection to
detect. For example, A->B means only object crossing the line from the A side to the B
side can be detected. The A and B sides of the line are shown on the video image.
b.
Set the
Sensitivity
value as needed. Sensitivity represents the percentage of the
body part of an acceptable target that crosses the pre-defined line. For example, if the
sensitivity is set to 60, the action can be counted as a line crossing action only when 60
percent or more body part goes across the line.
c.
Click
Save
to retain your settings.
7.
Click the
Save
button to retain your settings.
8.
Click the
Arming Schedule
tab. To configure the schedule, refer to “Scene Change Detection
Smart Event setup” on page 6.
9.
Click the
Linkage Method
tab. To configure the Linkage Methods menu, check the select boxes
for the actions you want the camera to perform when the event occurs.
10. Click the
Save
button to retain your settings.
Unattended Baggage Detection Smart Event setup
Use Unattended baggage detection to detect when objects such as baggage, a purse, dangerous
materials, etc. are left in the pre-defined area of the field of view. You can set the Sensitivity for
detecting objects, and the time the object remains in the detection area.
This feature is configured nearly identical to the way Intrusion Detection is configured, with the
exception that the Threshold time can be much longer. Refer to “Intrusion Detection Smart Event setup”
on page 7.
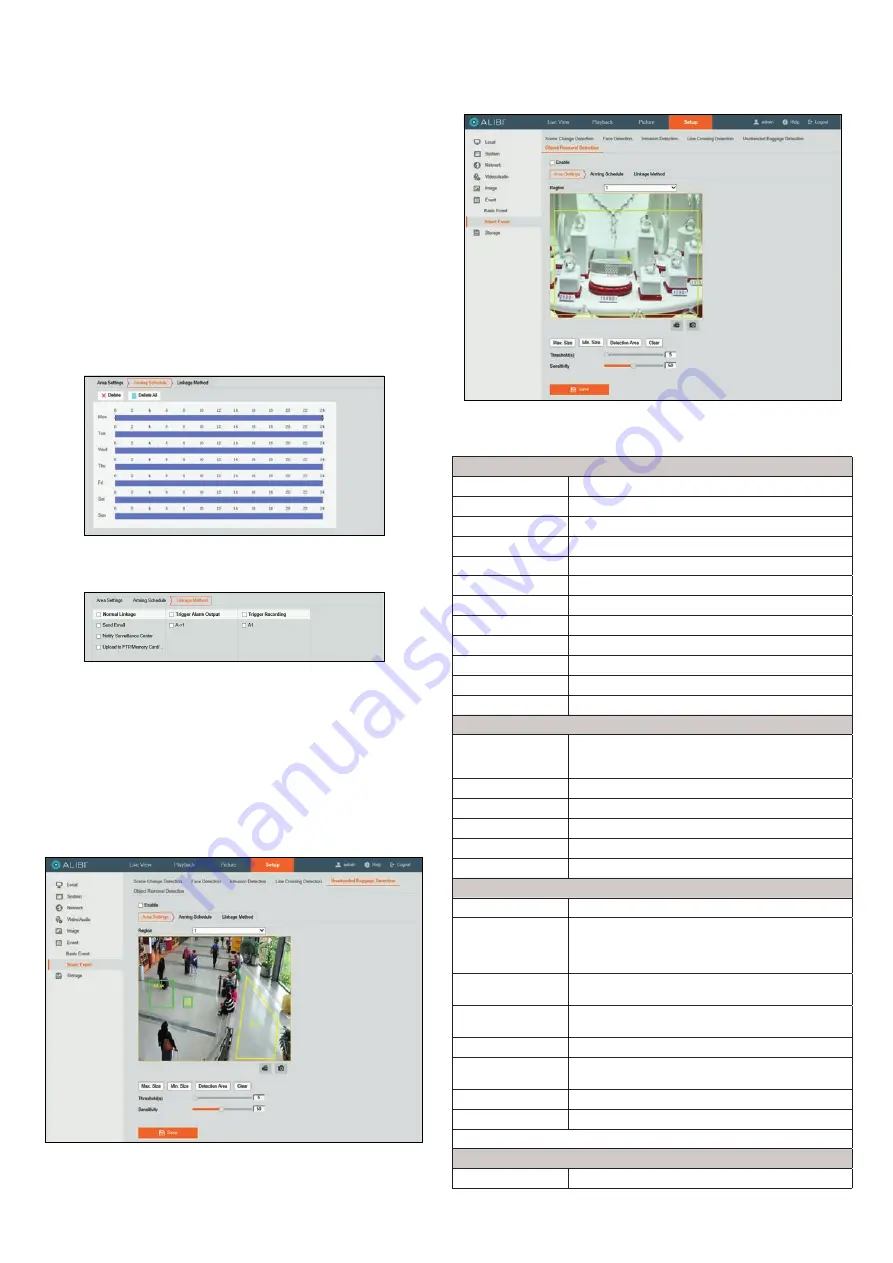
Object Removal Detection Smart Event setup
Use Object removal detection to detects when an object, such as an exhibit on display, is removed from
the pre-defined area of the field of view.
This feature is configured nearly identical to the way Intrusion Detection or Unattended Baggage
is configured, with the exception that the Threshold time can be much longer. Refer to “Intrusion
Detection Smart Event setup” on page 7.
Specifications
Camera
Image Sensor
1/2.4” Progressive Scan CMOS
Min. Illumination
Color: 0.009 Lux @ (F1.2, AGC ON), 0.016 Lux @ (F1.6, AGC ON)
Shutter Speed
1/3 seconds ~ 1/100,000 seconds
Slow Shutter
Yes
Focus
Fixed
Focal length, Lens
2.8 mm, horizontal FOV: 99°, vertical FOV: 61°, diagonal FOV: 128°
Lens Mount
M12
Aperture
F1.6
Day &Night
IR cut filter
DNR
3D DNR
Wide Dynamic Range
120dB
3-Axis Adjustment
Pan: 0° to 360°, tilt: 0° to 75°, rotate: 0° to 360°
Compression Standard
Video Compression
Main stream: H.265/H.264
Sub stream: H.265/H.264/MJPEG
Third stream: H.265/H.264
H.264 Type
Main Profile/High Profile
H.264+
Main stream supports
H.265 Type
Main Profile
H.265+
Main stream supports
Video Bit Rate
32 Kbps to 16 Mbps
Image
Max. Resolution
3072 × 2048
Main Stream
50 Hz: 20 fps (3072 × 2048, 3072 × 1728, 2944 × 1656), 25 fps (2560 × 1440,
1920 × 1080, 1280 × 720)
60 Hz: 20 fps (3072 × 2048, 3072 × 1728, 2944 × 1656), 30 fps (2560 × 1440,
1920 × 1080, 1280 ×720)
Sub Stream
50 Hz: 25 fps (640 × 480, 640 × 360, 320 × 240)
60 Hz: 30 fps (640 × 480, 640 × 360, 320 × 240)
Third Stream
50 Hz: 25 fps (1280 ×720, 640 × 360, 352 × 288)
60 Hz: 30 fps (1280 ×720, 640 × 360, 352 × 240)
Image Enhancement
BLC/3D, DNR/HLC
Image Settings
Rotate mode, brightness, contrast, saturation, and sharpness are adjustable via web
browser and client software
ROI (Region of Interest)
Support 1 fixed region for main stream and sub stream separately
Day/Night Switch
Day/Night/Auto/Schedule
*Note: When the main stream resolution is 2944 × 1656 and above, max frame rate is 20 fps for all streams.
Network
Network Storage
Support micro SD/SDHC/SDXC card (128G) local storage, NAS (NFS,SMB/CIFS), ANR


