background image


Aliaro reserve the right to vary from the description given in this data sheet and shall not be liable for any errors. 


www.aliaro.com 

Installing additional modules 

1.


Caution Do not touch the contacts or remove the I/O boards or cables while the system 
is energized.  

2.


Power off the main DC power source or disconnect the power source from the chassis 
before installing any modules or RTIs. 

3.


Ensure that the chassis is powered off. The POWER LED should be off. If the POWER 
LED is not off, do not proceed until it is off.  

Notice The AL-1020U chassis and the SLSC modules do not support hot plug-in. The 
entire chassis must be powered off when a module is inserted or removed.  

4.


Loosen the screws on the upper rear panel of the chassis. 

5.


Position the RTI backplane (if needed) at the desired slot and insert the securing screws, 
but do not fully tighten them. 

6.


Insert the SLSC module into the same slot as its corresponding RTI while firmly holding 
the RTI in place until the RTI is firmly connected to the module.  

7.


Repeat steps 4 and 5 for all required RTIs. 

8.


Fully tighten the screws for all RTIs and the upper rear panel of the chassis. Note Waiting 
until all RTIs and modules are installed to fully tighten the screws ensures proper 
alignment for future connections between modules and RTIs. 

9.


Fully tighten the two module mounting screws on each newly installed module. 

10.


Power on the AL-1020U chassis


Calibration 

Recommended warm-up time 

10 min 

Calibration interval 

Not required 


Summary of Contents for AL-1020U

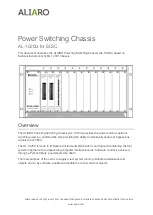
Page 1: ...0U provides the power and bus network switching used in a vehicle while also providing the ability to individually enable or bypass bus signals to each ECU The AL 1020U is made to fit National Instrum...

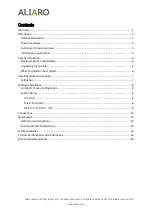
Page 2: ...ssis installation 6 Electromagnetic Compatibility 6 Unpacking the module 6 What You Need to Get Started 6 Installing additional modules 7 Calibration 7 Software installation 8 AL 1020U Chassis Configu...

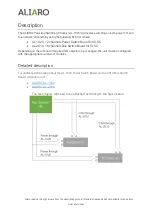
Page 3: ...ing SLSC modules AL 1020 12 channels Power Switch Board for SLSC AL 2010 16 channels Bus Switch Board for SLSC Depending on the amount of required test objects to be managed the unit must be configure...

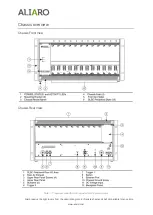
Page 4: ...to vary from the description given in this data sheet and shall not be liable for any errors www aliaro com Chassis overview Chassis Front View Chassis Rear View Note 11 requires connection with an e...

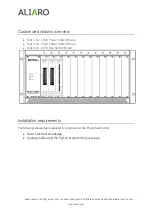
Page 5: ...aliaro com Customized chassis overview Slot 1 AL 1020 Power Switch Board Slot 2 AL 1020 Power Switch Board Slot 3 AL 2010 Bus Switch Board Installation requirements The following knowledge is required...

Page 6: ...void your authority to operate it under your local regulatory rules Unpacking the module Carefully inspect the shipping container and the module for damage Check for visible damage to the exterior an...

Page 7: ...a module is inserted or removed 4 Loosen the screws on the upper rear panel of the chassis 5 Position the RTI backplane if needed at the desired slot and insert the securing screws but do not fully ti...

Page 8: ...rowser is Internet Explorer Python Library Contents The chassis communicate over ethernet utilizing the supplied ALIARO Python driver library API The library contains the following components pws_chas...

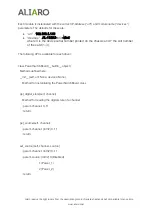
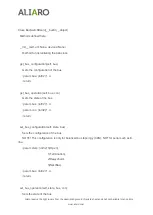
Page 9: ...printed on the chassis and Y the slot number of the card 1 3 The following API is available for each driver class PowerSwitchBoard __builtin__ object Methods defined here __init__ self url None device...

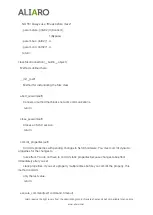
Page 10: ...self bus Gets the configuration of the bus param bus int32 1 4 return get_bus_operation self bus con Gets the state of the bus param bus int32 1 4 param con int32 1 4 return set_bus_configuration sel...

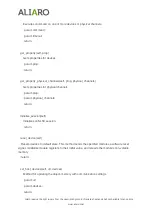
Page 11: ...e Slsc class abort_session self Cancels a method that blocks network communications return close_session self Closes an SLSC session return commit_properties self Commits properties with pending chang...

Page 12: ...nnels self prop physical_channels Gets properties for physical channels param prop param physical_channels return initialize_session self Initializes an SLSC session return reset_device self Resets de...

Page 13: ...to commit static properties You can set only one property for one or multiple devices or physical channels param prop param value return set_property_physical_channels self prop physical_channels valu...

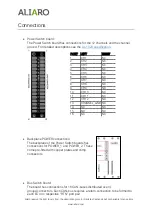
Page 14: ...ons The backplane of the Power Switch boards has connections for POWER_1 and POWER_2 These come pre fitted with copper plates and crimp connectors Bus Switch board The board has connections for 16 CAN...

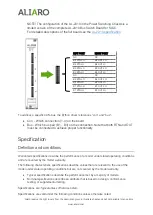
Page 15: ...ranted specifications describe the performance of a model under stated operating conditions and are covered by the model warranty The following characteristic specifications describe values that are r...

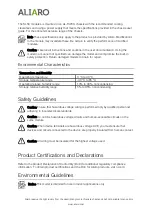
Page 16: ...tics Temperature and Humidity Operating temperature 0 C to 40 C Storage temperature range 40 C to 85 C Operating relative humidity range 10 to 90 noncondensing Storage relative humidity range 5 to 95...

Reviews: