Alfano AStrO Quick Start Manual Download Page 5

TO START; PRESS BOTH BUTTON AND HOLD 3 sec

To scroll through the menus:

press briefly the 

left button

.

To make your selection from one of the menus:

press the 

right but-

ton

.

From STOP Mode

,(The screen w/the STOP icon) if you hold the

left button

for more than 2 seconds you will be in 

Configuration Mode

.

From any screen: 

if you hold the 

left button

for more than 2 seconds,

it will bring you back to 

Stop Mode

. Also, If you delay too long on a cer-

tain screen, it will bring you automatically back to 

Stop Mode

, .

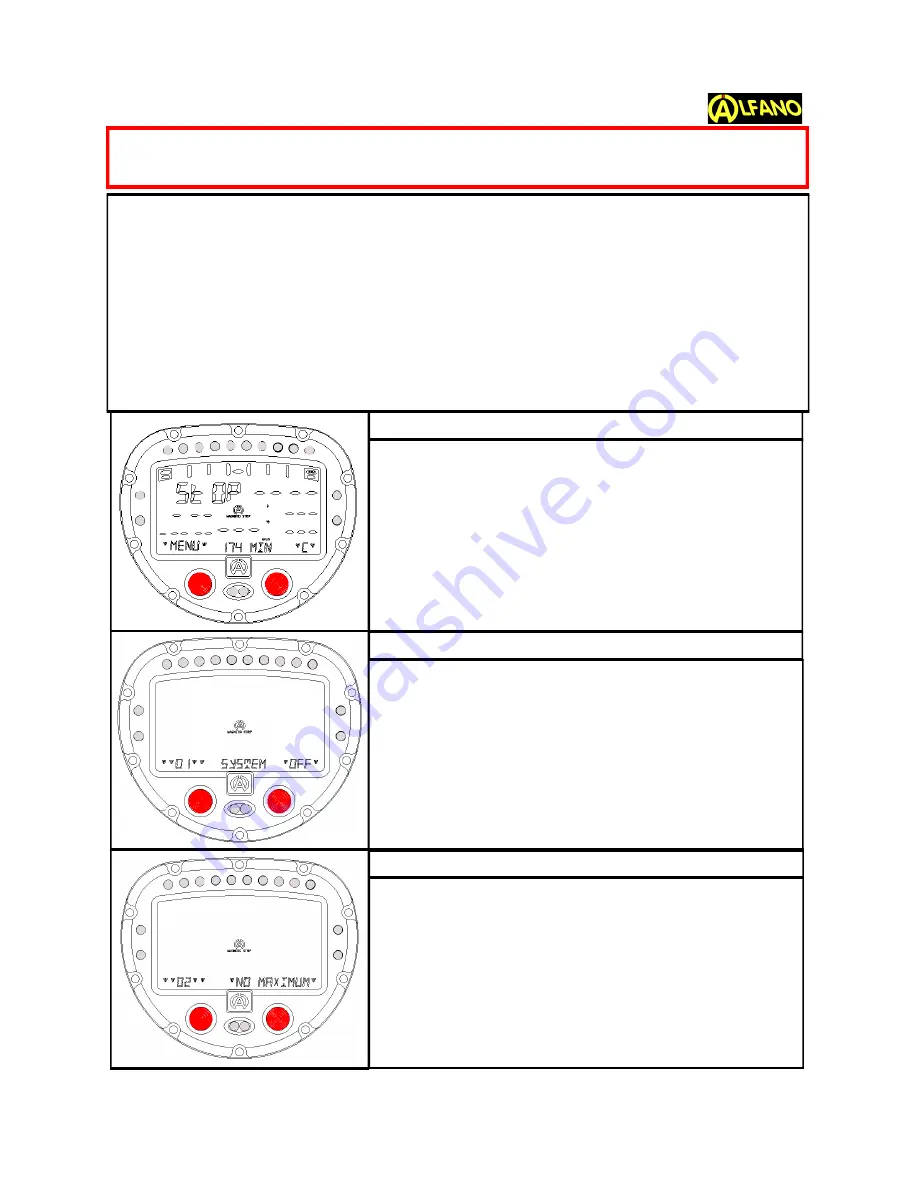
This is the main menu for the AStrO.

174”:

Time in minutes available to record data.  

"

C

°": Choice that was made between  Celcius over

Fahrenheit (C° or F°).

"

D

": Dynamic mode over Peak Delay (D or P).

"

(1)

(2)

"...: Number of strips or beacons at that track.

"

Km/h

": Choice that was made between Metric or Imperial

(mph).

"

C

": (on the right bottom of screen) tells you to press right

button to get into the counters.
Press the 

left button

to pass to the next menu.

Pressing the 

right button

will manually turn off the

unit.

If on this menu you read 

"No Maximum"

, it means you

have no data in memory.
When data has been stored, pressing the 

right button

will

bring you to the Maximum RPM, Speed, Gear, Temp 1,
Temp 2, combining all the laps and best of all laps.
Press the 

left button

to pass to the next menu.

Toll Free:1 (877) 462-7296

5

TO START RECORDING

TO TURN OFF

TO REVIEW MAXIMUMS ONLY

BEFORE BEGINNING TO START YOUR RECORDING GO TO CON-
FIGURATION MENUS (Page 8 OF THIS MANUAL)

www.Alfano-usa.com

Summary of Contents for AStrO

Page 1: ...1 QUICK START GUIDE AStrO Ver 10 309 Toll Free 1 877 462 7296 Visit www Alfano usa com...

Page 2: ...the manual as user friendly as possible making it easy for you to input data As we are always striving for excellence in our products we welcome your feedback and comments on this product guide or an...

Page 3: ...ith speed sensor Temperature 1 Temperature 2 Temperature Alarm LED 2 RPM Display Graphic RPM 1 or Temperature 2 Display Display A G Force sensor for track mapping B Temperatures 1 inputs NTC type ther...

Page 4: ...shing LEDS Temperature is Above the Pre Set High Range Simple push of button gives access to menu 1 from 1 to 7 Holding for 2 seconds gives access to menu 2 CONFIG SYSTEM from 10 to 28 Number of sessi...

Page 5: ...er Fahrenheit C or F D Dynamic mode over Peak Delay D or P 1 2 Number of strips or beacons at that track Km h Choice that was made between Metric or Imperial mph C on the right bottom of screen tells...

Page 6: ...u to the previ ous lap Pressing right button right arrow will bring you to the next lap in this case you cannot choose as you are already at the last lap On a chosen lap wait a few seconds for VIEW pr...

Page 7: ...ired Counters 4 5 6 RPM Time Accumulate your engine s running time Counters 7 8 Miles Accumulate distance traveled in motion Pressing the right button will bring you to the 1st counter Pressing the le...

Page 8: ...UTTON 3 sec Tip Prior to this configuration go to Menu 22 and choose between Celcius or Fahrenheit Press the right button to choose your low temperature tar get for Temp 1 wait for arrows up or down p...

Page 9: ...to pass to the next menu By pressing the right button this feature allows the driver a delay giving him time while driving to watch the RPM peak He can choose between 0 4 and 4 4 With increments of 0...

Page 10: ...ocket using right button and with arrows up and down set again with left button Finally using the right button set the gear size of the rear axle number of teeth and left button sets passes to next me...

Page 11: ...or drive your vehicle Press the right button to choose the number of gears on your engine and to set that number press left button Now you are in the configuration of your 1st gear As soon as you reac...

Page 12: ...in memory for further use but will not be displayed while driving Tip This must be set up prior to configuration of Menu 13 Low High Temp alarm Press the right button to choose between Celcius or Fah...

Page 13: ...g your G Force calibration is OK In case you see NO you will need to start the process over Press the left button to set and pass to the next menu With the right button you can enter a 2 digit passwor...

Reviews: