


5
Connection
To connect your monitor to your mixer or audio interface, follow the steps below for your connector
type. Make sure your audio source is line-level.
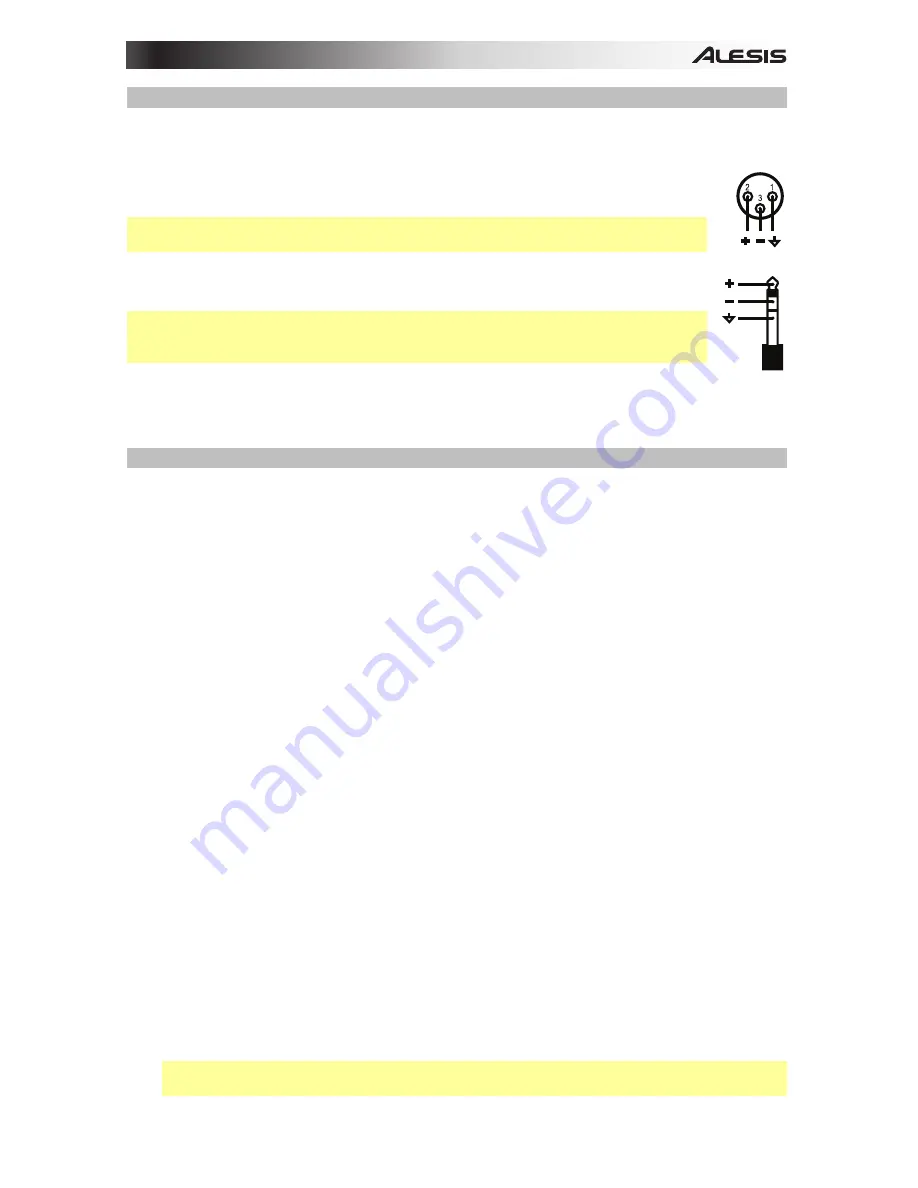
XLR Cable:
Connect a channel of your audio source's main output to the monitor's XLR
input.
Important: Pin 2
is positive/hot,
Pin 3
is negative/cold, and
Pin 1
(the shield pin) is the
ground.
1/4" (6.35 mm) TRS or TS Cable:
Connect a channel of your audio source's main
output to the monitor's 1/4" (6.35 mm) input.
Important:
For
balanced
cables (TRS, shown here), the
tip
of the plug is positive/hot,
the
ring
is negative/cold, and the
sleeve
is the ground. For
unbalanced
cables (TS), the
tip
of the plug is the signal, and the
sleeve
is the ground.
RCA Cable:
Connect a channel of your audio source's main output to the monitor's RCA input.
Make sure your audio source is line-level.
Acoustic Compensation
Since studio monitors (including the Elevate 6) are designed to have a flat frequency response, you
may be wondering why some monitors include additional EQ controls. Elevate 6 has an
HF Trim
switch and
LF Trim
switch for two reasons:
Varying studio size, shape, and acoustical treatment:
Elevate 6 monitors are tested and tuned in
an anechoic chamber to be as linear (flat) as possible. This means that leaving the switch set to their
default settings will closely resemble monitoring in an "ideal" environment similar to those found in
high-end recording studios. In these studios, acousticians determine the size and shape of the
control room, placement of the studio monitors and large furniture, construction materials of the
walls and ceiling, and acoustical treatments applied to various parts of the room. This ensures that
studio monitors will sound as flat and accurate as possible at the "mixing position."
In the real world, however, many project studios are set up where the room cannot be easily
modified to improve acoustics. This means that the room's design may adversely affect the
monitors' frequency response (i.e, sound reflections can cause the monitors to not sound linear).
Monitor placement within a studio:
The proximity of your monitors to the walls, floors, and ceilings
may adversely affect the frequency response of what you hear at the mixing position. This is
because all monitors radiate low-frequency sounds in all directions—not just toward the mixing
position. Large, flat surfaces within one foot of the speaker act as low-frequency "sound reflectors"
for bass energy, resulting in bass that sounds "tubby" or exaggerated.
To configure the HF Trim and LF Trim switches,
begin by mixing a few songs with these switches
set to their
0dB
positions. If your mixes sound good in the studio and on other speakers (car stereos,
"multimedia" computer speakers, etc.), leave the switches in their default positions.
•
If your mixes sound good in the studio but sound "dull" and lack high-frequency "sparkle" on
other playback systems, set the
HF Trim
to
-2dB
, and/or set the
LF Trim
to
+2dB
. These
settings compensate for a studio that sounds too "dead" (not enough high-frequency reflection
around the room).
•
If your mixes sound good in the studio but sound too "crispy" or "brittle" and contain too much
high-frequency content on other playback systems, set the
HF Trim
to
+2dB
, and/or set the
LF
Trim
to
-2dB
. These settings compensate for a studio that sounds too "live" (too much high-
frequency reflection around the room).
Important:
When using two Elevate 6 monitors, make sure the
Volume
knob,
HF Trim
switch,
and
LF Trim
switch are in
the same position on both monitors
.
Summary of Contents for Elevate 6
Page 2: ......
Page 24: ...alesis com Manual Version 1 0...


