background image

www.aleratec.com

23

Using the USB Duplicator

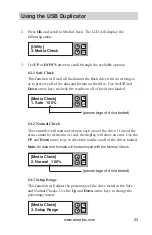
Press 

2. 

OK

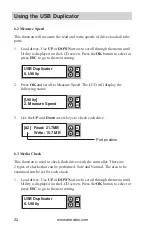
 and scroll to Media Check. The LCD will display the 

following status:

Use 

3. 

UP

 or 

DOWN

 arrow to scroll through the available options:

6.3.1 Safe Check

This function will read all the data on the flash drive with no writing so 

as to preserve all of the data and format on the drive. Use the 

UP

 and 

Down

 arrow keys to check the results on all of the drives loaded. 

6.3.2 Normal Check

The controller will read and write in each area of the drive. If one of the 

areas cannot be written to or read, the display will show an error. 

Use the 

UP

 and 

Down

 arrow keys to check the results on all of the drives loaded.

Note: All data and formats will be destroyed with the Normal Check.

6.3.3 Setup Range

This function will adjust the percentage of the drive tested in the Safe 

and Normal Checks. Use the 

Up

 and 

Down

 arrow keys to change the 

percentage tested. 

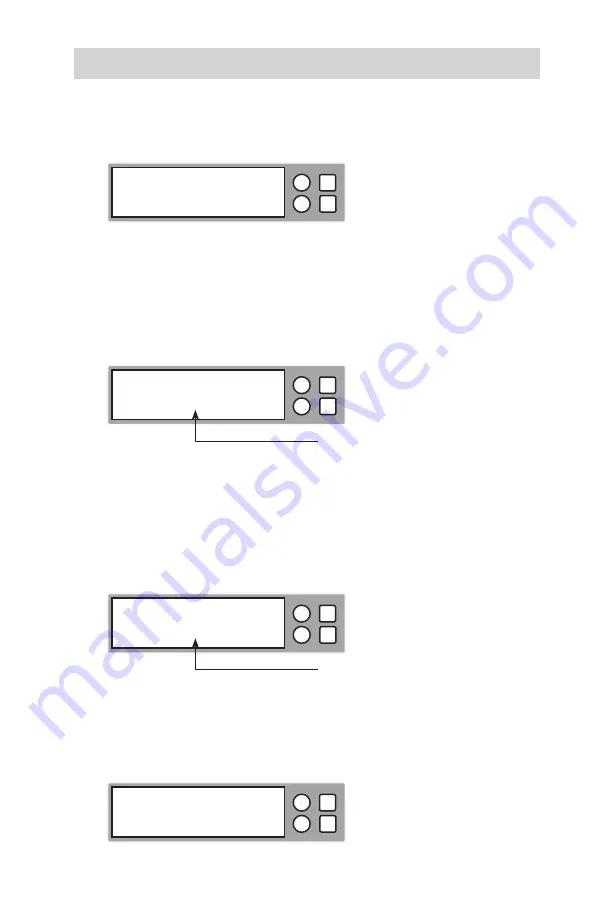
ESC

OK

[Utility]
3. Media Check

ESC

OK

[Media Check]
1. Safe   100%

(percentage of drive tested)

ESC

OK

[Media Check]
2. Normal   100%

(percentage of drive tested)

ESC

OK

[Media Check]
3. Setup Range

Summary of Contents for 330106

Page 1: ...USER GUIDE Aleratec 1 27 USB Copy Tower SA Part No 330106...

Page 2: ...mal use of the product s described within or to make a backup copy Copyright 2009 Aleratec Inc 9851 Owensmouth Avenue Chatsworth CA 91311 U S A www aleratec com Aleratec and 1 27 USB Copy Tower SA are...

Page 3: ...use harmful interference to radio or television reception which can be verified by turning the equipment off and on the user is encouraged to try to correct the interference by one or more of the foll...

Page 4: ...ratec com Safety Regulations WARNING To prevent fire or shock hazard do not expose the unit to rain or moisture To avoid electrical shock do not open the cabinet Refer servicing to authorized personne...

Page 5: ...n 3 Operation 3 Transportation 3 Overview 4 Main Menu 4 Subfunctions of Main Menu Items 5 6 and 7 5 Using the USB Duplicator 7 Synchronous and Asynchronous 7 Main Menu 8 1 Copy 8 2 Compare 11 3 Copy C...

Page 6: ...www aleratec com...

Page 7: ...y Compare or Erase up to 27 drives simultaneously Backlighted LCD display shows function selected and job progress Compatible with popular drive capacities and formats Fast Synchronous and Asynchronou...

Page 8: ...to execute a selected function 3 ESC button is used to cancel a selected function 4 UP arrow is used to scroll up through functions or menus 5 DOWN arrow is used to scroll down through functions or me...

Page 9: ...vibration Direct sunlight Electromagnetic radiation Operation Avoid exposing the duplicator to sudden changes in temperature as condensation may form on the lens inside the duplicator Operating the d...

Page 10: ...re given in the next section The functions are numbered for easy reference these numbers are also used in the next section USB Duplicator 1 Copy OK ESC USB Duplicator 2 Compare OK ESC USB Duplicator 3...

Page 11: ...ion has 2 subfunctions These are The main menu Utility function has 6 subfunctions These are 5 1 USB Info 5 2 System Info USB Duplicator 5 Information OK ESC 6 1 Format FAT 16 32 6 2 Measure Speed USB...

Page 12: ...and 7 continued The main menu Setup function has 8 subfunctions These are 7 1 Start up Menu 7 2 Copy Area USB Duplicator 7 Setup OK ESC 7 3 Button Beep 7 4 Asyn Hold Time 7 5 Ignore Size 7 6 Asynchro...

Page 13: ...sh drives that are ready for copying and the content size When you have finished loading the target drives use the arrow keys to select Copy and then select OK Asynchronous Copying Asynchronous Copyin...

Page 14: ...s larger than the system buffer 120MB Load the source flash drive into the USB Duplicator Use the 1 UP or DOWN arrow to scroll through the menu until Copy is displayed on the LCD screen Press the 2 OK...

Page 15: ...being copied to a 4GB Target it may cause an error to the Target s capacity and format To avoid this error it is strongly recommended that the Target and Source be close in their respective capacitie...

Page 16: ...anel is blinking Do not take out the drive while it is copying When copying is finished the Green LED stays on no blinking If an error occurs during the copy process a Red LED will display As finished...

Page 17: ...ded in the USB Duplicator use the UP or DOWN arrow to scroll through the menu until Compare is displayed on the LCD screen Press the 2 OK button on the display panel to select Compare The LCD will dis...

Page 18: ...flash drive This process is repeated until the comparison job is complete Load the source flash drive into the USB Duplicator Use the 1 UP or DOWN arrow to scroll through the menu until Compare is dis...

Page 19: ...ccurs during the process a Red LED will display As finished drives are removed and new flash drives inserted the 4 display will show the number of comparisons completed and the number of USB flash dri...

Page 20: ...0MB Load the source flash drive into the USB Duplicator Use the 1 UP or DOWN arrow to scroll through the menu until Copy Compare is displayed on the LCD screen Press the 2 OK button on the display pan...

Page 21: ...Compare portion will automatically begin 7 The LCD will display the status of the copying process When Compare is complete the display will show the total and the 8 number that pass and fail Note Whe...

Page 22: ...through the menu until Copy Compare is displayed on the LCD screen Press the 2 OK button on the display panel The USB Duplicator will start to read the source content into the system s buffer and imme...

Page 23: ...ompare is complete the display will show the total and the 6 number that pass and fail When Copy Compare is finished with any of the target drives you can take out the finished drive and put another b...

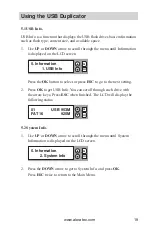
Page 24: ...serted When finished the following screen will appear Using the UP and DOWN arrows you can scroll thru each drive loaded to display capacity 5 Information This function includes 2 subfunctions These a...

Page 25: ...ect or press ESC to go to the next setting Press 2 OK to get USB Info You can scroll through each drive with the arrow keys Press ESC when finished The LCD will display the following status 5 2 System...

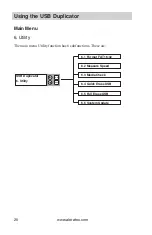
Page 26: ...Duplicator Main Menu 6 Utility The main menu Utility function has 6 subfunctions These are 6 1 Format FAT 16 32 6 2 Measure Speed USB Duplicator 6 Utility OK ESC 6 3 Media Check 6 4 Quick Erase USB 6...

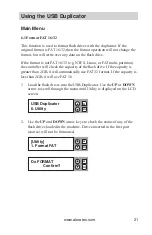
Page 27: ...ll check the capacity of the flash drive If the capacity is greater than 2GB it will automatically use FAT 32 format If the capacity is less than 2GB it will use FAT 16 Load the flash drives into the...

Page 28: ...following status Use the 3 UP and Down arrow keys to check each drive 6 3 Media Check This function is used to check flash drives with the controller There are 2 types of checks that can be performed...

Page 29: ...e controller will read and write in each area of the drive If one of the areas cannot be written to or read the display will show an error Use the UP and Down arrow keys to check the results on all of...

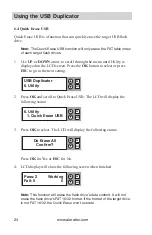
Page 30: ...o go to the next setting Press 2 OK and scroll to Quick Erase USB The LCD will display the following status Press 3 OK to select The LCD will display the following status Press OK for Yes or ESC for N...

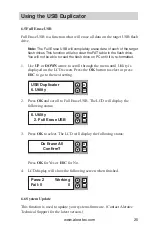
Page 31: ...the menu until Utility is displayed on the LCD screen Press the OK button to select or press ESC to go to the next setting Press 2 OK and scroll to Full Erase USB The LCD will display the following s...

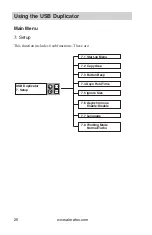
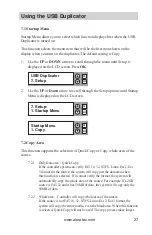
Page 32: ...Menu 7 Setup This function includes 8 subfunctions These are 7 1 Start up Menu 7 2 Copy Area USB Duplicator 7 Setup OK ESC 7 3 Button Beep 7 4 Asyn Hold Time 7 5 Ignore Size 7 6 Asynchronous Enable D...

Page 33: ...opy or Copy whole area of the source 7 2 1 Only Data area Quick Copy If the controller system can verify FAT 16 32 NTFS Linux Ext 2 Ext 3 format for the source the system will copy just the data area...

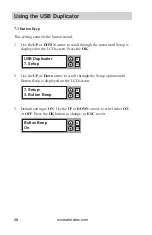
Page 34: ...tup is displayed on the LCD screen Press the OK Use the 2 UP or Down arrow to scroll through the Setup options until Button Beep is displayed on the LCD screen Default setting is 3 ON Use the UP or DO...

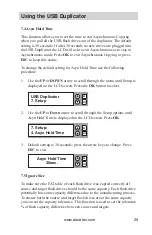
Page 35: ...ed on the LCD screen Press the OK button to select Use the 2 UP or Down arrow to scroll through the Setup options until Asyn Hold Time is displayed on the LCD screen Press OK Default setting is 30 sec...

Page 36: ...Different drive sizes will have different index sectors For example if your are copying a 2G source flash drive to a 4G target flash drive without performing data transforming the index sector of the...

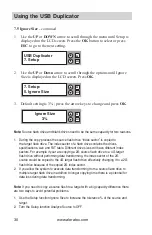
Page 37: ...wing procedure Use the 1 UP or DOWN arrow to scroll through the menu until Setup is displayed on the LCD screen Press the OK button to select or press ESC to go to the next setting Use the 2 UP or Dow...

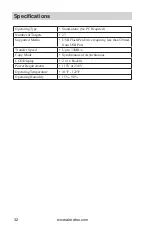
Page 38: ...umber of Targets 27 Supported Media USB Flash Pen Drive requiring less than 500mA from USB Port Transfer Speed Up to 33MB s Copy Mode Synchronous or Asynchronous LCD Display 2 x 16 Backlit Power Requi...

Page 39: ...bottom of the 1 27 USB Copy Tower SA Serial Number the serial number is located on the 2 bottom of the 1 27 USB Copy Tower SA Troubles your questions about the 1 27 USB Copy Tower SA Please 3 provide...

Page 40: ...nc an Aleratec Inc authorized dealer or distributor or any other Aleratec Inc approved reseller for this product This product is warranted to be free from defects in workmanship and material for a per...

Page 41: ...c shall not be liable for any direct indirect special incidental products or consequential damages including but not limited to any loss of data or loss of profits or business regardless of the form o...

Page 42: ...warranty service may be other than new but will be in good working order and become your property at the time of exchange At the same time the exchanged products or parts become the property of Alera...

Page 43: ..._______________________ RE _ ________________________TEL _ ____________________________ DATE ________________ OF PAGES _ ____________________________ I am experiencing the following problems with my U...

Page 44: ...Document Number 9399059_ENG_Rev C Copyright 2009 Specifications subject to change without notice Aleratec Inc 9851 Owensmouth Avenue Chatsworth CA 91311 U S A www aleratec com...

Reviews: