background image

www.aleratec.com

13

Using the DVD/CD Copy Tower Pro HS

Main Menu

Functions are selected with the arrow keys. The numbers correspond to the 

Function listing in the previous section.

Copy 

During the duplication process, data will be simultaneously written to all 

blank discs loaded in the DVD/CD Copy Tower Pro HS. For fast copy from 

source DVD/CD master disc, before starting the duplication process, please 

make sure the source disc is placed in one of the DVD Recorders. For 

copying from the Hard Drive, the source should be set to HDD.

1.  Place blank discs into the DVD Recorders as needed; when the DVD 

Recorders detect the discs are present, press the 

ENT

 button, and the 

duplicator will start copying.

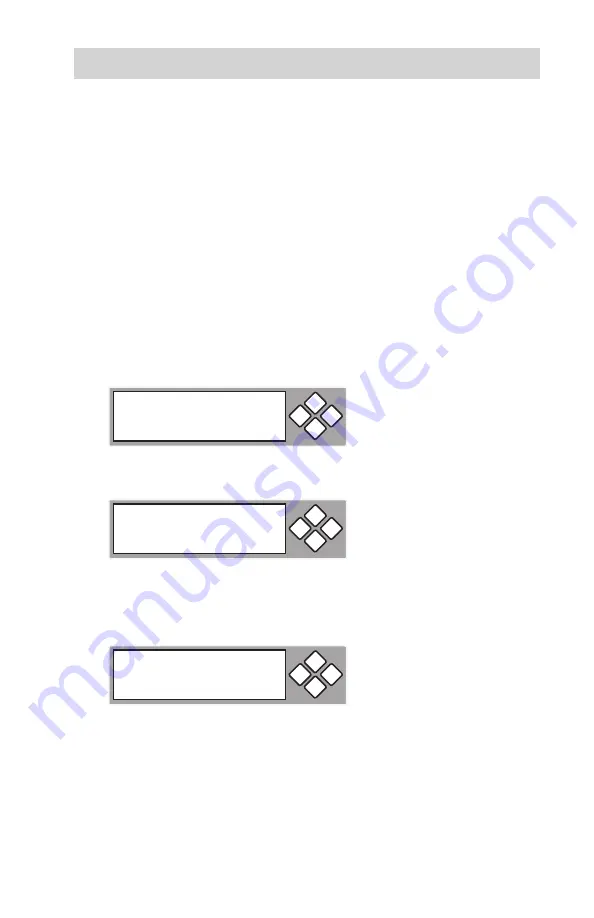
2.  The LCD will display the status of the copying process.

3.  When Copy is finished, discs which have passed will be ejected 

automatically and failed discs will remain in the DVD Recorders. Press 

the 

ENT

 button to eject any failed discs.

Note:

 DVD-RW discs which already contain data can also be used as 

blanks in the DVD/CD Copy Tower Pro HS. Any data stored on DVD-RW 
discs will be automatically erased before copying new data. Be sure you 
do not want data on DVD±RW discs inserted as blanks as any DVD±RW 
discs inserted in the DVD-Recorders to be used as blank media will 
automatically be erased, and then the content from the source DVD will 
be recorded on them.

1. Copy

ESC

ENT

Copying-DVD 

0%

4213.4MB 

d:20:15

ESC

ENT

1. Copy

OK: 03

ESC

ENT

Summary of Contents for 1:3 DVD/CD Copy Tower Pro HS

Page 1: ...USER GUIDE Aleratec 1 3 DVD CD Copy Tower Pro HS 1 7 DVD CD Copy Tower Pro HS Part No 260152 1 3 DVD CD Copy Tower Pro HS Part No 260153 1 7 DVD CD Copy Tower Pro HS...

Page 2: ...013 Aleratec Inc 9851 Owensmouth Avenue Chatsworth CA 91311 U S A Aleratec is a registered trademark and 1 3 DVD CD Copy Tower Pro HS and 1 7 DVD CD Copy Tower Pro HS are trademarks of Aleratec Inc Ch...

Page 3: ...use harmful interference to radio or television reception which can be verified by turning the equipment off and on the user is encouraged to try to correct the interference by one or more of the foll...

Page 4: ...www aleratec com...

Page 5: ...Selection 6 Operation 6 Transportation 6 Overview 7 Main Menu 7 Subfunctions 8 Using the DVD CD Copy Tower Pro HS 11 Inserting Discs 11 Ejecting Discs 11 Power Up Sequence 12 Overview Copies from Sou...

Page 6: ...www aleratec com...

Page 7: ...Powerful Control Features with LCD Display and intuitive menu maximizing copy control flexibility and output 1 3 DVD CD Copy Tower Pro HS copies three DVDs simultaneously without a computer 1 7 DVD CD...

Page 8: ...lace near heat sources such as radiators or air ducts or in a place subject to direct sunlight excessive dust mechanical vibration or shock 3 Good care will help assure maximum product life Improper o...

Page 9: ...n a safe place where no un authorized users can copy or view the data The removable HDD is located in the top bay in the 1 7 tower and in the bay directly under the controller in the 1 3 The removable...

Page 10: ...l close To replace the HDD 1 Align the HDD carriage with the door opening and push the drive carriage through the protective drive bay door until you feel the drive seat in its connector 2 Push the HD...

Page 11: ...all functions and messages 2 ENT button is used to execute a selected function 3 ESC button is used to cancel a selected function 4 UP arrow is used to scroll up through functions or menus 5 DOWN arro...

Page 12: ...at can be set for input power of 115 VAC the default setting or 230 VAC Be sure it is set correctly for the input voltage you will be using Operation Do not move the DVD CD Copy Tower Pro HS during op...

Page 13: ...xt section There are 12 main menu items that will display in the DVD CD Duplicator Display Panel These are Note Main Menu item Image number 9 works only when a Hard Disk is connected Note Main Menu it...

Page 14: ...main menu Edit Track function has 4 subfunctions These are 9 1 Load 9 2 Delete Image 9 3 Image Info 9 4 Compare Image 9 5 Select Image 9 6 Select Src Drive 9 7 Image Format Info 9 8 Edit 9 Image ENT E...

Page 15: ...06 Startup Menu 11 07 Auto Verify 11 08 Auto Compare 11 09 Auto Prescan 11 10 Eject Disc 11 11 Burn On The Fly 11 12 Burn Mode 11 13 Display Time 11 14 Button Sound 11 15 Device Info 11 16 System Info...

Page 16: ...irmware are not supported 12 01 UnderRun Protect 12 02 Overburn 12 03 Read Error Skip 12 04 Format HDD 12 05 Verify HDD 12 06 Burn in 12 07 Update Firmware 12 08 Compare Firmware 12 09 Hardware Diagno...

Page 17: ...pies will Auto Eject upon completion of a successful copy Discs can also be manually ejected from the drives 1 Press the drive s Eject button 2 Carefully lift the disc from the tray 3 To close the tra...

Page 18: ...ject any failed discs or press the eject button on a recorder to eject a disc For continuous duplication reload blank discs into the recorders and repeat the procedure Overview Loading Disc Images and...

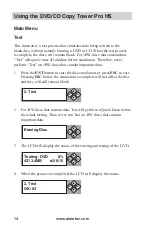
Page 19: ...the discs are present press the ENT button and the duplicator will start copying 2 The LCD will display the status of the copying process 3 When Copy is finished discs which have passed will be ejecte...

Page 20: ...contain important data 1 Press the ENT button to start the disc simulation or press ESC to exit Pressing ESC before the simulation is complete will not affect the disc and they will still remain blank...

Page 21: ...ore starting the Copy function the Test function as described above will be performed 2 When testing is completed the duplicator will start writing data onto the DVD CD R RW disc When the process is c...

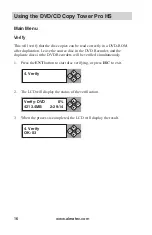
Page 22: ...source disc in the DVD Recorder and the duplicate discs in the DVD Recorders will be verified simultaneously 1 Press the ENT button to start disc verifying or press ESC to exit 2 The LCD will display...

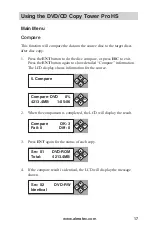
Page 23: ...tton again to show detailed Compare information The LCD display shows information for the source 2 When the comparison is completed the LCD will display the result 3 Press ENT again for the status of...

Page 24: ...f the comparison fails the LCD will display the number of discs that failed and passed 6 Press the ENT button again for the status of each copy If the comparison fails the LCD will display the reason...

Page 25: ...e higher than the writing speed for the target disc s 1 Press the ENT button to prescan the disc or press ESC to exit 2 The LCD will display the status of the prescan 3 If a disc can be read correctly...

Page 26: ...utton again and the LCD will display the time and capacity of the source disc 4 Press the ENT button again and use the arrow keys to display information on the sessions 5 Press the ENT button again an...

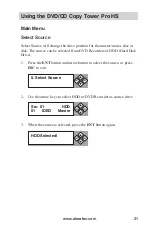
Page 27: ...sk The source can be selected from DVD Recorders or HDD Hard Disk Drive 1 Press the ENT button and arrow button to select the source or press ESC to exit 2 Use the arrow keys to select HDD or DVD Reco...

Page 28: ...VD CD Copy Tower Pro HS Main Menu Image This function includes 8 subfunctions These are 9 1 Load 9 2 Delete Image 9 3 Image Info 9 4 Compare Image 9 5 Select Image 9 6 Select Src Drive 9 7 Image Forma...

Page 29: ...Image mode or press ESC to exit 2 Press ENT to load 3 The LCD shows loading information 4 After the image file is successfully loaded the LCD shows the results 5 If there is an image file in the curr...

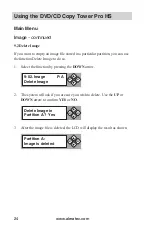
Page 30: ...e the function Delete Image to do so 1 Select the function by pressing the DOWN arrow 2 The system will ask if you are sure you wish to delete Use the UP or DOWN arrow to confirm YES or NO 3 After the...

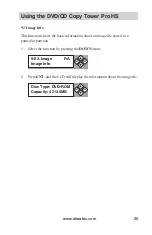
Page 31: ...shows the basic information about an image file stored in a particular partition 1 Select the function by pressing the DOWN arrow 2 Press ENT and the LCD will display the information about the image...

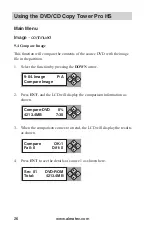
Page 32: ...ect the function by pressing the DOWN arrow 2 Press ENT and the LCD will display the comparison information as shown 3 When the comparison comes to an end the LCD will display the results as shown 4 P...

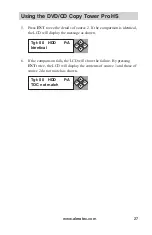
Page 33: ...comparison is identical the LCD will display the message as shown 6 If the comparison fails the LCD will show the failure By pressing ENT twice the LCD will display the contents of source 1 and those...

Page 34: ...er will format it automatically Each partition occupies 5GB The number of partitions is dependent on the drive s capacity The partitions are designated alphabetically in sequence Select a partition by...

Page 35: ...lar partition as an image file 1 Select the function by pressing the DOWN arrow 2 Then use the UP and DOWN arrows to select any of the DVD Recorders as the source 3 After selecting the source you can...

Page 36: ...any of the DVD Recorders 2 Press ENT to see the display shown here This display shows that the hard drive has been formatted as DVD 3 If your hard drive is a new one and has not been formatted yet the...

Page 37: ...ys to enter numbers first sequence or letters second sequence The title should be composed of 1 to 13 characters characters can be A B C etc or 1 2 3 etc or any combination of both After keying in the...

Page 38: ...rent CDs and copied to one or more blank CDs When copying audio CDs it is highly recommended to copy at a speed of 16x or lower to ensure good quality audio reproduction Go to Setup and then Burning S...

Page 39: ...is displayed on the LCD screen Press the ENT button to select or press ESC to go to the next setting 3 Select CD to CD Edit displayed on the LCD screen 4 Press ENT and scroll to Select Track to selec...

Page 40: ...e completion of the copying process the LCD will display the Burn Complete message Press the ENT button to continue to step 7 7 The system will display Continue Edit Next Disc Yes Use the arrow keys t...

Page 41: ...sc s session Yes Use the arrow keys to make YES or NO selection Select YES 10 LCD display will show the process of closing the session Closing Session Please Wait Note You will NOT be able to use the...

Page 42: ...y Audio you can play music with your DVD CD Copy Tower Pro You can connect speakers to the headphone jack on any drive 1 Load the CD you want to play in that drive and press the ENT button to play mus...

Page 43: ...to index to the next setting 2 The system will ask to close the disc session Close all disc s session Yes Use the arrow keys to make YES or NO selection Select YES 3 LCD display will show the process...

Page 44: ...ubfunctions These are 11 01 Language 11 02 CD Burn Speed 11 03 DVD Burn Speed 11 04 Read Speed max 11 05 Auto Drive Start 11 06 Startup Menu 11 07 Auto Verify 11 08 Auto Compare 11 09 Auto Prescan 11...

Page 45: ...s The default setting is Auto which will use the highest writing speed of the recorders for the blank media being used Sometimes Maximum writing speed causes a high failure rate due to poor CD quality...

Page 46: ...DVD writing due to high speed Lowering the writing speed will increase the probability of making successful copies 1 Press the ENT button to change the setting or ESC to exit 2 Use the arrow buttons t...

Page 47: ...OFF Press ENT button to change or ESC to exit 11 06 Startup Menu This function selects the menu item that will be the first item shown on the display when you turn on the duplicator The default settin...

Page 48: ...ault setting is OFF press the ENT button to change or ESC to exit 11 08 Auto Compare This setting controls auto compare of data between source and target discs after copying 1 Default setting is OFF p...

Page 49: ...setting controls auto prescan of the master to verify that it can be read properly and also tests the reading speed 1 Default setting is OFF press the ENT button to change or ESC to exit 11 09 Setup...

Page 50: ...e passed disc automatically and leave a failed disc in the DVD Recorders 2 Eject All Disc will eject the disc whether it has passed or failed 3 If you select Do Not Eject the disc will remain in the D...

Page 51: ...lt setting is ON press the ENT button to change or ESC to exit 11 12 Burn Mode This setting is for CDs only and controls the writing modes of the disc including Disc At Once DAO or Track At Once TAO 1...

Page 52: ...time display 1 Default setting is ON press the ENT button to change or ESC to exit 11 14 Button Sound This setting controls the button sound 1 Default setting is ON press the ENT button to change or...

Page 53: ...button to see Device Information using the UP and DOWN arrows to scroll through the devices or ESC to exit 11 16 System Info This function will show the system information on the display 1 Press the...

Page 54: ...then press the ENT button to execute ESC to go back 2 When the process is finished the display will show the status 11 18 Full Erase Disc This function is similar to the Quick Erase Disc except it rem...

Page 55: ...This command allows setting the time delay before the tray of each DVD Recorder will close 1 Press the ENT button to enter choices selectable with the UP and DOWN arrows Available time delays are 5 1...

Page 56: ...is OFF Available selectable choices with the UP and DOWN arrows are 100MBytes 10MBytes 1MByte 100KBytes 10KBytes 1KByte 1Byte 11 21 Audio Burn Speed Audio Burn Speed lets you control the burning spee...

Page 57: ...nds The main menu Adv Setup Advanced Setup function has 18 subfunctions These are 12 01 UnderRun Protect 12 02 Overburn 12 03 Read Error Skip 12 04 Format HDD 12 05 Verify HDD 12 06 Burn in 12 07 Upda...

Page 58: ...to change or ESC to exit 12 02 Overburn CDs Only This function will allow you to burn a few MB more than the standard capacity of the target Audio CD e g 75 minutes of recording time vs 74 minutes Yo...

Page 59: ...If an error is detected during source loading the duplicator will stop loading and display the error message If the setting is ON there will be no message shown even if there is an error in reading Y...

Page 60: ...ted 1 Press the ENT button to change or ESC to exit 2 Use the UP and DOWN arrows to select DVD CD or DL In DVD a partition occupies 5GB in CD 1 GB and in DL 10 GB If you format once more the old data...

Page 61: ...k Drive or its partitions can work properly 1 Press the ENT button to change or ESC to exit 2 Use the UP and DOWN arrows to select Disk or Partition 3 Press ENT to verify After verification the displa...

Page 62: ...not be written to the target discs 2 Go to Burn In and press the ENT button to enter You can select Test to simulate duplication of CDs DVDs or Erase and Copy to test CD RW or DVD RW erase and write...

Page 63: ...to COPY 2 Press ENT to update Display will ask if you want to update Select YES then press the ENT button Do not turn the power off until the update finishes and the machine resets to COPY Procedure...

Page 64: ...stic This function will detect the devices connected to the duplicator s controller and display information on the hardware 1 Move to Hardware Diagnostic with the arrow keys and press the ENT button t...

Page 65: ...ator will be reset to it s factory default settings 12 11 CD G Not supported 12 12 ISRC MCN This function supports copying ISRC and MCN formats 1 Default setting is OFF press the ENT button to change...

Page 66: ...ou to enter CD Text CD Text is a kind of copying format that copies text that can be viewed by players that support this feature 1 Press ESC and the DOWN arrow to enter CD Text mode Then press ENT to...

Page 67: ...ted or reset 3 Press the DOWN arrow JB in the display below means Job that is each individual copying task It records the number of discs you have copied and it can be deleted when the job is finished...

Page 68: ...e the arrow keys to confirm YES or NO 7 Press the DOWN arrow again to enter the display at below Dev means Device DVD writer counter 8 Press ENT to enter the display below Press ENT to delete the reco...

Page 69: ...W DVD RAM DVD ROM CD R CD RW CD ROM Supported Formats All popular CD and DVD formats Recording Modes Disk at Once Track at Once CD only Copy Speed Selectable Maximum Speed Power Requirements 90 240 VA...

Page 70: ...contain any data Verify that the disc you wish to copy contains the appropriate data The tray currently set as source ejects which by default should be the top tray If a different tray opens the Sele...

Page 71: ...licator off Wait for about ten seconds then power on and attempt the operation again Check that the disc s you wish to copy onto are inserted correctly with the data shiny side facing down A CD cannot...

Page 72: ...ch the power off wait 10 seconds and then power on again to check for any improvement No message on the display and or no indicator lights when powered on Cycle the power by switching the power off wa...

Page 73: ...serial number is located on the bottom of the DVD CD Copy Tower Pro HS 2 Troubles your questions about the DVD CD Copy Tower Pro HS Please provide enough information about your problems so our technic...

Page 74: ...www aleratec com 68...

Page 75: ...www aleratec com 69...

Page 76: ...www aleratec com 70...

Page 77: ...____________________________ DATE ________________ OF PAGES _ ____________________________ I am experiencing the following problems with my DVD CD Copy Tower Pro HS ___________________________________...

Page 78: ...www aleratec com Notes...

Page 79: ...www aleratec com Notes...

Page 80: ...Document Number 9399035_ENG_Rev C Copyright 2013 Specifications subject to change without notice Aleratec Inc 9851 Owensmouth Avenue Chatsworth CA 91311 U S A www aleratec com...

Reviews: