2
Installing an OmniAccess
This section covers procedures for:
• Unpacking the switch
• Finding a secure, well-ventilated location
• Rack-mounting the switch (optional)
• Installing uplink submodules
• Connecting to a power source
• Verifying management LED status
• Connecting external devices
1. Unpack the Switch
Remove the switch and accessories from their packing
box and inspect each item to ensure there has been no
damage during shipping.
If you discover or suspect any damage, contact your
OmniAccess 512 distributor immediately.
2. Find a Secure, Well-Ventilated Location
Find a secure, flat surface for the switch—preferably on
a desk or in a wiring closet. For proper cooling, the
sides of the switch should have at least two inches of
clearance. Be sure that the switch is within reach of all
necessary connections (e.g., power source, external
devices, etc.).
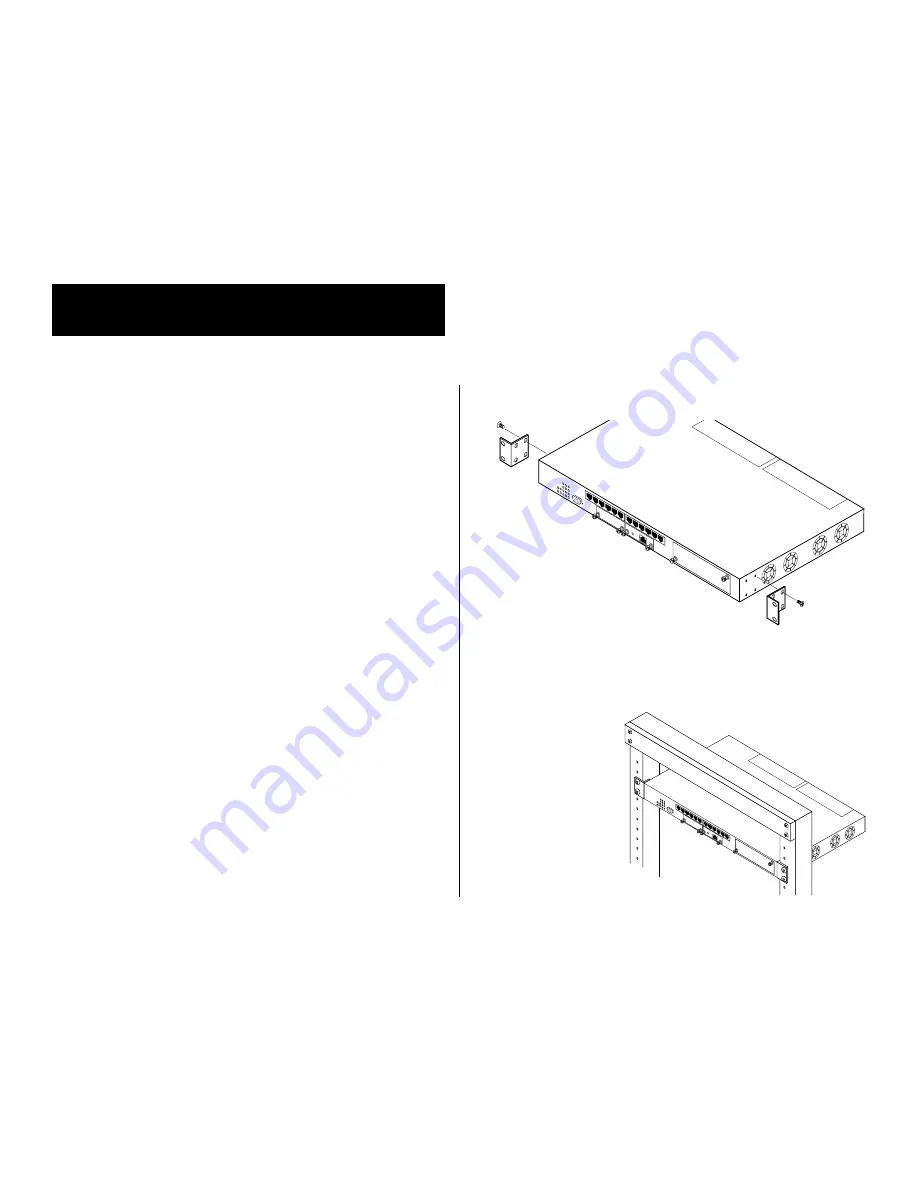
3. Rack-Mount the OmniAccess (Optional)
a.
Select a shelf on the rack
that allows easy access
to all necessary connec-
tions.
b.
Attach one rack-mounting bracket to the side of the switch
using Phillips-head screws shipped with your switch.
c.
Attach the second bracket to the opposite side of the switch
using the remaining screws.
d.
Carefully lift the
switch and insert
it into the rack.
e.
Attach both brack-
ets to the rack
with the screws
provided by your
rack vendor.
Installing an OmniAccess


