G B
Petrol law nm ow er
M o w in g w ith th e s id e o u tle t d u c t (o p tio n a l)
Caution - risk o f injury!
Attach/detach the side outlet only when the motor
is switched off and the mower blade has come to
a standstill.
Inserting th e side outlet
1. Rem ove the grass catcher and insert the mulch kit.
2. Fold up the side outlet cover and hold it ( O 11/1].
3. Insert the side outlet duct (C l 11/2].
4. Slowly close the cover.
The cover holds the side outlet duct and prevents
it falling out.
Rem oving the side outlet
1. Fold up the side outlet cover and hold it (C l 11/1].
2. Rem ove the side outlet and close the cover
(C l 11/2].
S e ttin g th e h a n d le h e ig h t (o p tio n a l)
Knob adjustm ent
1. Press and hold both knobs on the handlebar and
select the desired position (C l 12/1].
2. Release the knobs to lock the handlebar in position.
C lam p adjustm ent
1. Hold the bar and loosen both clamps (C l 12/2].
2. Move the bar to the desired position
3. Lock the clamps.
S ta rtin g th e m o to r
Caution - risk o f poisoning!
Never leave a motor running in an enclosed
space.
Caution - Risk of injury!
Do not tilt the lawnmower while starting.
Start the motor only when the blade is mounted
(the blade acts as a flywheel mass]
If starting the motor when hot do N O T use the
choke or primer button
Do not change the motor controller settings
Do not start the equipment if the outlet shaft is not
covered by one of the following parts:
Grass catcher
Deflector plate
Mulch kit
Be particularly careful when operating the starter
switch - follow the manufacturer's instructions
Keep your feet at a safe distance from the cutting
gear
Start the lawnm ower where the grass is shorter
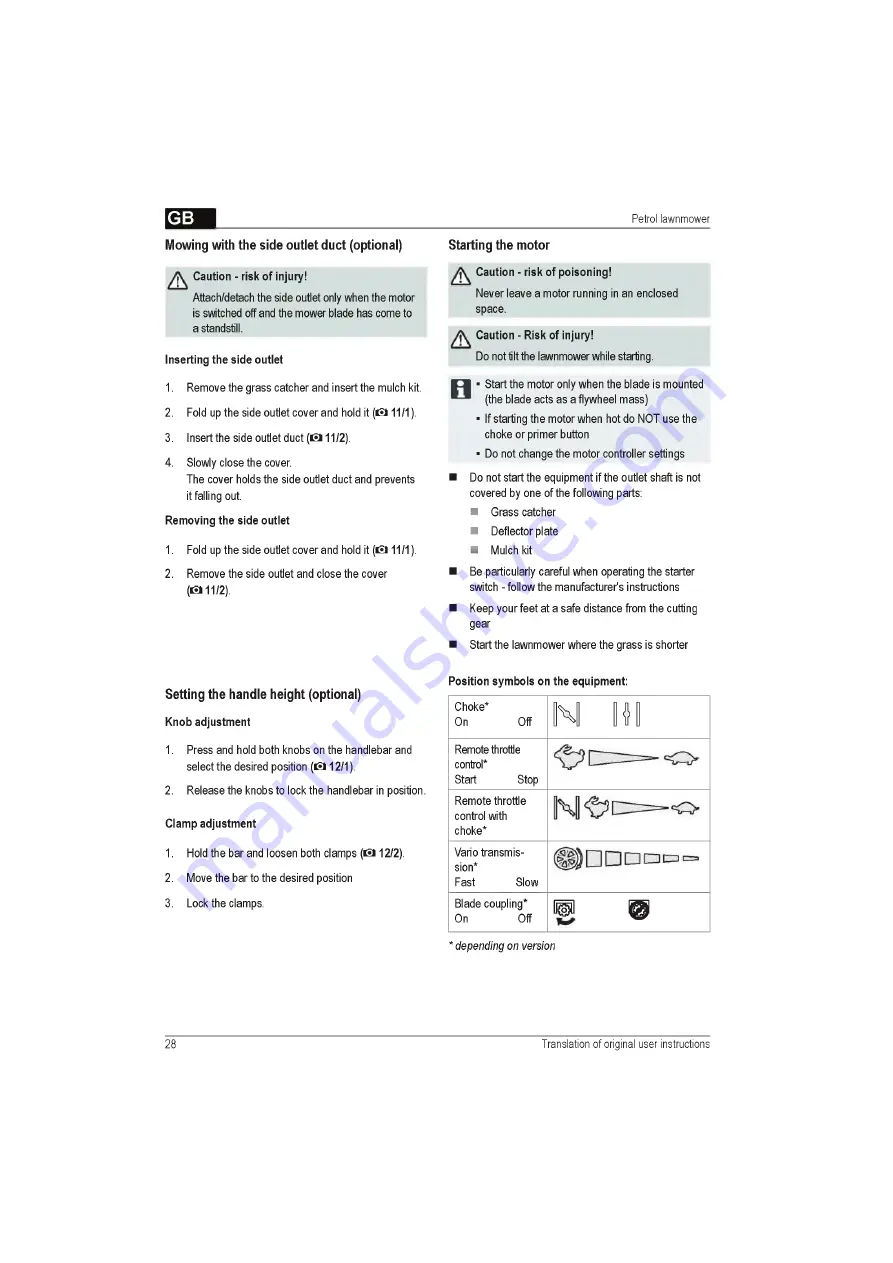
Position sym bols on the equipm ent:
Choke*
On
Off
N IDI
Remote throttie
control*
Start
Stop
Rem ote throttle
control with
choke*
Vario transmis-
sion*
Fast
Slow
Blade coupling*
On
Off
m
w
*
depending on version
28
T ranslation o f orig in al u ser instru ctio ns
Summary of Contents for Classic 4.26 P-A
Page 3: ...Notice 470 591_c 3...
Page 4: ...Benzin Rasenmaher 4 Original Betriebsanleitung...
Page 5: ...ESsM...
Page 6: ...Benzin Rasenmaher S I o 6 O riginal Betriebsanleitung...
Page 7: ...s l 470 591_c 7...


