25
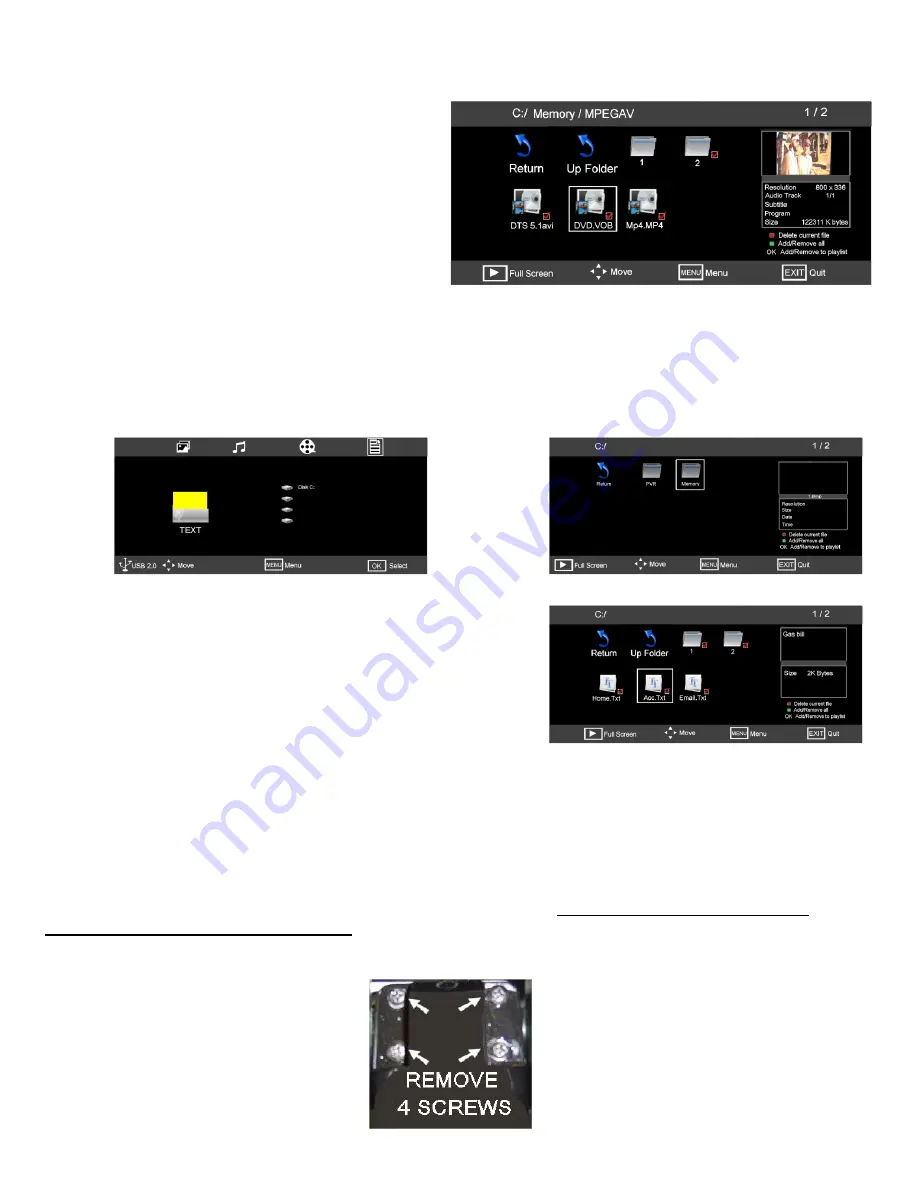
Fig 53
Fig 52
21
14. Media
Media Playback “Movie” cont...
Select one of the files using the
►
/
◄
buttons and
press OK. This will “Tick” that file and start playing in
the box on the right. If you wish to select more files,
tick these also. To see full screen press “PLAY”.
To stop play, press “STOP”. The screen will then
return to “Fig 52”. To return to the master menu “Fig
50”, press “EXIT”.
21
25
Select one of the files using the
►
/
◄
buttons and press
OK. This will “Tick” that file and start playing in the box on
the right. If you wish to select more files, tick these also. To
see full screen press “PLAY”.
To stop play, press “STOP”. The screen will then return to
“Fig 54”. To return to the master menu “Fig 53”, press
“EXIT”.
Note :- The TEXT feature will only play .TXT files
Press the “SOURCE” button and select “TEXT” a display as in Fig 53 will be shown. To select Text use the
►
button. Press “OK” and Fig 54 will be displayed. Press “OK” again and Fig 55 will be displayed.
Use the
►
/
◄
buttons to select the correct file, “Memory”. Press OK and Fig 55 will be displayed.
Fig 53 also shows “Disk C:” If your disc is partitioned (Logical drive), then this will display the number of partitions.
To select a different partition use the
▲
/
▼
buttons to select and press “OK”.
Media Playback “Text”.
Fig 54
Fig 55
To mount the TV on a wall you need to purchase a VESA Standard (100mm) bracket.
Remove the screws as shown below (Fig 56).
Mount the wall bracket as described by the manufacturer.
Mount the TV to the wall bracket using
4 x 4mm x 10mm set screws. (Do NOT use longer screws as the
internal parts of the TV may be damaged).
Akura Ltd accepts no responsibility for damage, caused to or by, incorrect mounting of the wall bracket.
15. Wall Mounting
Fig 56


