DISASSEMBLY INSTRUCTIONS
B2-2
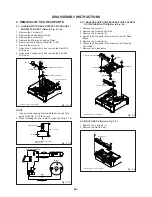
2-6:
2-4:
Remove the screw (1).
Remove the Disc L Lever and Disc L Lever Spring.
Remove the Stopper Spring.
Unlock the support (2) and remove the Locker Stopper.
Unlock the support (3) and remove the Disc Stopper.
Remove the Upper Roller, Roller Rubber and Roller
Gear.
1.
2.
3.
4.
5.
6.
DISC L LEVER/DISC STOPPER/LOCKER STOPPER/
ROLLER GEAR (Refer to Fig. 2-4-A)
Fig. 2-4-A
Disc L Lever
(1)
Disc L Lever Spring
Stopper Spring
Locker Stopper
(2)
(3)
Disc Stopper
Upper Roller
Roller Rubber
Roller Gear
• Screw Torque: 1.1 ± 0.2kgf•cm
2-5:
Remove the Guide Arm Spring.
Unlock the 3 supports (1) and remove the Rack Loading.
Remove the Rack Gear and Mid Rack Gear.
1.
2.
3.
Fig. 2-5
RACK LOADING/RACK GEAR/GUIDE ARM
SPRING/MID RACK GEAR (Refer to Fig. 2-5)
NOTE
1. In case of the Upper Roller installation, install correctly
as Fig. 2-4-B.
Fig. 2-4-B
[OK]
[NG]
Upper Roller
Upper Roller
Roller Gear
Roller Gear
Rack Loading
Guide Arm Spring
Rack Gear
Mid Rack Gear
LINK R ASS'Y/LINK L/LINK MID/LINK SPRING
(Refer to Fig. 2-6)
Remove the screw (1).
Remove the Link Spring.
Unlock the support (2) and remove the Link L.
Unlock the support (3) and remove the Link Mid.
Remove the screw (4).
Unlock the 4 supports (5) and remove the Link R Ass'y.
1.
2.
3.
4.
5.
6.
Fig. 2-6
• Screw Torque: 0.7 ± 0.1kgf•cm (Screw
(1)
)
• Screw Torque: 1.5 ± 0.2kgf•cm (Screw
(4)
)
(1)
Link Spring
Link L
(2)
(3)
Link Mid
(4)
Link R Ass'y
(5)
(5)
(5)
(5)
(1)
Mid Roller Gear 2
Arm Roller Ass'y
Terminal Gear
Mid Roller Gear 1
Fig. 2-7
• Screw Torque: 1.5 ± 0.2kgf•cm
2-7: ARM ROLLER ASS'Y/MID ROLLER 1/2 GEAR/
TERMINAL GEAR (Refer to Fig. 2-7)
Remove the screw (1).
Remove the Arm Roller Ass'y.
Remove the Terminal Gear and Mid Roller Gear 1.
Unlock the support (2) and remove the Mid Roller Gear 2.
1.
2.
3.
4.
(2)
(1)
(1)
(1)

