


1
1
Chapter 2: Installation & Configuration
2
Installation Overview
The installation and setup of T-TAP is very
simple. The steps of installation and
configuration are discussed here and
summarized as follows:
1.
Unpack the shipping box (see
)
2.
If not previously installed on your Thunderbolt equipped computer, ensure that
appropriate application software such as Adobe Premiere Pro is installed as detailed in
its user documentation.
3.
Cable T-TAP Thunderbolt port, SDI and HDMI outputs as required for your workflow.
4.
Install AJA T-TAP software on your computer from the latest AJA website download.
Start by installing the T-TAP driver package with AJA Control Panel and then finally
install any AJA plug-ins for 3rd-party software.
Installers for the T-TAP driver software and for the AJA Control Panel are found on the
AJA website—here you will get the most current software and documentation.
5.
When you run the AJA Control Panel, you’ll notice that the T-TAP is auto-discovered as
long as it is properly cabled and powered up.
Each of these steps are explained in greater detail on the remaining pages of this chapter.
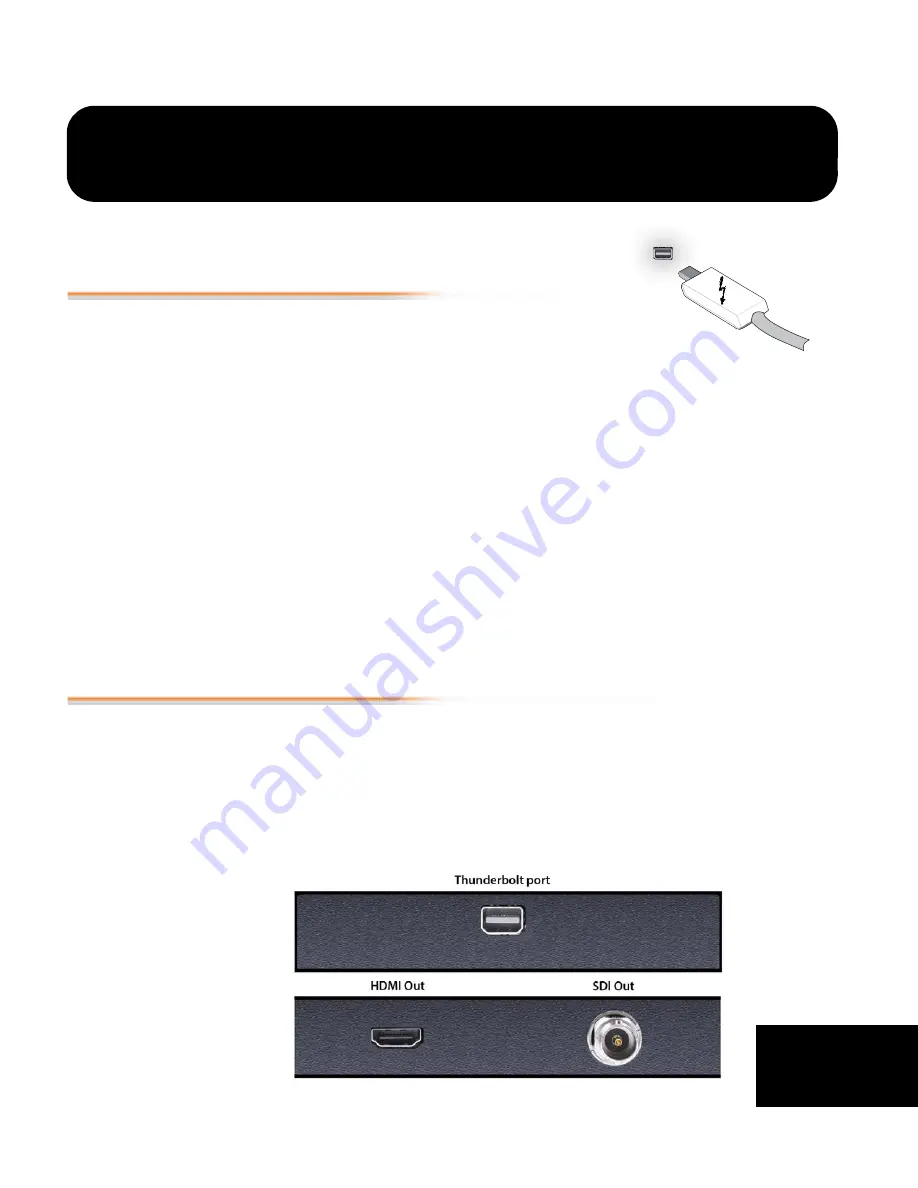
Connecting to your Computer
Your system may differ depending on VTRs, audio monitoring, and video monitoring.
1.
Connect your computer via a Thunderbolt cable (not included) to the T-TAP
Thunderbolt port.
T-TAP power is delivered via this cable.
2.
Connect an HDMI Video Monitor to the T-TAP HDMI Out connector.
3.
Connect an SDI cable between the T-TAP SDI output BNC and your digital
VTR SDI In. The T-TAP SDI connections has embedded audio so the VTR must be
configured accordingly.
T-TAP Connectors


