


21
ES
EN
FR
IT
PT
EN
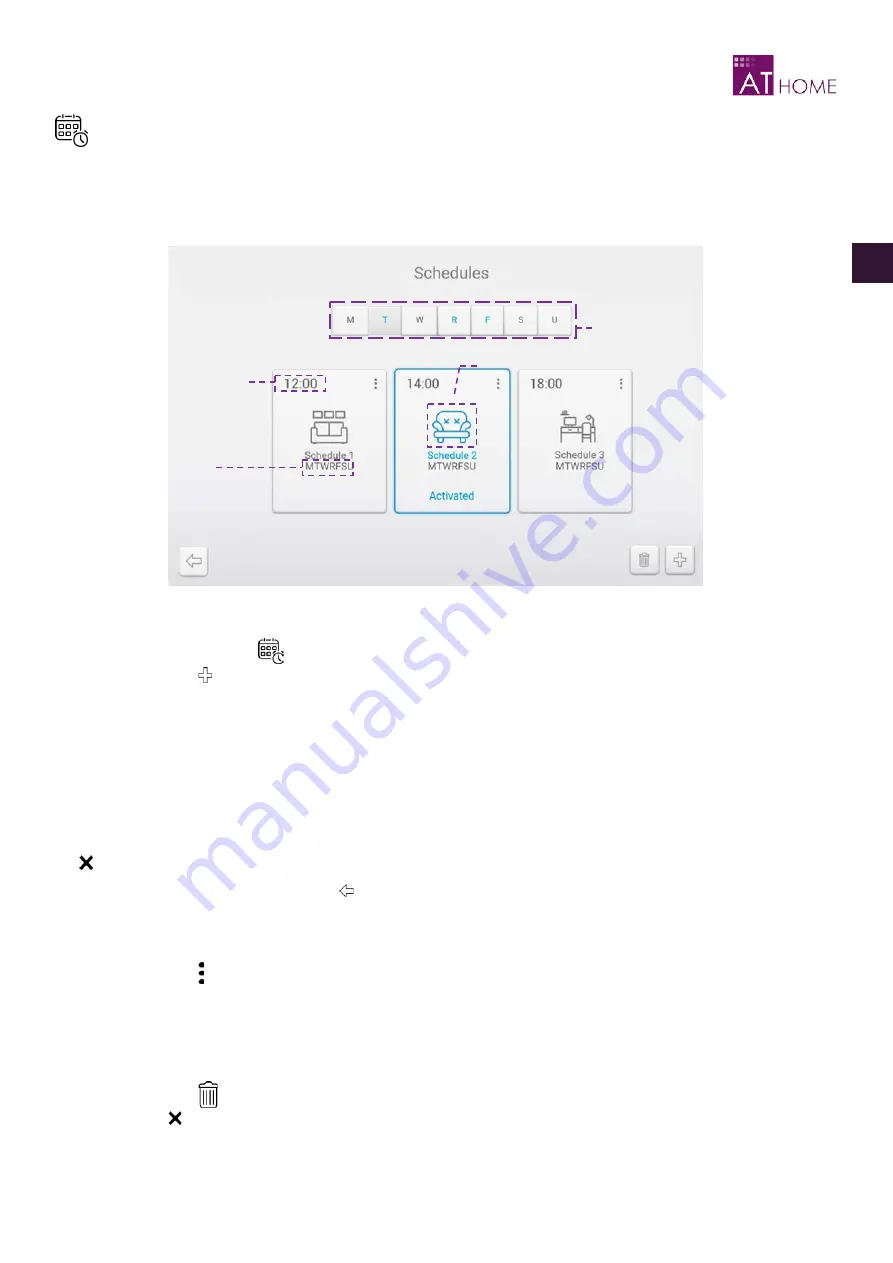
SCHEDULES
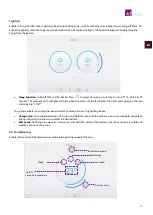
The AT-Home system enables the management of up to 32 schedules of one scene or various actions on days and hours pre-
established by the user. When a scene is scheduled, the scene icon displays inside the schedule. Press the day of the week to
see the schedule associated to that day. Activate/Deactivate the desired schedule by pressing on it. The active schedules will
stay highlighted in blue.
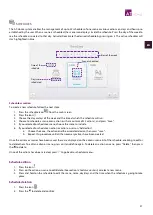
Schedules creation
To create a new schedule, follow the next steps:
1.
Press the schedule icon
from the main screen.
2.
Press the icon .
3.
Choose the day or days of the week and the time at which the schedule will run.
4.
Choose to schedule a scene or an action (with a maximum of 32 actions), and press “Save”.
5.
If you selected to schedule a scene, choose the scene to include.
6.
If you selected to schedule an action or actions, press on “Add action”.
a.
Choose the zone, the action and the associated device, then press “save”.
b.
Repeat this procedure until all the necessary actions have been created.
Once the actions or scenes have been saved, these are displayed on the actions/scene list of the schedule, enabling to edit or
to delete them. To edit an action or scene, press on it and define again. To delete an action or scene, press “Delete”, then press
the to delete.
Once all the actions have been created, press to go back to schedules menu.
Schedule edition
1.
Press the icon .
2.
Press on the action or scene to edit/delete (See section
Schedules creation
) or select a new scene.
3.
Press and hold on the schedule to edit the scene, name, day/days and the time when the schedule is going to take
place.
Schedule deletion
1.
Press the icon
.
2.
Press the to delete and confirm.
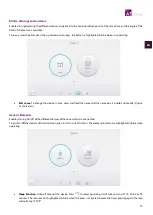
Days of the week
Scene scheduled
Days
scheduled
Time of the
schedule