background image

AIRSTREAM CLASSIC TRAILER 

F-22 

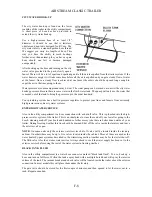
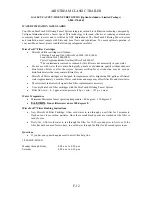
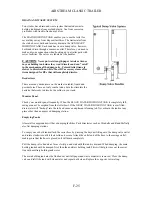
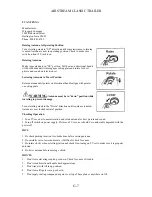
coach for easier access. If you look between 

our tires you can see a galvanized "box" that is a few inches lower than the trailer frame. This "box" or 


tom of the tank, accessible under the inspection plate close to 


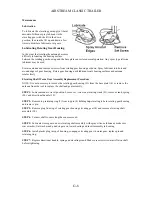
Water Heater Draining  

 
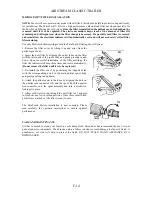
All models have a drain plug or petcock on the water heater. Access is from the exterior. The plug or valve 
is usually located in the lower left corner, viewed as you face the exterior of the water heater.  
 

WATER VALVES  

 
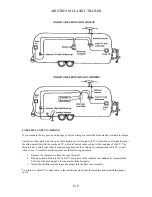
Your Airstream has five in-line water shut off valves. Two are for shutting off the cold water supply to the 
toilet and exterior water service and the other three are for bypassing the water heater when winterizing 
using the anti-freeze method as explained in the winterizing section of this manual. 
 
The water heater by-pass valves.may be located in one of two places. Inside the lavatory cabinet, accessed 
by opening the cabinet door or removing the cabinet drawer, or by opening the roadside exterior 
compartment door. See the winterizing section for their use. 
 
The toilet shut off valve is used to shut water off to the toilet in an emergency or service situation. On some 
units it is located inside the lavatory cabinet, on most units it is located just behind the toilet close to the 
floor. 
 
The exterior water service shut off valve is located on the cold water supply line running inside the lavatory 
cabinet and can be accessed by either opening the cabinet doors or removing the cabinet drawers. Since the 
exterior water service is located beyond the heated area of the trailer, the exterior valve and its supply line 
can be damaged if the water is not turned off in freezing temperatures. In these temperatures shut off the 
valve in the lavatory cabinet and open the exterior water service. This drains the water in the so freezing 
won’t damage the exterior valve.  
 
There may be one, two, or five valves located inside the lavatory cabinet according to your model length. If 
there are more than one, three of valves are used as the water heater by-pass system as explained above and 
are easily recognizable as they will be located next to the water heater. Another may be for the toilet shut 
off. The fifth valve is for the exterior water service. Always check to see if the water supply has been cut to 
the exterior service before using the rest of the water system in freezing weather. 


DRAIN VALVES 

 
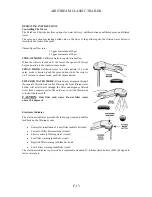
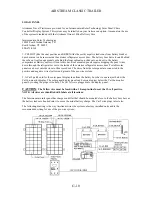
The line drain valves have been moved to the exterior of the 
y
pan supports the water tank.  

The line drains will be the two brass petcocks extending from the end of the pan. The white plastic petcock 
you will see is to drain the water tank.  
 

To Empty Fresh Water Tank  

 
Pumping the water out with the self-contained water pump may empty the fresh water tank. Simply turn on 
the pump switch and open a couple of faucets until the water will no longer comes out. On all models there 
is also a petcock type drain valve located in the wheel well and extended out through the tank support pan.  
 
An additional drain plug is located on the bot
the petcock that can be seen on the bottom of the tank support pan.  

Note

: For winterizing purposes, only the petcock behind the tires needs to be opened to drain the tank.  

Summary of Contents for Classic Trailer 25' 2005

Page 1: ...AIRSTREAM AN AMERICAN LEGEND CLASSIC TRAILER OWNERS MANUAL 2005...

Page 2: ......

Page 3: ...ellowship are your constant companions To encourage clubs and rallies that provides an endless source of friendship travel fun and personal expression To lead caravans wherever the four winds blow ove...

Page 4: ...you may be getting in over your head please see your dealer to have the repairs made A brief explanation of the operation of the appliances such as refrigerator furnace water heater and others are exp...

Page 5: ...ack Tires Axle and Running Gear Electric Brakes E INTERIOR FURNISHINGS AND ACCESSORIES Fabric Care Lounges Tables Features Fixtures Storage Areas Smoke Alarm Gas Detector Fire Extinguisher Exterior Wi...

Page 6: ...f the trailer or component equipment as installed by the factory LIMITATION OF IMPLIED WARRANTIES All warranties of merchantability and fitness for a particular purpose whether written or oral express...

Page 7: ...bility in connection with any of its trailers for additional equipment or accessories installed at any dealership or other place of business or by any other party Such installation of equipment or acc...

Page 8: ...ine oil lodging meals telephone tolls and loss of work and loss of use of the trailer Some examples of consequential damages would be stained curtains due to rain leaks or delaminated floor caused by...

Page 9: ...hough they may be normal for the area are beyond Airstream s control and become the responsibility of the owner It is the responsibility of the owner to take such preventative measures as are necessar...

Page 10: ...lso provide you with additional copies if you need them ALL CENTERS OPERATE ON AN APPOINTMENT BASIS FOR THE UTMOST EFFICIENCY When you require service from the Airstream Factory Service Center or a Ce...

Page 11: ...minum and steel wheels to 95 ft lbs EVERY 5 000 MILES OR 90 DAYS Exterior Door locks Lubricate with dry graphite Exterior Hinges Lubricate with light household oil LPG Hold Down Lubricate with light h...

Page 12: ...te all moving parts with silicone lubricant Exterior Wax Escape Window Lubricate latches with WD 40 EVERY YEAR Battery Clean neutralize and coat terminals with petroleum jelly A Frame Step Wire brush...

Page 13: ...lways replace the light bulb on an interior or exterior light fixture with the correct bulb for that light Failure to heed this warning could cause fire property damage personal injury or death FUSES...

Page 14: ...AIRSTREAM CLASSIC TRAILER A 9 MAINTENANCE RECORD DATE DEALER SERVICE PERFORMED...

Page 15: ...AIRSTREAM CLASSIC TRAILER A 10 NOTES...

Page 16: ...be used for towing some type of trailer The dealers are provided with guidelines to use when helping a customer decide on a tow vehicle The guidelines are not just determined by the power output of th...

Page 17: ...ra stopping distance that may be required when towing 3 Immediately after each hook up always test that the trailer brakes are operating properly before attaining normal road speed 4 Make regular peri...

Page 18: ...line pressure when the vehicle is stopped without operating the motor This dramatically reduces heat build up and improves reliability and longevity Filling Reservoir Fill the reservoir with NEW CLEAN...

Page 19: ...nd person near the ActiBrake With the ignition switch turn on keeping the vehicle in Park or not in gear with the parking brake engaged and stationary move the manual override lever of the brake contr...

Page 20: ...vehicle brake controller also allows for manual activation of the trailer brakes independent of the tow vehicle by using the manual override feature of the controller It is essential that each driver...

Page 21: ...shoreline into an exterior 110 volt service or running your tow vehicle with the 7 way cord connected will charge your trailer batteries Failure to maintain proper charge in the breakaway battery wil...

Page 22: ...an After the system has been flushed the reservoir must be re filled with new DOT 3 or DOT 4 brake fluid and the brake lines bled as outlined of Page 8 of the Actibrake Owner s Manual The use of conta...

Page 23: ...sured at the tire ground interfaces When loading heavy objects such as tools skillets irons and boxes of canned goods etc keep them as low as possible preferably on the floor Try to hold additional we...

Page 24: ...he tongue weight by using the following method see illustration Place a piece of wood of approximately the same thickness as the bathroom scales on the ground in line with the trailer hitch jack as sh...

Page 25: ...hough Airstream has not intruded into the hitch manufacturers field of expertise and preformed formal testing we find the vast majority of Airstream owners purchases sway control devices When passed b...

Page 26: ...as the weight equalizing hitch distributes the hitch load A low hitch ball increases tail w tendencies by lowering the nose of th trailer thus changing the center of support for the trailer and reduci...

Page 27: ...ll mount Cross the safety chains under the hitch C retract the hitch jack k al it ove the rig ahead about 50 feet and test the trailer brakes then check the ground for forgotten objects CHE S n first...

Page 28: ...l be lining up behind you because you travel at a lower speed It is both courteous and sensible to signal pull onto the shoulder and let them pass Your trailer is designed to be towed easily at any le...

Page 29: ...he momentum carry the rig through Apply power gently and use as little as possible Stay in the tracks of the vehicle ahead and keep the tow vehicle in the highest possible gear If you get stuck it is...

Page 30: ...aighten the tow vehicle and trailer by turning the steering wheel more sharply and then when they are in line straighten the steering wheel ALWAYS TRY TO BACK TO YOUR LEFT BECAUSE THE VISIBILITY IS MU...

Page 31: ...emove and stow jack stand or wood block 7 Check clearance and stoplights 8 Check lug nuts 9 Check tires for correct pressure 10 Check that TV antenna is properly stowed 11 Adjust tow vehicle mirrors 1...

Page 32: ...ke a checklist of clothing for everyone and toilet articles Motoring Essentials 1 Display the tow vehicle and trailer registration properly 2 Carry drivers license In Canada you ll need a non residenc...

Page 33: ...AIRSTREAM CLASSIC TRAILER B 18 NOTES...

Page 34: ...each campsite make sure you have not parked in such a manner as to block the operation of the escape window by being too close to trees fences or other impediments Scenic views are one reason for tra...

Page 35: ...less the tow vehicle is needed for transportation it is not necessary to unhitch WARNING Do not parked in a manner that would prevent the escape windows from opening Try to pick as level a parking spo...

Page 36: ...your trailer where the room is located there s a large hinged access panel attached to the underside of the trailer It s rectangular and about a foot wide and six feet long On the side opposite the hi...

Page 37: ...backing the trailer up one or more 2 x 6 boards See Diagram We do not recommend placing tires in a hole for leveling LEVEL FROM FRONT TO REAR by disconnecting the hitch from the tow vehicle putting t...

Page 38: ...ded period where electric or water hookups are not available you must make regular checks on the condition of your 12 volt battery Hooking up the tow vehicle trailer electrical connector and running t...

Page 39: ...AIRSTREAM CLASSIC TRAILER C 6 NOTES...

Page 40: ...mon sense How cold is it How long will it be before you can turn the heat back on Is the temperature dropping or raising Remember when towing at 50 MPH the wind chill factor will cause the interior of...

Page 41: ...rmanent housing Use of this product for long term or permanent occupancy may lead to premature deterioration of structure interior finishes fabrics carpeting and drapes Damage or deterioration due to...

Page 42: ...oner will reduce the relative humidity Vents are located in the bathing and cooking areas and constant use is advised during food preparation and bathing even during colder weather Additionally openin...

Page 43: ...bake harden these materials making them almost impossible to remove without heavy buffing If a substance is found on the coating that cannot be removed by normal washing procedures Airstream recommend...

Page 44: ...Spline holding the screen in place is looped so it can be pulled out in one swift motion You and all your family should practice escape procedures so they can be rapidly accomplished even in total dar...

Page 45: ...all coupler Add one inch to this figure when setting the ball height on the tow vehicle to allow for the suspension settling under the added weight WARNING ALWAYS OPEN LATCH HANDLE BEFORE INSERTING BA...

Page 46: ...3 Replace head on post and make sure that drive pin is engaged with post coupler Tighten Allen set screws Note Leave tow vehicle transmission in neutral when lifting both units Dolly wheels are not re...

Page 47: ...Try to park out of the sun whenever possible when in warm climates In desert regions use tire covers to prevent ultra violet deterioration to tires To CHANGE A TIRE with a jack see the label affixed t...

Page 48: ...pare at least monthly when the tires are cool after the vehicle has stopped three hours and then driven less than one mile Do not reduce pressure when tires are hot Use a tire gauge to check pressure...

Page 49: ...under the front of the trailer The front handle of the tire carrier is a one inch tube protruding out from under the front A frame on the curbside It is secured by a bracket and bolt along the inside...

Page 50: ...eck with your dealer for the nearest location having the proper equipment CAUTION Never allow heat to he applied to the axle tube since the rubber providing the spring torsion action will be severely...

Page 51: ...nuts every 25 50 and 100 miles for the first 100 miles of travel Aluminum and steel wheels should be torque to 95 ft lbs When greasing bearings by hand place a glob of grease in the palm of one hand...

Page 52: ...trailer brakes for a sufficient length of time to stop the trailer The switch is activated when the wire attached to it and to the tow vehicle pulls out the small pin in the front of the unit THIS PIN...

Page 53: ...draulic pressure while your electric trailer brakes are actuated by an electromagnet With all of the brake components connected into the system the brakes w operate as follows See Figure A When electr...

Page 54: ...Proper synchronization of tow vehicle to trailer braking can only be accomplished by road testing Brake lockup grabbiness or harshness is quite often lack of synchronization between the tow vehicle an...

Page 55: ...BRUSHING FOR CLEANING DUST CAN BE REMOVED WITH A DAMP BRUSH Brake Lubrication Before reassembling apply a a lever arm Apply a light film of oil on the actuating blo CAUTION DO NOT GET GREASE OR OIL ON...

Page 56: ...d by more than 015 then the drum surface should be turned If scoring or other wear is greater than 090 the drum must be replaced When turning the drum surface the maximum re bore diameter is as follow...

Page 57: ...PSI rating beyond rim specifications HOW OVERLOADING AFFECTS YOUR TIRES Tire pressure is what enables your RV tire to support loads Overloading your tires can have serious consequences for passengers...

Page 58: ...AIRSTREAM CLASSIC TRAILER D 16 OTES N...

Page 59: ...detergent With either method pretest a small area before proceeding Use professional furniture cleaner when an overall soiled condition is reached Code S Fabric Care Spot clean using a mild water free...

Page 60: ...raveling the VENETIAN TYPE BLINDS should be lowered secured at the bottom and the slats turned vertically Carpet The carpet ca CAREFUL N Vinyl Floor The vinyl fl floors and warm water Counter Area The...

Page 61: ...e pulled out and the wall hinge will let it be lowered on the supports of the dinette seats The backrests of the seats are placed over the table to complete the conversion Table To open th osition unt...

Page 62: ...fresh A extension vents with fans will automatically turn on For maximum air without fan open until fan starts and back up just enough to turn fan off Turning counterclockwise will close the vent Scre...

Page 63: ...attery is weak Immediately M 3 4 Do not open the smoke alarm or try to repair it For replacement information see the WARRANTY in the Owner s Manual 5 Verify you have the proper number of smoke alarms...

Page 64: ...see USING THE TAMPER RESIST LOCKING MECHANISM section If so pull the pin completely out of the smoke g nose pliers moke alarm from the mounting bracket by twisting counterclockwise esh one If your smo...

Page 65: ...se special features read the following e Push to Test utt USING THE TAMPER RESIST LOCKING MECHANISM mak the smoke alarm somewhat tamper resistant a locking pin has been provided in the base of the ill...

Page 66: ...disconnected from the battery during periods of storage There is a small heater on the sensor of the device which burns away impurities in the ir during periods of normal a use During periods when po...

Page 67: ...the desired position and place the operators into one of three positioning slots on the side of the frames To lock the windows reverse this procedure Note Some windows are designed as emergency escape...

Page 68: ...not allow gas to flow from the cylinder until a positive seal has been made at the connection The valve outlet has 1 5 16 Acme threads on the outlet exterior and female POL left handed threads on its...

Page 69: ...sure that regulator vent faces downward and that cover is kept in place to minimize vent blockage which could result in excessive gas pressure causing fire or explosion WARNING The vent at the bottom...

Page 70: ...air must be forced out through the lines by gas pressure before you will be able to light the pilots Hold a match to the pilot of the appliance closest to the tanks until it lights and stays lit Then...

Page 71: ...grills and stoves shall not be used inside the recreational vehicle The use of this equipment inside the recreational vehicle may cause fires or asphyxiation WARNING A warning label has been located...

Page 72: ...AIRSTREAM CLASSIC TRAILER F 5 YPICAL GAS LINE SYSTEM T...

Page 73: ...ing pushed out through the lines Once the water heater is full a steady stream of water will come from the faucet Now open a cold faucet It will sputter for a short time but will soon expel a steady s...

Page 74: ...ents or ones that have been subjected to contamination should also be disinfected as follows 1 Use one of the following methods to determine the amount of common h sanitize the tank sanitize the tank...

Page 75: ...o the exterior service before using the rest of the water system in freezing weather BLACK TANK FLUSH Also in the utility compartment is a water hose connector marked black tank flush To use hook up a...

Page 76: ...icroTech 400 600 Cysts Cryptosporidium Giardia The contaminants removed or reduced by t Do not use wi disinfected waters that may contain filtera MicroTech filter cartridges are designed for replaceme...

Page 77: ...t ports must be fully inserted into the filter ports 2 Install the filter and faucet head spou by t wetting the faucet head o ring seal and ful sliding the free end of the filter into the spout ximate...

Page 78: ...nce Amber Green A new filter must be flushed with co This procedure helps clean the filter of l ld water for 5 minutes after it is installed oose carbon particles Green Filter performing at optimum ef...

Page 79: ...System integrates c C commonly found in water and is certified by NSF International The PureTouch Filtering Faucet System a your new Moen faucet please read the following safeguards carefully MicroTec...

Page 80: ...desired push the spray button while the wate o return to stream mode push the stream button E ED WATER MODE Filtered water dispensed through epa ate filtered water outlet Pressing the front filtered...

Page 81: ...necessary If a partially used filter is removed and reinstalled the electronic indicator will automatically reset and will not accurately reflect filter life remaining U Faucet System 1 Remove the fi...

Page 82: ...water is being filtered indicating it is time to change the battery O Successful Installation of a new Filter When the depleted filter is replaced with a new filter three beeps are sounded and the 10...

Page 83: ...r button covers O H screwdriver I Battery and Upper Housing Replacement 1 With faucet off push filtered water button and cord percentage o re b re 2 Remove pullout spout 19 from tie a dishtowel around...

Page 84: ...Return spout to the receptor e refer to of battery 100 isplayed The difference represents the display setting at which the esired Example Remaining filter life prior to battery change equals 30 1 TIG...

Page 85: ...800 BUY MOEN Use only MicroTech fil Filtering Faucet Syste Do not remove the filter until it is to be replaced 1 d the spout receptor 2 Disconnect the quarter turn connector 18 from pullout spout by...

Page 86: ...and out of valve body ith notched flat on stem facing forward Be the front and back Reinstall the retainer clip 14 which raddles the ears on the cartridge Reinstall the retainer nut 11 and pivot stop...

Page 87: ...LifeShine TM finish can be cleaned with most household cleaners including mild abrasives when used according to their manufacturers instructions for use Rinse any strong cleaners off immediately after...

Page 88: ...until the front of the le ting If cold w er nd reinstall 180 ears on the cartridge shell are flush and aligned with the body Replace the retainer clip so that the legs straddle the cartridge ears and...

Page 89: ...exterior water service is located beyond the heated area of the trailer the exterior valve and its supply line can be damaged if the water is not turned off in freezing temperatures In these temperat...

Page 90: ...HOLDING TANKS AND THE WATER HEATER AND THE BATTERY To completely winterize your trailer follow this procedure 1 Level the trailer from side to side and front to rear Open all faucets 2 Turn the water...

Page 91: ...om your trailer and store in a cool dry place where there is no danger of freezing It is very important for optimum life of a battery to check it periodically and to keep it fully charged 14 Remove an...

Page 92: ...completely full is overfilled the tanks at any d dumping station lmost all campgrounds will have dumping facilities Park directories such as Woodalls and Rand McNally p valve outlet nd rotate clockwis...

Page 93: ...e vacuum breaker and check valve will be located inside the trailer above the exterior connection In most models this will place them under the lavatory The gate valve should be closed for the first c...

Page 94: ...ever Now when you depress the pedal all the water is routed through the hand spray T M 710 Ann Arbor MI 48103 313 769 6000 The RV toilet in your Airstream is a design that h large pedal opens and clos...

Page 95: ...e 12 volt batteries is replenished when towing or when plugged into 110 volt city power The most common failure in the exterior electrical system is an open circuit An open circuit is an interruption...

Page 96: ...e of corrosion To clean terminals neutralize with a solution of baking soda rinse in clear water and dry Note Care must be used to make sure soda is not allowed to enter battery cells To insure maximu...

Page 97: ...park in the vicinity of the battery Do not use a match or flame to provide light for checking the level of the water D there is no danger of freezing It should be kept full of water cleaned and charge...

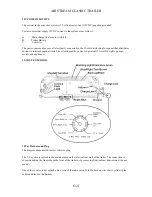
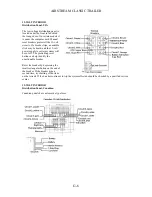
Page 98: ...cted to the 12 volt distribution fu urrent to interior branch circuits The circuits provide power to operate all 12 vo c motors and appliances 1 7 Way Harness and Plug The diagram above match the tow...

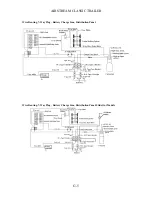
Page 99: ...AIRSTREAM CLASSIC TRAILER Wire Routing 7 Way Plug Battery Charge Line Distribution Panel Wire Routing 7 Way Plug Battery Charge Line Distribution Panel Slide Out Models G 5...

Page 100: ...volt power supply to certain systems will be cut off The protruding reset button can help identify the questionable breaker Reset the breaker by depressing the small rectangular button on the end of t...

Page 101: ...nt damage Turn elevating crank in the Down direction until resistance is noted Antenna is now locked in travel position Checking Operation 1 Tune TV receiver to nearest station and rotate antenna for...

Page 102: ...Install plastic plug in top of housing re engage elevating gear in worm gear replace pin and e sure setscrew contacts flat on shaft y elevating gear with the lif position then run the li times to dist...

Page 103: ...satellite system use the following procedure 1 Remove the jumper wire from the coax faceplate 2 Hook a portable dish into the Cable TV receptacle in the roadside rear underbelly compartment This feeds...

Page 104: ...to the inside of the exterior refrigerator access door Portable solar panels can be set outside close to the access door The wires from the solar panel are connected to the positive and negative wire...

Page 105: ...perated will activate the fan H Manufacturer FAN TASTIC VENT CORP 4349 S Dort Hwy Burton MI 48529 1 313 742 0330 1 800 521 0298 Airstream installs two types of fans One has the switch mounted on the f...

Page 106: ...lean screen with BACK UP CAMERA PRE WIRE Your trailer has a 2 pin power conn of a Power Line Vision System made by PowerLinx at th website or call http rvenjoyment com rearview h EXTERNAL RA al ur tra...

Page 107: ...ttom via a 3 4 female NPT spin in thread The sensor is solid state there are no moving parts to wear or maintain Because the principle of operation does not involve any electrical current flow through...

Page 108: ...press and release the status button one time The monitor will m al system press and release the status button until the LED beside t Release the status button and the monitor will display the m Empty...

Page 109: ...for lights and appliances as only the surplus goes to harging the battery If you are making an extended stay then you should if it is available keep your under the bed or lower cabinet While you are...

Page 110: ...CI protect several outlets on the trailer When properly installed the GFCI circuit breaker provides reliable overload and short circuit protection PLUS protection from Ground Faults that might result...

Page 111: ...ker Y JUN JUL AUG SEP 2004 2005 2006 2007 2008 2009 rator Hook Up optional equipment e front plate of the trailer just behind the LPG bottles A using this plug and a power cord supplied separately he...

Page 112: ...AIRSTREAM CLASSIC TRAILER 110 VOLT LAYOUTS Bedroom outlets will vary to twin or double bed models G 18...

Page 113: ...AIRSTREAM CLASSIC TRAILER G 19...

Page 114: ...er used on Airstream trailers is e of the most popular on the market today In your Owner s Packet is a set of literature covering all opera and maintenance instructions If the literature is misplaced...

Page 115: ...nace burns LP gas and is powered by 12 volt current from the battery or power converter when plugged into city pow perating instructions are located in your Owners Packet If they should becom O can be...

Page 116: ...customers used to electric ranges may be a little apprehensive at first but will quickly gain confidence The basic operation of the gas ranges have been the same for many years but please be su read...

Page 117: ...arkway 10 Sharp Plaza oth microwave ovens can be removed for service by removing the screws in the vented trim ring The trim rings are fastened to microwave oven After removing the screws pull straigh...

Page 118: ...cle is moving the leveling is not critical as the rolling and pitching movement of the vehicle will pass to either side of level keeping the liquid ammonia from accumulating in the evaporator tubing O...

Page 119: ...cause any problems but the stress is easily alleviated As the water is heating just open any faucet and run as little as a cup of water Just removing this small amount of water reduces the pressure b...

Page 120: ...a options and certain water capacities 10 1 with slide extended Gross Vehicular Weight Rating GVWR is the maximum permissible weight of this trailer when fully ncludes all weight at the trailer axle s...

Page 121: ...h h height T tch ball is th set to higher according to the spring our tow ve icle to allow for it to settle he trailer ed up 2004 Classic Trailer Owner s Manual AIRSTREAM INC 2004 SPECIFICATIONS gnmen...

Page 122: ...rnace C 7 E 4 H 2 Fuses A 8 C 3 E 8 G 1 G 4 G 6 Galley E 2 Gas LP C 7 F 1 Gas Regulator F 2 Grey Tank Aux F 25 I 1 Ground Fault Interrupter G 16 Grounding G 2 G 16 GVWR B 8 I 1 GAWR B 8 I 1 Generator...

Page 123: ...otation Tire D 7 Safety A 5 C 1 E 9 F 4 H 6 Safety Chains B 12 Sanitizing Satellite Radio System G 12 Screens D 2 E 9 Service A 5 7 Way Connector G 4 G 15 Sewer Hose F 25 Shower E 2 Sink E 2 S Smoke A...

Page 124: ...Notes...

Page 125: ......

Page 126: ......

Reviews: