Page 5
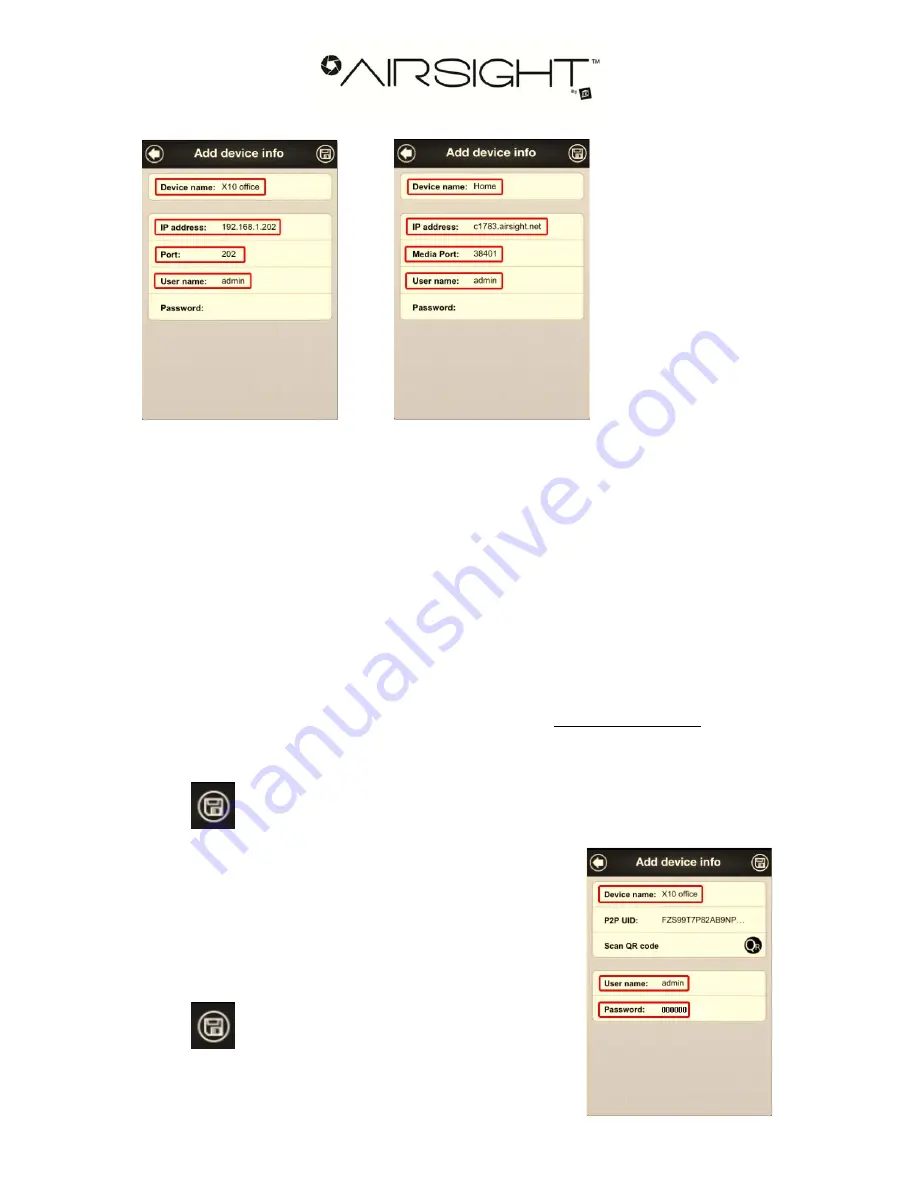
For LAN connection
For remote viewing via the Internet
For remote viewing via the Internet
: If your camera does not support P2P, but you want to
remotely view it, enter the Device name, and DDNS address (in the box for IP address), User
name: (default admin), no password, and port number: Use Web Port for MJPEG cameras,
use Media Port for H.264 cameras – using your desktop or laptop PC, use the IPCameraTool
for MJPEG or SearchIPCam for H.264 cameras (found on the CD included with your camera),
run the tool and right-click on the camera to find your Web port for MJPEG (default 80) or
Media port for H.264 (default 38401). Select the "Network Configuring" option and change the
Web Port or Media Port listed there. It’s best to use a port number higher than the default. Set
different port numbers for multiple cameras. See right screen above.
Note:
You need to set the camera’s DDNS first. Set a port both in the camera and you’re your
router first, after you set the DDNS successfully, enter the DDNS address or external IP
address. Tip: Your external IP address can be found via www.whatismyip.com. See your
camera’s full Owner’s Manual for more information on setting your DDNS.
Touch
to save the camera settings. You can now view your camera remotely.
For P2P cameras
: Touch
Add,
choose
P2P device
.
Enter a Device name, User name, Password, and
P2P UID
(found on the bottom of the camera). You can also view the
P2P UID
from your PC under P2P settings.
Tip: If you want set quickly, see Option A above, and
scan the QR code to enter the settings automatically.
Touch
to save camera settings.
Note
: Default User name: admin, password: 000000


