background image

Configuration

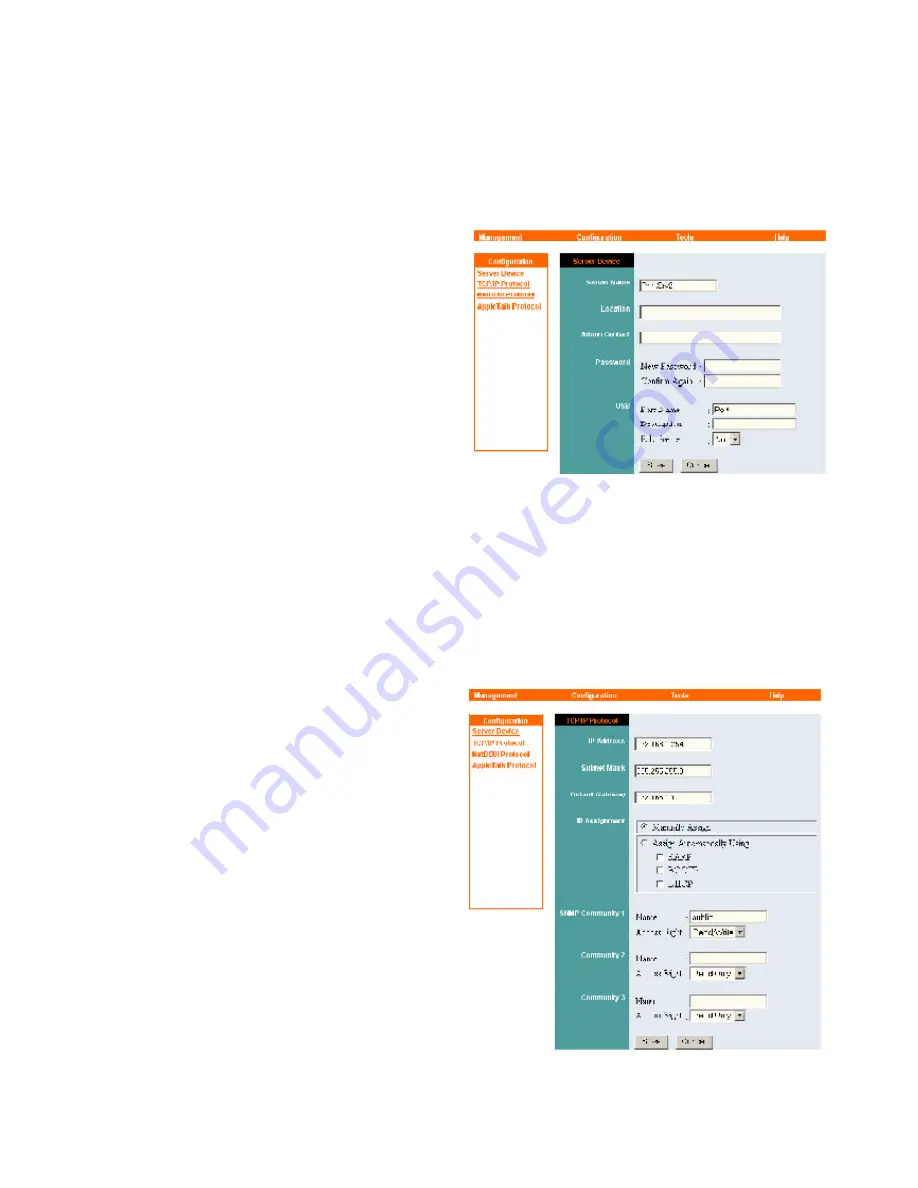
Server Device

: Configures the Print

Server properties. 

See Fig. 5.3

Server Name

: Assign a name to the Print

Server or keep the default.

Location

: (optional) Indicate where the

Print Server is located.

Admin Contact

: (optional) Indicate the

administrator for the Print Server.

Password

: Password for accessing the

Print Server.

USB Port Name

: Assign a name for the

USB Port.

Description

: (optional) Brief description

for the USB port.

PJL Printer

: This feature supports

Hewlett-Packard PJL (Printer Job

Language) standard for bi-directional

printing.

Fig. 5.3

Click 

Save 

to update any changes you

have made.

TCP/IP Protocol

: Configures the TCP/IP

properties of the Print Server. 

See Fig. 5.4

IP Address

: Assign an IP address to the

Print Server or keep the default.

Subnet Mask

: Assign a subnet mask to

the Print Server or keep the default.

Default Gateway

: Enter the IP address of

the Default Gateway of your network.

IP Assignment

: Choose either to manually

assign an IP address to the Print Server, or

automatically obtain an IP address by

RARP

BOOTP

, or 

DHCP

.

Fig. 5.4

Click 

Save 

to update any changes you

have made.

Summary of Contents for APSUSB1

Page 1: ...Installation Guide Model APSUSB1...

Page 2: ...t one end of the USB cable to the USB port of the Print Server and attach the other end of the cable to the USB port of the printer Step 3 Turn ON the printer Step 4 Plug one end of the power cord int...

Page 3: ...k Places on your desktop and right click on Local Area Connection Step 2 Select Internet Protocol TCP IP and click Properties See Fig 2 1 Fig 2 1 Step 4 Select Use the following IP ad dress and enter...

Page 4: ...3 and is not currently assigned to any device on your network Step 5 Enter 255 255 255 0 for the Subnet mask See Fig 2 4 Step 6 Click OK and OK again Step 7 Restart the computer if you are prompted to...

Page 5: ...254 See Fig 3 1 Fig 3 1 Step 2 The Welcome screen will appear See Fig 3 2 Fig 3 2 Step 3 Click on Configuration You may rename the Print Server name and Port name or leave them with the default Step 4...

Page 6: ...e Print Server you want to use Be sure to click Save when you are done configuring the settings Step 8 Close the web browser Section 4 Adding Printer For Windows 2000 XP Step 1 Go to Start Settings Pr...

Page 7: ...g 4 2 Step 5 Click Next at the Add Standard TCP IP Printer Port Wizard Fig 4 2 Step 6 Type in the IP address of the Print Server and the port name you have written down on the piece of paper in Sectio...

Page 8: ...he list click Have Disk insert the printer driver disk that came with your printer and click Next See Fig 4 6 Step 12 If a driver for the printer is already installed select Keep existing driver and c...

Page 9: ...ovided CD into the CD ROM drive Step 6 Click Browse and browse to your CD ROM drive Step 7 Select the letter of your CD ROM drive double click on the lpr folder select lpr inf and click OK See Fig 4 9...

Page 10: ...98 CD and type in D Win98 where D is the letter of your CD ROM drive and click OK See Fig 4 13 Restart the computer if you are prompted to do so Fig 4 13 Step 15 After your computer is restarted go t...

Page 11: ...printer driver disk that came with your printer and click Next See Fig 4 15 Fig 4 15 Step 22 If a driver for the printer is already installed select Keep existing driver and click Next See Fig 4 16 F...

Page 12: ...displays general informa tion about the Print Server See Fig 5 1 Server Name Model Hardware Version Firmware Version MAC Address IP Address Up Time Printer Status displays general informa tion about...

Page 13: ...ature supports Hewlett Packard PJL Printer Job Language standard for bi directional printing Fig 5 3 Click Save to update any changes you have made TCP IP Protocol Configures the TCP IP properties of...

Page 14: ...ig 5 7 Click Save to update any changes you have made Click Save to update any changes you have made Fig 5 7 Workgroup Enter the name of your workgroup Maximum Connected Stations Set the maximum numbe...

Page 15: ...et all settings to fac tory default and restart the Print Server The IP address of the Print Server will return to the factory default of 192 168 1 254 Click Yes to Factory Reset and restart the Print...

Page 16: ...ame Types 802 2 802 3 Ethernet II SNAP auto switching Transport Protocols TCP IP NetBEUI AppleTalk TCP IP Protocols Supported BOOTP SNMP Telnet TFTP FTP LPD RARP DHCP Management and Diagnostics Standa...

Page 17: ...Section 7 Technical Support E mail support airlinkplus com Toll Free 1 888 746 3238 Web site www airlinkplus com...

Reviews: