Air Lift 1000
MN-34
7
5. Push the inflation valve through the hole and use the rubber washer, flat washer, and
another 5/16” nut to secure it in place. Tighten the nuts to secure the assembly.
6. Route the air line along the frame to the fitting on the air spring (Fig. D.3). Keep
AT LEAST 6” of clearance between the air line and the exhaust system. Avoid sharp
bends and edges. Use plastic tie straps to secure the air line to fixed points along the
chassis. Be sure that the tie straps are tight, but do not pinch the air line. Leave at least 2”
of slack to allow for any movement that might pull on the air line.
7. Cut off the air line, leaving approximately 12” of extra air line. A clean square cut will
prevent leaks. Insert the air line into the air fitting. This is a push-to-connect fitting.
Simply push the air line into the 90° swivel fitting until it bottoms out (9/16” of air line
should be in the fitting).
TEE AIR LINE ROUTING
TO PREVENT THE AIR LINE FROM MELTING, MAINTAIN AT LEAST 8” FROM THE
EXHAUST SYSTEM TO THE AIR LINE.
1. Locate the desired tee location on the frame rail or cross member. Determine and
cut an adequate length of air line to reach from the tee to the left and right side air
springs.
LEAVE SUFFICIENT AIR LINE SLACK TO PREVENT ANY STRAIN ON THE FITTING
DURING AXLE MOTIONS.
2. Slide an air line clamp onto the air line.
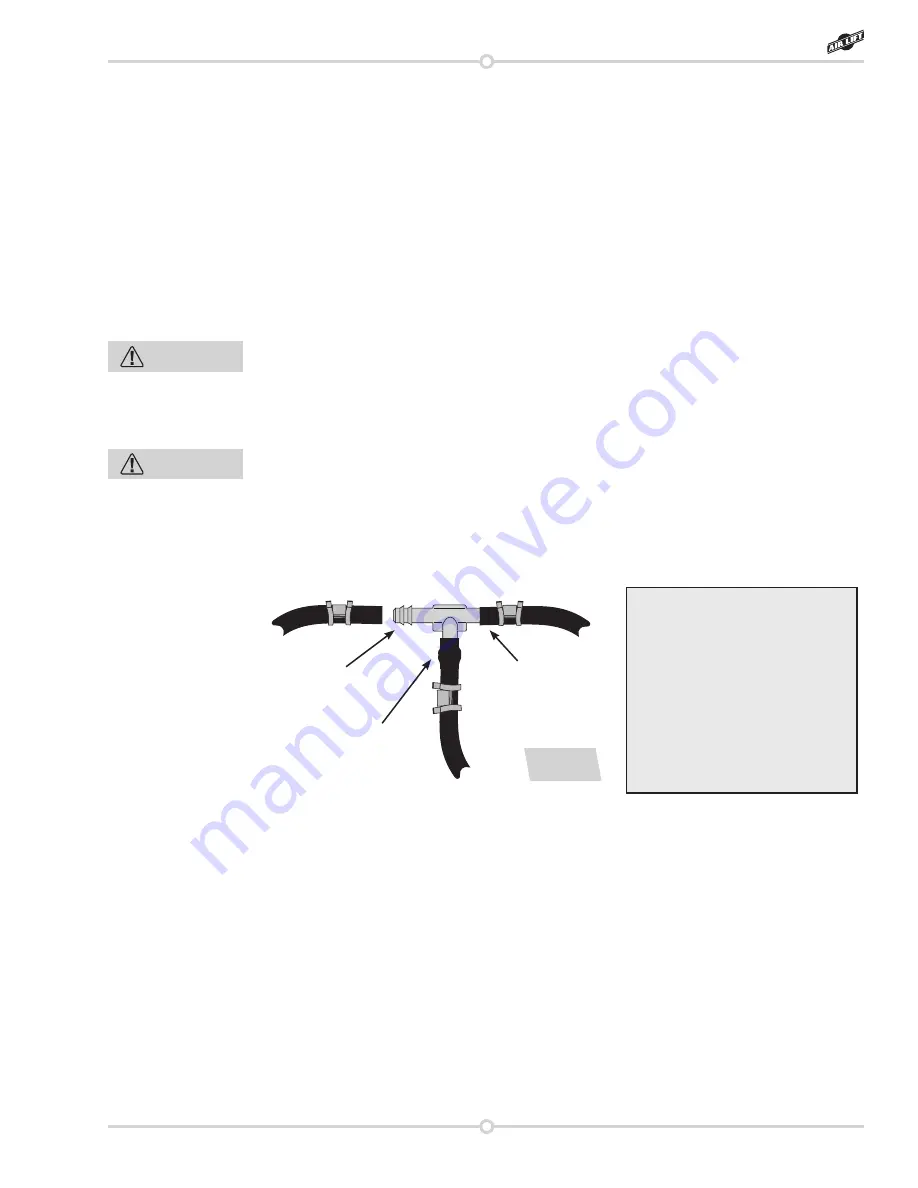
3. Push the air line over one side of the tee until all the barbs are covered. With a pair of
pliers, slide the air line clamp forward until it fully covers the barbed section. Repeat
the entire procedure for the other leg of the tee. (Fig. D.3)
4. Route the air line along the cross member and either the lower control arm or the
upper spring seat to the air spring.
5. Insert the air line through the spring seat and spacers.
6. Push the air line onto the stem, covering all the barbs. With the pliers, slide the air line
clamp upward until it fully covers the barbed section.
Use this procedure for all air
line connections:
1. Slide the air line clamp onto
the air line.
2. Push the air line over the
barbed stem.
3. Compress the ears on the
air line clamp with pliers and
slide it forward to fully cover
the barbed section.
1
2
3
fig. D.3
CAUTION
CAUTION


