REFRACTOR PROFESSIONAL OVERDRIVE
19
ENCLOSURE LAYOUT: MAIN & FOOTSWITCH PCBS
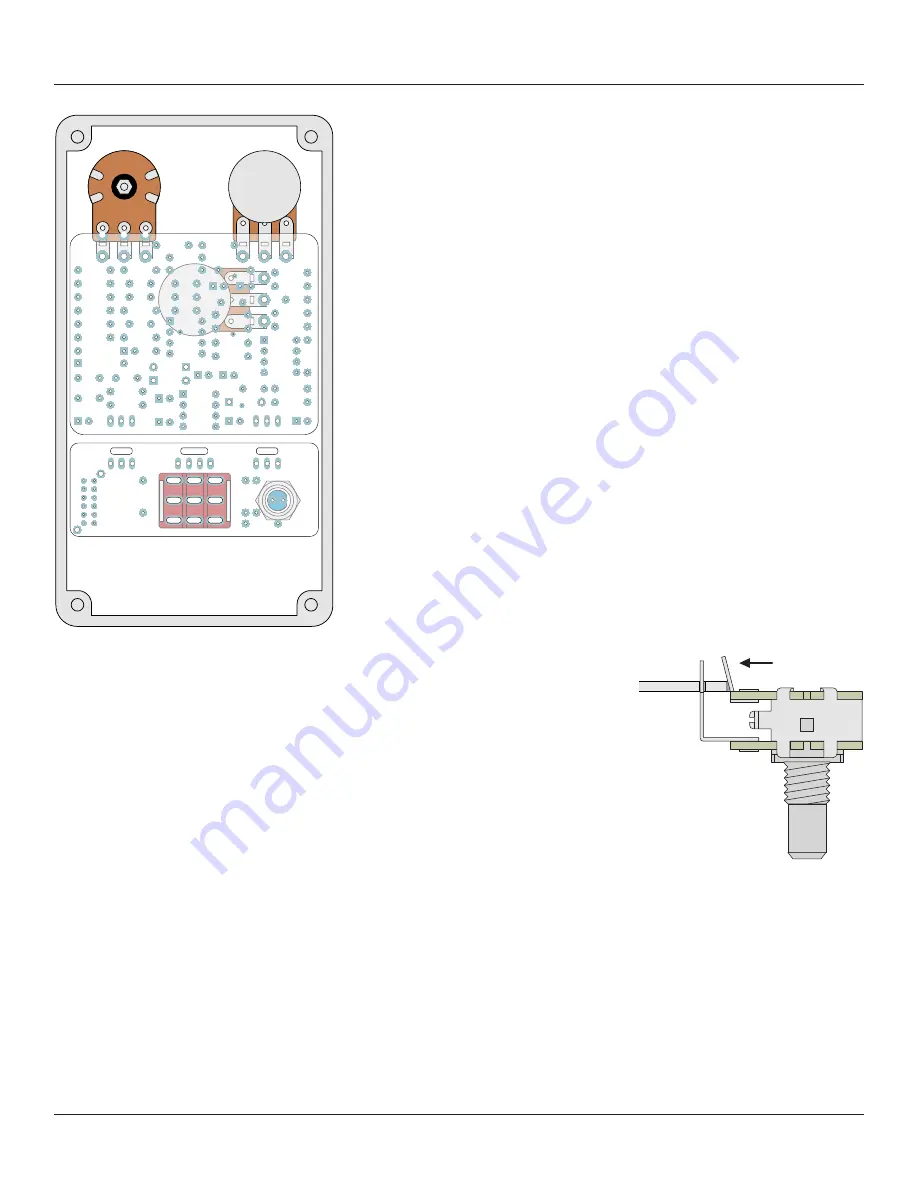
A note about the dual-gang potentiometer
The upper pads for the dual-gang gain potentiometer appear to be
cut in half.
This is intentional.
It’s called a
plated half-hole
or
castellated
hole
, and it’s used so that the PCB can lay flat across the pots instead of
angling upward for the dual pot.
Solder it like you would if they were normal pads, but bend the top pins
of the pot forward slightly so they make contact with the inside edges of
the half-holes, as shown in the diagram to the right.
Why solder everything inside the enclosure before testing it?
“Rock it before you box it” is conventional wisdom in pedalbuilding, and you’ll often hear it
recommended that builders should test the circuit before putting everything inside the enclosure.
However, Aion FX projects are designed to be extremely easy to remove from the enclosure for
troubleshooting, with no desoldering required—so with these kits, it’s actually much easier to “box it
before you rock it”.
If you’ve read the documentation carefully and followed all the instructions, there’s a good chance you
will get it right the first time!
125B
After all the components are affixed to the enclosure as
shown on the previous page, place the main PCB on top of the
potentiometers as in the diagram to the left.
You may need to adjust the position of the potentiometers
slightly if they are not aligned straight.
Once all of the pins are through and the PCB is laying flat, solder
each of the pins from the top, being careful not to touch any of
the surrounding components with the soldering iron.
After you’ve finished soldering the pots,
clip the leads as close
as you can to the main PCB
. This is more important with the
two uppermost pots because the input/output PCB overlaps
them and you need to avoid any of the components shorting.
Next, do the same thing with the footswitch board—the 3PDT
footswitch and the LED.
Before soldering, double-check to
make sure the flat side of the
LED is facing to the right
, as shown in the diagram, and that the
short leg is coming through the pad on the right. It won’t work if
it’s turned the other way.


