


Technical documentation:
MyChron 3 XG LOG
– Version 1.07
4
Software
Once the logger installed and the sensors plugged in, to configure the logger,please use
Race
Studio 2
, the software developed by Aim to configure its instruments and analyze stored data.
Please run
Race Studio 2
, select “
M3 LOG /
VISOR/XGLOG
”, press “System manager”
button and follow these steps:
To correctly configure your
MyChron 3 XG
LOG
, please set all parameters reported in
the configuration window shown in the
previous figure:
•
Display
language.
•
Obscuring time and Number of splits.
•
Speed channel, wheel circumference
and pulses per wheel revolution.
•
Channels and alarms concerning the 2
display pages.
•
Gear channel: calculated or none
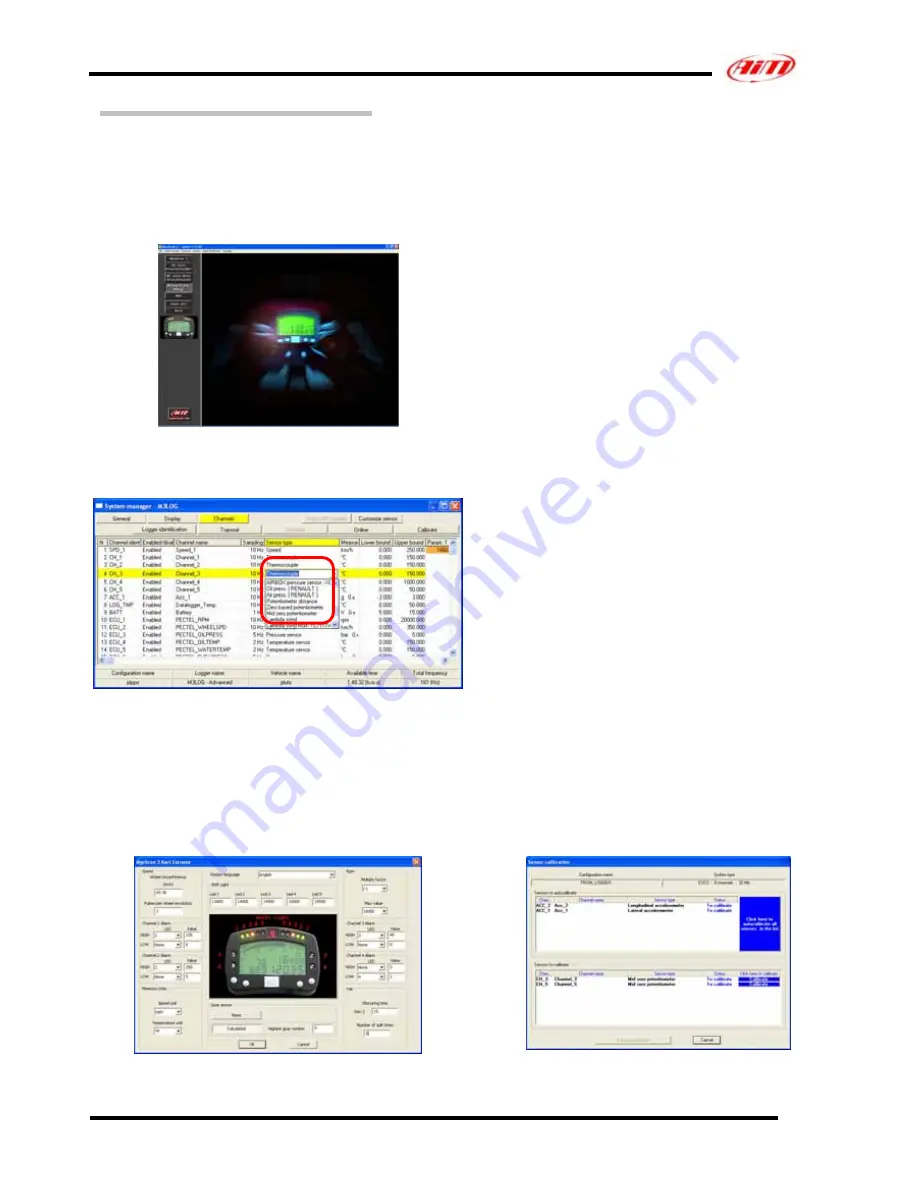
1) Set the input channels
Press “Channels” button to set the sensors
installed on your car; this window appears.
3) Transmit the configuration
Once the input channels set and configured
to transmit the configuration to the logger
please press “OK” button and than
“Transmit” button on the following wndow.
Please note
:
to transmit the configuration,
the gauge must be switched on and
connected to the PC, as shown in Figure 5.
4) Calibrate/auto-calibrate sensors
After configuration transmission you have
to calibrate/auto-calibrate the sensors.
To set an input channel, double-click on the cell
corresponding to the desired one: the pop up
window circled above appears.
“Potentiometer distance” and “Internal
lateral accelerometer” sensors need auto-
calibration, while “Mid zero potentiometer”,
2) How to configure the gauge
Once set the desired input channels, press
“Configuration” button to set all the other
parameters. The window below appears.
“zero based potentiometer” and “on-board
gear sensor” need calibration. Please press
“Calibrate” button and this window appears
G-force sensor and “potentiometer distance”
sensor need to be auto-calibrated pressing
5) Re-transmit the configuration
Once the calibration/autocalibration has


