37
EN
Option 1:
mounting on the ceiling/wall with connecting directly to the
wiring.
Option 2:
mounting on the wall with the connection to the outlet, using
the cable supplied.
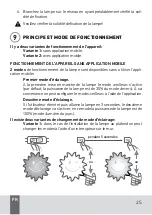
THE FIRST OPTION FOR MOUNTING THE DEVICE:
1.
Use dowels and screws, fix the mounting plate on the ceiling/wall.
2.
Use the connectors to connect the lamp wires to the 220 V network
wiring.
3.
Install the lamp in the grooves and turn as shown in the picture.
THE SECOND OPTION FOR MOUNTING THE DEVICE:
1.
Insert the cable into the lamp (
1
).
2.
Install the cable holder (
2
).
3.
Connect the lamp wires using connectors (
3
). Do not forget to connect
all three grounding cables!
4. Secure the mounting plate with dowels and screws (
4
).
5.
Install the lamp in the grooves and turn as shown on the picture (
5
and
6
).
6.
Check the reliability of the fastening and connect the lamp to the
network.
Check if the lamp is securely attached!
Summary of Contents for SUN1
Page 44: ...44 1 45 2 46 3 47 4 47 5 48 6 48 7 49 8 51 9 53 10 55 11 55 12 56 13 56 14 57 AGU SUN1 RU...
Page 45: ...45 RU AGU SUN1 AGU SUN1 AGU 1...
Page 46: ...46 2 2014 30 EU EMC 2011 65 EU RoHS 2014 53 EU 2014 35 EU WEEE 2011 65 EU 020 2011 004 2011...
Page 47: ...47 RU AGU SUN1 430 650 AGU SUN1 1 3 2 2 3 1 1 1 1 5x42 8x40 3 1 3 4...
Page 49: ...49 RU AGU SUN1 LED AGU SUN1 AGU SUN1 7...
Page 50: ...50 1 0...
Page 51: ...51 RU agu baby com 2 1 2 1 2 220 3 8...
Page 52: ...52 1 1 2 2 3 3 4 4 5 5 6 3...
Page 53: ...53 RU 6 2 1 2 2 30 5 100 2 1 9 5...
Page 54: ...54 2 Android 5 0 iOS 8 0 a PlayMarket AppStore AGU QR 1 2 3 4 5 6 a 1 2 3 4 5...
Page 55: ...55 RU 10 40 c 75 AGU SUN1 10 30 65 10 11...
Page 57: ...57 RU 24 agu baby com 14...
Page 58: ......
Page 59: ......
Page 60: ......
Page 64: ...AGU is the registered trademark by Montex Swiss AG Tramstrasse 16 CH 9442 Berneck Switzerland...


