© AGRETO electronics GmbH
User Manual
AGRETO PFM II Baler Mounted Moisture Meter
31.05.2017
Page 1: ...AGRETO electronics GmbH User Manual AGRETO PFM II Baler Mounted Moisture Meter 31 05 2017...
Page 2: ...the sensor plate and the sensor cable 7 6 4 Installation of the display unit 9 7 Working with the device 11 7 1 Keypad 11 7 2 Switching on the device 11 7 3 Performing measurements 12 7 4 Setting the...
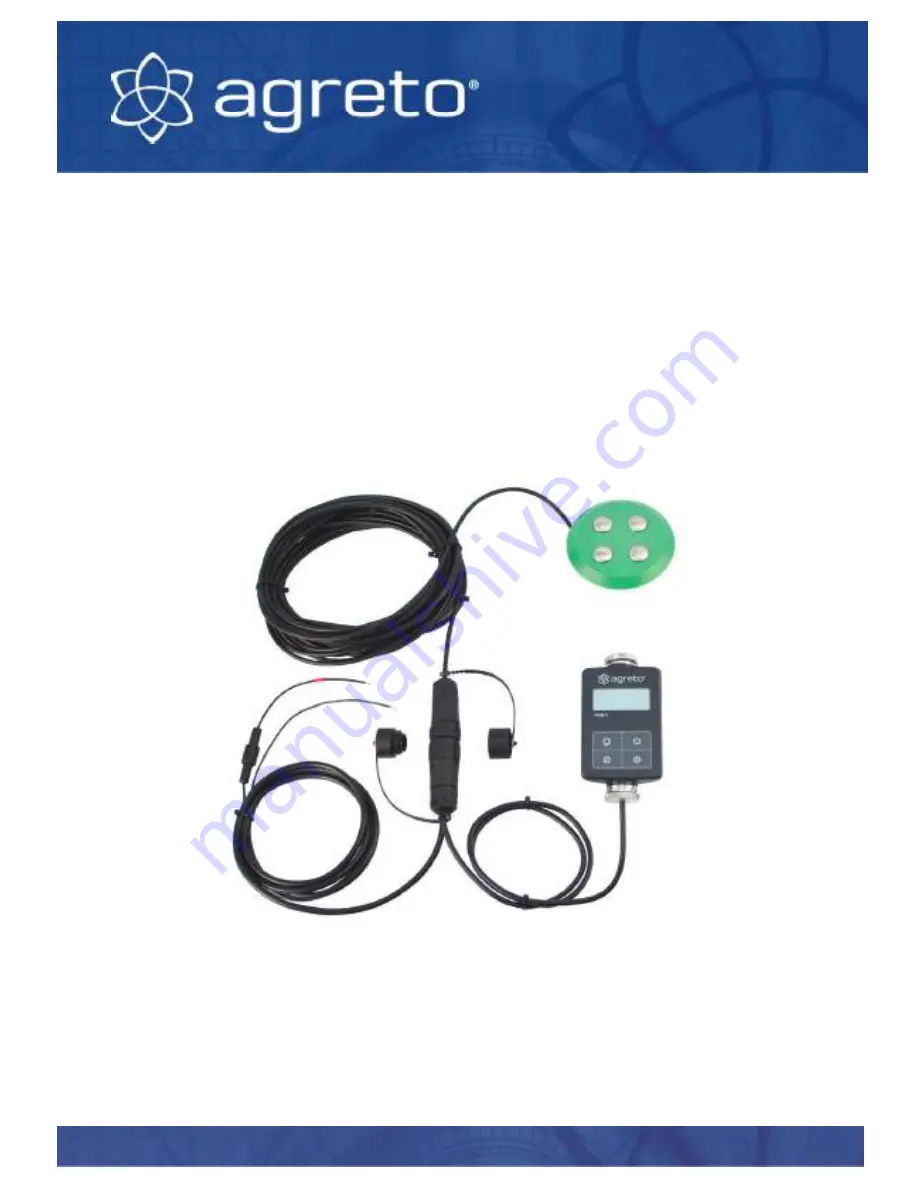
Page 3: ...6 x stainless steel nuts 4 x nuts und 4 x plastic isolation discs 1 Manual 3 Intended use The AGRETO PFM II Baler mounted moisture meter is designed for measuring the moisture of hay and straw bales d...
Page 4: ...read and understood this manual 4 2 Safety instructions for the operator DANGER The AGRETO PFM II may only be operated by persons who are familiar with the operation of the device CAUTION Keep the wor...
Page 5: ...with the device or reside in the working area the wearing of safety shoes are required 4 4 Residual risks When using the device Residual hazards for persons and objects may occur that can t be prevent...
Page 6: ...inuous display of the measured value during the pressing process Display of average values in adjustable intervals 1 2 5 or 15 seconds Manual averaging counting function Acoustic warning in case of to...
Page 7: ...accessible for installation even from the outside If the pressed material is cut on one side mount the sensor on the other side where the material to be pressed is not cut 6 3 Installation of the sens...
Page 8: ...contact uniformly with the press wall without spacing otherwise there is the danger that stalks are pinched or the sensor plate is torn Mount on the outside first one plastic spacer Then fit a washer...
Page 9: ...ble location in the cab for mounting the display unit You can use the 6 holes in the bracket for mounting on a bracket a mounting panel or directly to a cab upright If you perform drilling operations...
Page 10: ...and disconnect the sensor cable when attaching and deattaching the baling machine Pin assignment sensor cable If you dismount a connector on the sensor cable and need to re connect use the pin assign...
Page 11: ...AGRETO electronics GmbH page 11 7 Working with the device 7 1 Keypad 7 2 Switching on the device Make sure that the sensor is connected and turn the power on by pressing the On Off button Light Interv...
Page 12: ...e current display is signaled by the flashing decimal point 7 4 Setting the display interval The button Interval the duration of the display interval can be set in seconds Possible values are 1 2 5 an...
Page 13: ...y To delete the total memory switch the device manually off and on again 7 8 Acoustic warning When the moisture measurement is over the set limit an acoustic signal sounds For setting the limit betwee...
Page 14: ...e This fact is advantageous in practice in many cases as with more compressed bales increased sensitivity is advisable with respect to quality and storability 8 2 Material A hay or straw bale consists...
Page 15: ...the power supply is upright and if the fuse in the power cable is okay 10 2 Incorrect measuring values If you have reason to believe that the displayed values are not correct please note the followin...
Page 16: ...The warranty period begins with the first accounting to an end customer and ends 5 years from this date of invoice Prerequisite for warranty service are the presentation of the original invoice and co...
Page 17: ...ation of the laws of Member States relating to electromagnetic compatibility 2004 108 EC For the evaluation regarding electromagnetic compatibility the following standards were applied EN 61000 6 1 20...
Page 18: ...hnical changes or design changes All information in this manual are supplied without liability despite careful preparation A liability by the author is excluded Copyright 2017 AGRETO electronics GmbH...