6 Installation Note E4411-90045
Removing the Front Frame
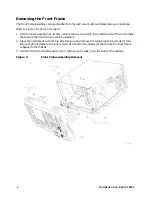
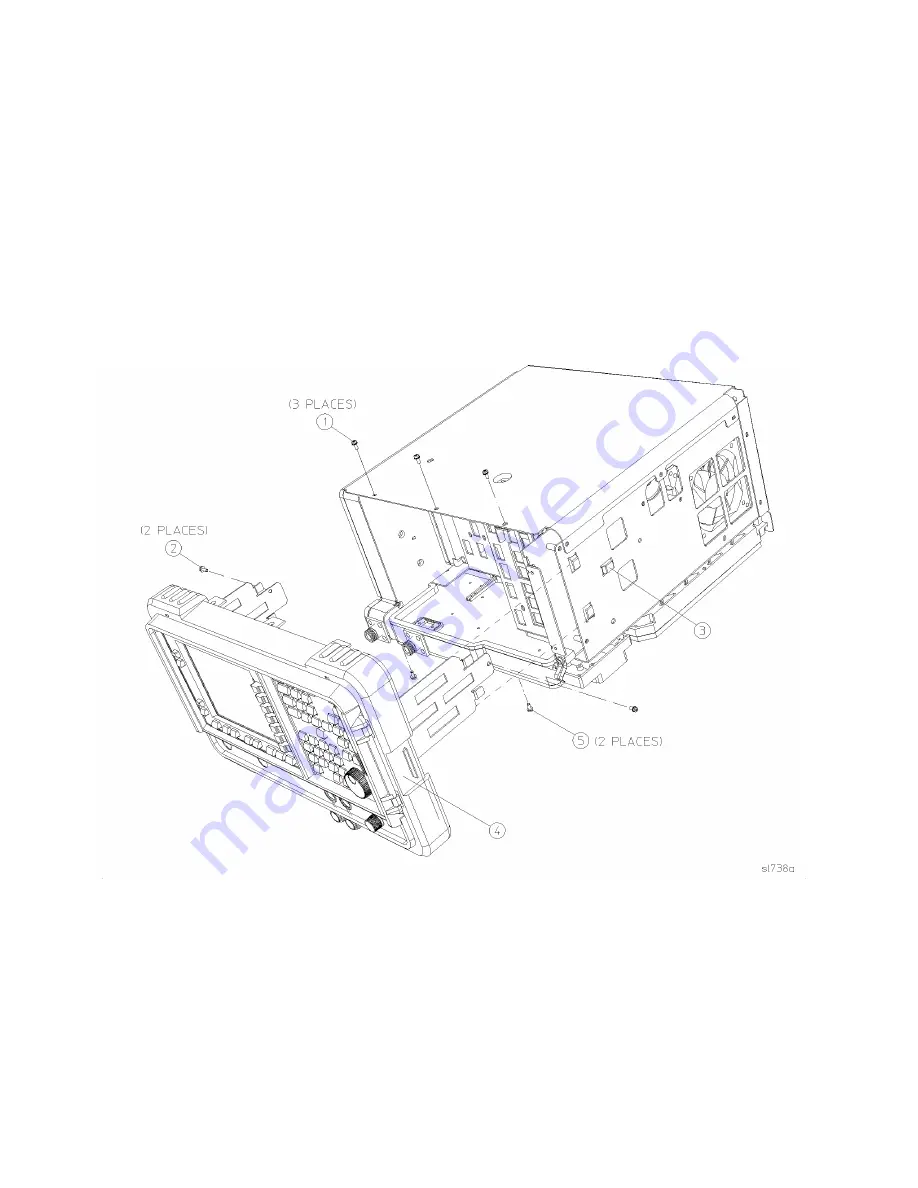
The front frame assembly can be extended from the instrument without detaching any connections.
Refer to
1. With the instrument still on its face, remove the two screws (5) on the bottom side of the instrument
that secure the front frame to the RF assembly.
2. Place the instrument with the top side facing up and remove the remaining three screws (1) that
secure the front frame to the inner shield. Remove the two screws (2) that secure the front frame
subpanel to the chassis.
3. Slide the front frame (4) forward until it catches on the tabs (3) on the sides of the chassis.
Figure 3
Front Frame Assembly Removal


