


2-13
Preparing the Oscilloscope for Use
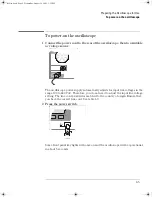
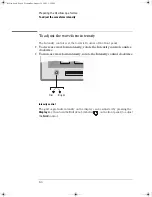
To connect a printer
To connect a printer
The oscilloscope connects to a parallel printer through the Parallel output
connector on the rear of the oscilloscope. You will need a parallel printer cable
to connect to the printer.
1 Attach the 25-pin small “D” connector to the Parallel output connector
on the rear of the oscilloscope. Tighten the thumbscrews on the cable
connector to secure the cable.
2 Attach the larger 36-pin “D” connector to the printer.
3 Set up the printer configuration on the oscilloscope.
a Press the
Utility
key, then press the
Print Confg
softkey.
b Press the
Print to:
softkey and set the interface to
Parallel
.
c Press the
Format
softkey and select your printer format from the list.
For more information on printer configuration, refer to the “Utilities” chapter
in the User’s Guide.
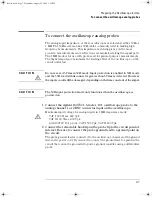
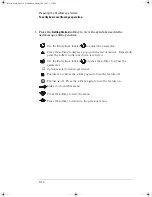
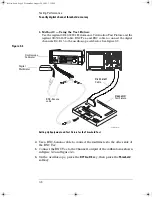
To connect an RS-232 cable
The oscilloscope can be connected to a controller or a PC through the RS-232
connector on the rear of the oscilloscope. An RS-232 cable is shipped with each
54642A/42D oscilloscope and may be purchased for the 54641A/41D
oscilloscopes.
1 Attach the 9-pin “D” connector on the RS-232 cable to the RS-232
connector on the rear of the oscilloscope. Tighten the thumbscrews on
the cable connector to secure the cable
2 Attach the other end of the cable to your controller or pc.
3 Set up the RS-232 configuration on the oscilloscope.
a Press the
Utility
key, then press the
I/O
softkey.
b Press the
Controller
softkey and select
RS-232
.
c Press the
Baud
softkey and set the baud rate to match your controller or pc.
d Press the
XON DTR
softkey and set the handshake to match your controller
or pc.
For more information on RS-232 configuration, refer to the “Utilities” chapter
in the User’s Guide.
service.book Page 13 Wednesday, August 28, 2002 3:25 PM
Summary of Contents for 54641A
Page 4: ...iv service book Page iv Wednesday August 28 2002 3 25 PM ...
Page 7: ...1 General Information ...
Page 24: ...1 18 ...
Page 25: ...2 Preparing the Oscilloscope for Use service book Page 1 Wednesday August 28 2002 3 25 PM ...
Page 45: ...3 Testing Performance service book Page 1 Wednesday August 28 2002 3 25 PM ...
Page 66: ...3 22 service book Page 22 Wednesday August 28 2002 3 25 PM ...
Page 67: ...4 Calibrating and Adjusting service book Page 1 Wednesday August 28 2002 3 25 PM ...
Page 76: ...4 10 service book Page 10 Wednesday August 28 2002 3 25 PM ...
Page 77: ...5 Troubleshooting service book Page 1 Wednesday August 28 2002 3 25 PM ...
Page 90: ...5 14 service book Page 14 Wednesday August 28 2002 3 25 PM ...
Page 91: ...6 Replacing Assemblies service book Page 1 Wednesday August 28 2002 3 25 PM ...
Page 107: ...7 Replaceable Parts service book Page 1 Wednesday August 28 2002 3 25 PM ...
Page 114: ...7 8 service book Page 8 Wednesday August 28 2002 3 25 PM ...