17 |
P a g e
RESOLUTION
Select recording resolution using the mouse or the control button on the remote control.
QUALITY
Select the recording quality for the specified channel. LEVEL 1 ~ LEVEL 5 (Allows
the user to change the recording QUALITY of the selected CHANNEL)
RECORDING
Assign the recording mode for each channel.
Options are: Continuous, Motion, Sensor, Schedule, or Disable.
SENSOR
RECORDING
In case of selecting SENSOR for recording mode, allocate the number of sensor to trigger
the recording.
PRE RECORD
Enable/disable pre-event recording. Pre-event recording time is 5 seconds to 20
Minutes.
POST EVENT
RECORD
Set the post event recording time duration for the specified channel. (10~60 seconds)
AUDIO
Enable/disable audio recording for the specified channel.
SCHEDULE
Set the recording schedule. Press SEL to enter the schedule setup screen.
3-3-1. Recording Schedules
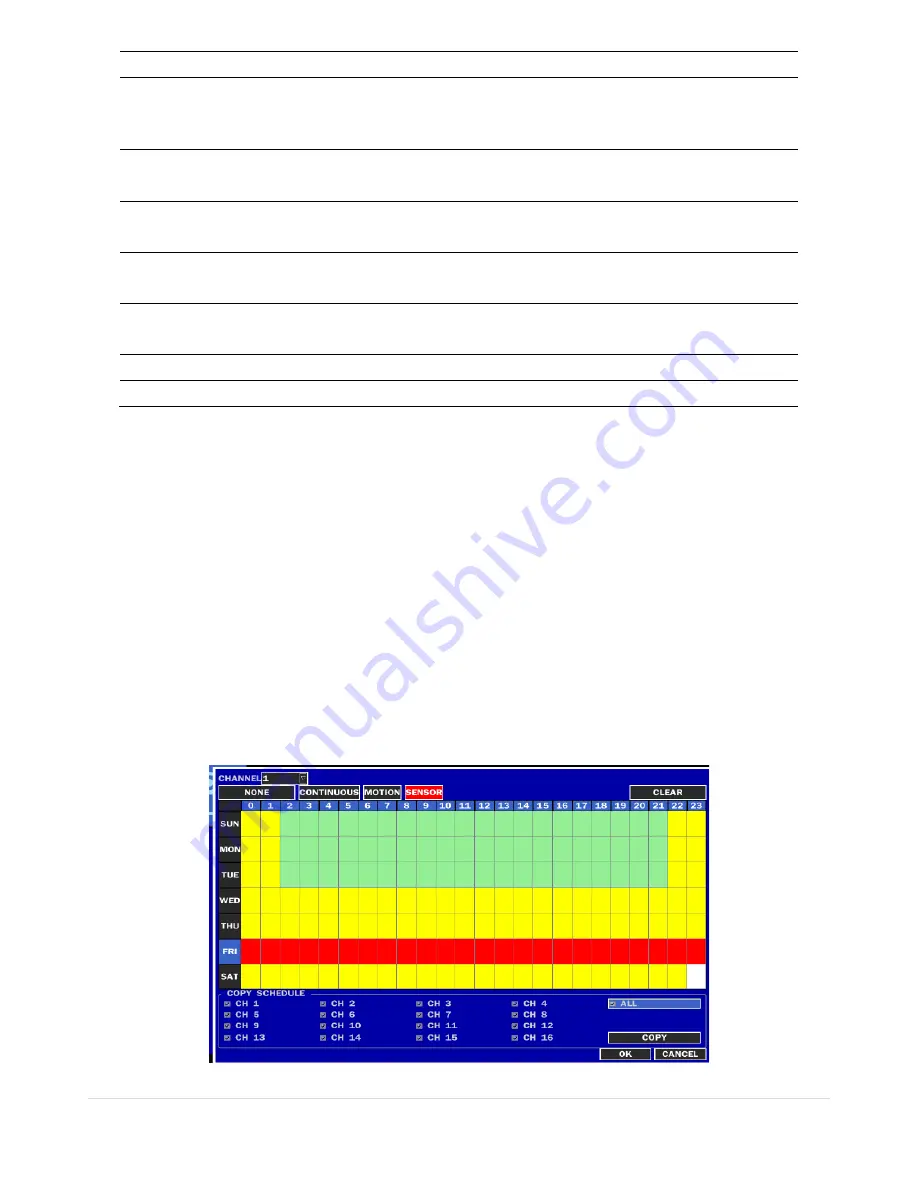
To setup a recording schedule, select SCHEDULE in the RECORD menu. Navigate through the menu items using the
mouse or the control button on the remote control.
[
CHANNEL
]: Select the specific channel.
[
Setup
]: Set up using the left button of the mouse to section under the specific time. It can set the all section under
the specific day or time at a time when pressing the specific day or time. It is also possible to set up recording
modes of various type using CONTINUOUS (Green), Motion (Yellow) and Sensor (Red). Left-Click and drag the
mouse to change the schedule for more than one timeslot.
[
COPY SCHEDULE]
: To copy the schedule setup from one channel to another, select the channel to copy using the
mouse or the buttons on the remote control, and select to channel to copy to and press the COPY button.
Select OK to confirm the changes.
Figure 3.3.2. Schedule Recording Setup Screen


