15
Creating a Flight Plan Using
Mission Planner
→https://youtu.be/MhHomssqD7k
1. Open Mission Planner
on Laptop and click on
flight plan tab.
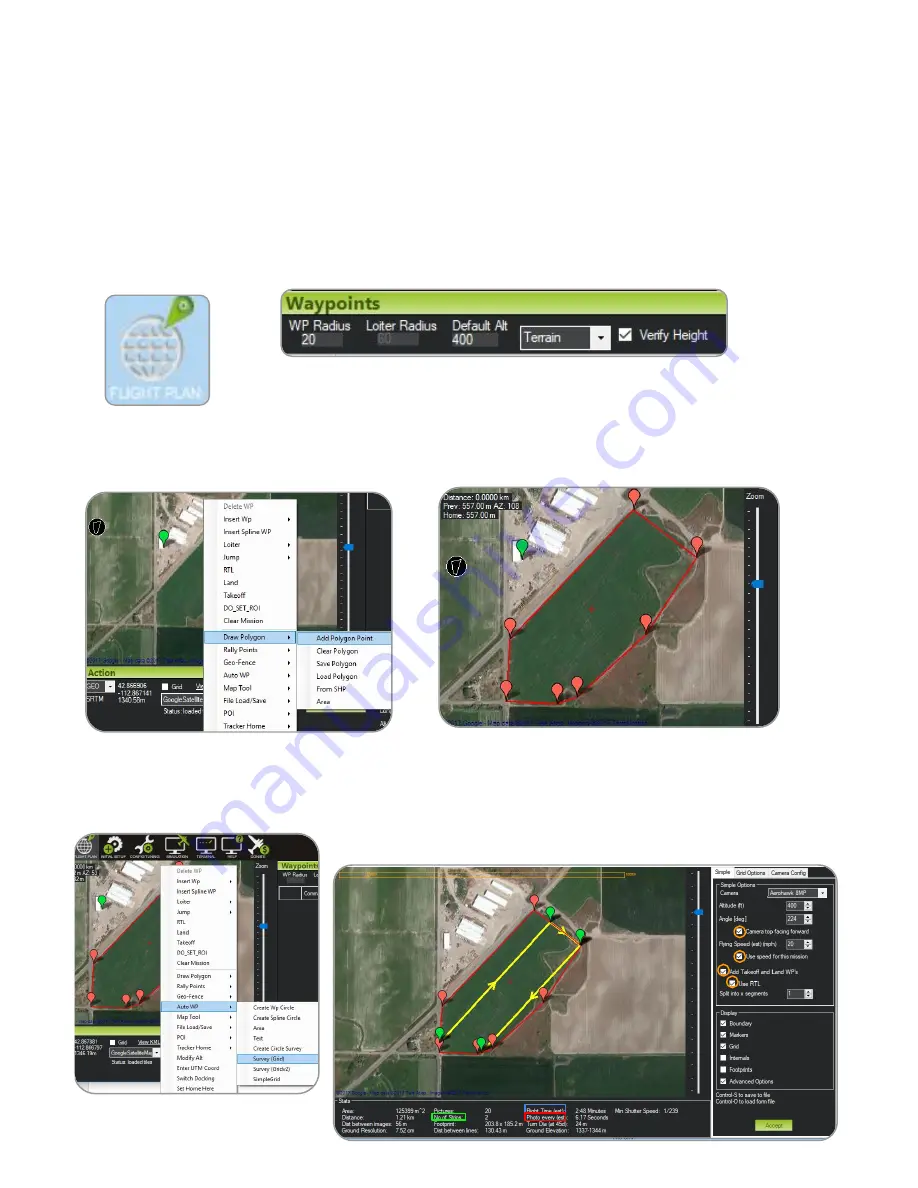
3. Locate the area you want to survey.
Right click on the screen and choose
Draw polygon then add Polygon
Point.
4. Left click around the edges of your field
to choose your flight area.
5.Right click and select Auto WP
then select Survey (Grid)
2. In the Waypoints tab set Default alt to 400 ft.
Select Terrain from the drop down box. And
check the verify height box.
6. Under Simple select the name of the Camera you are
using(Aero-hawk_8mp). Adjust Altitude to Fly at 400ft and Flight
Speed of 20mph, with the 4 boxes
checked
. Change the angle to
reduce the number of
strips
for shorter
flight times
. Check
photo
every
and ensure that it is not less than 1.5 seconds.
7. In the Grid Options tab check the
box. You can adjust your
overlap, sidelap and path starting point. In
some cases you may have to adjust overlap
and sidelap. This will affect photo interval
so remember to check it .


