3
Scheduling Transient Detection
1. Press the
button to display the Waveform Capture screen.
2. Ensure
Transient is highlighted, then press .
●
If there are no transient detection sessions stored in the instrument, the Detection
Schedule screen appears.
●
If there are recordings in the instrument, the Detection List screen is displayed. In this
case, press the
button to display the Detection Schedule screen.
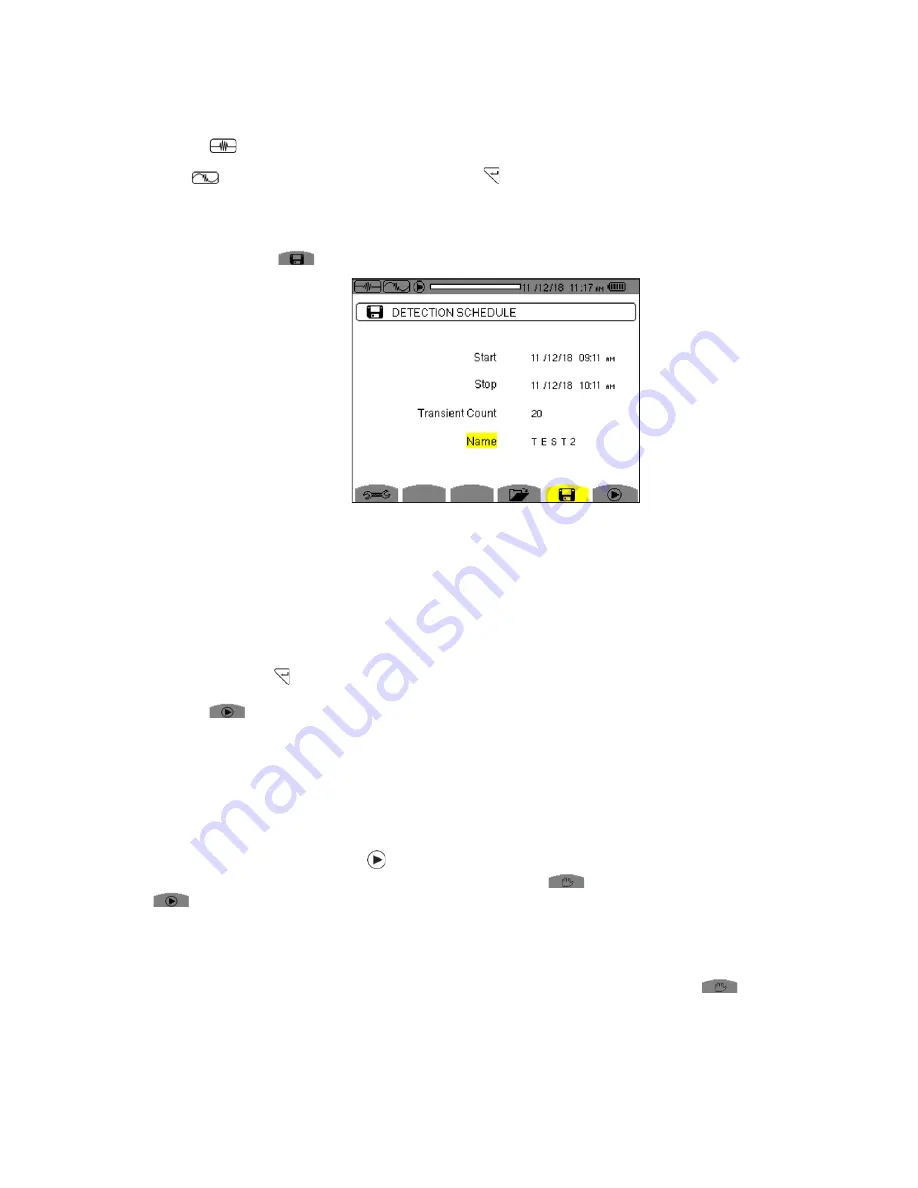
3. This screen displays four input fields:
●
Start
defines the time and date when the recording starts. This must be later than the
current date and time.
●
Stop
specifies when the recording ends. This must be later than the start date and time.
●
Transient Count
defines the maximum number of transients that you want to capture
before stopping the session.
●
Name
allows you to name the test. This can be 8 characters long.
4. Use the arrow and buttons to highlight, select, and edit these fields.
5. Press the
button to write the settings to the instrument and start the session.
6. If not enough memory is available, an error message appears informing you of this.
Otherwise, the transient detection session will begin at the scheduled start time and date.
If a session is scheduled but not yet started, the message DETECTION ON STANDBY
appears on the screen until the start time is reached, at which point the message changes to
DETECTION IN PROGRESS.
When the session is active, the icon blinks at the top of the screen, along with a status
bar showing the progress of the session. In addition, the
(stop) button appears in place
of
.
During the session, the Transient Count number is reduced by 1 every time a transient is
recorded. If this number counts down rapidly and appears as though it will reach zero well
before stop time is reached, we recommend stopping the session and setting the threshold
to a higher, less sensitive value. The session will continue until: (1) you press
, (2) the
Transient Count limit is reached (see Step 3), or (3) the stop time/date is reached.
7. When the transient detection session is finished, it appears in the Detection List screen. You
can now open the session and view its contents, as explained in the following.


