background image

19 

4. SAVING AND RECALLING IMAGES

When the micro SD memory card is inserted into the camera (see 

§ 1.3)

, you can store and later recall the 

displayed image and measurements.  

4.1. Image Files 

4.1.1. Naming Conventions 

The camera has two objective lenses, one for infrared images and the other for visible light images. When an 

image is saved, two files are created. The infrared image is saved using the filename convention: 

yyyymmdd_hhmmss_IR.PNG 

…where “yyyymmdd_hhmmss” is the date and time the image was acquired. The visible image is saved using 

the same naming convention, but without the “IR” designation (yyyymmdd_hhmmss.PNG). This naming 

convention requires accurate date/time settings (see 

§ 1.5.2

). 

An audio file can also be included with the two images. This allows you to record a description and other 

information relevant to the images. This requires a Bluetooth headset connected to the camera (see 

§ 6.2

). This 

file is given the same name as the associated IR image, with the extension .WAV instead of .PNG (for example 

yyyymmdd_hhmmss_IR.WAV). 

After you save an image, you can create copies of it (with palette changes, additions of cursors, and so on) by: 

Saving the same frozen image multiple times

Recalling the original saved image from the camera’s memory and saving it again (see 

§ 4.4.1

)

These copies are called “derived” images. To differentiate derived image files (which all have the same date of 

acquisition) an index letter is added after the date (for instance 20181020_131254a_IR.PNG). When all letters 

from "a" to "z" have been used, the letter "z" is re-used and the existing file with this name is overwritten. Note 

that a visible image is not created for the derived file, since the visible image associated with the original file also 

applies to the derived file. 

When erasing visible images other than through the camera's file manager, take care not to create 

“orphan” IR images for which no corresponding visible light image exists. 

4.1.2. Directories


Image files are saved in the working directory defined in the Directory menu (see 

§ 1.5.7

). The working directory 

must be located on the micro SD card installed in the camera. If the card is missing, an error message appears 

when you attempt to save an image. 


4.2. Saving an Image


You can save an image when a micro SD memory card is inserted into the camera. To save a new image file: 

If the trigger function setting is Aim or Freeze (see 

§ 1.5.4

), you must first stop acquisition. If the trigger

function is Aim, press 

F2


 to freeze the image and then press 

F3


. If the trigger function is Freeze,

press the trigger and then press 

F2


. In either case the displayed image is saved in the working

directory.

If the trigger function is Save, each press freezes the image (if it is not already frozen) and saves it in

memory.

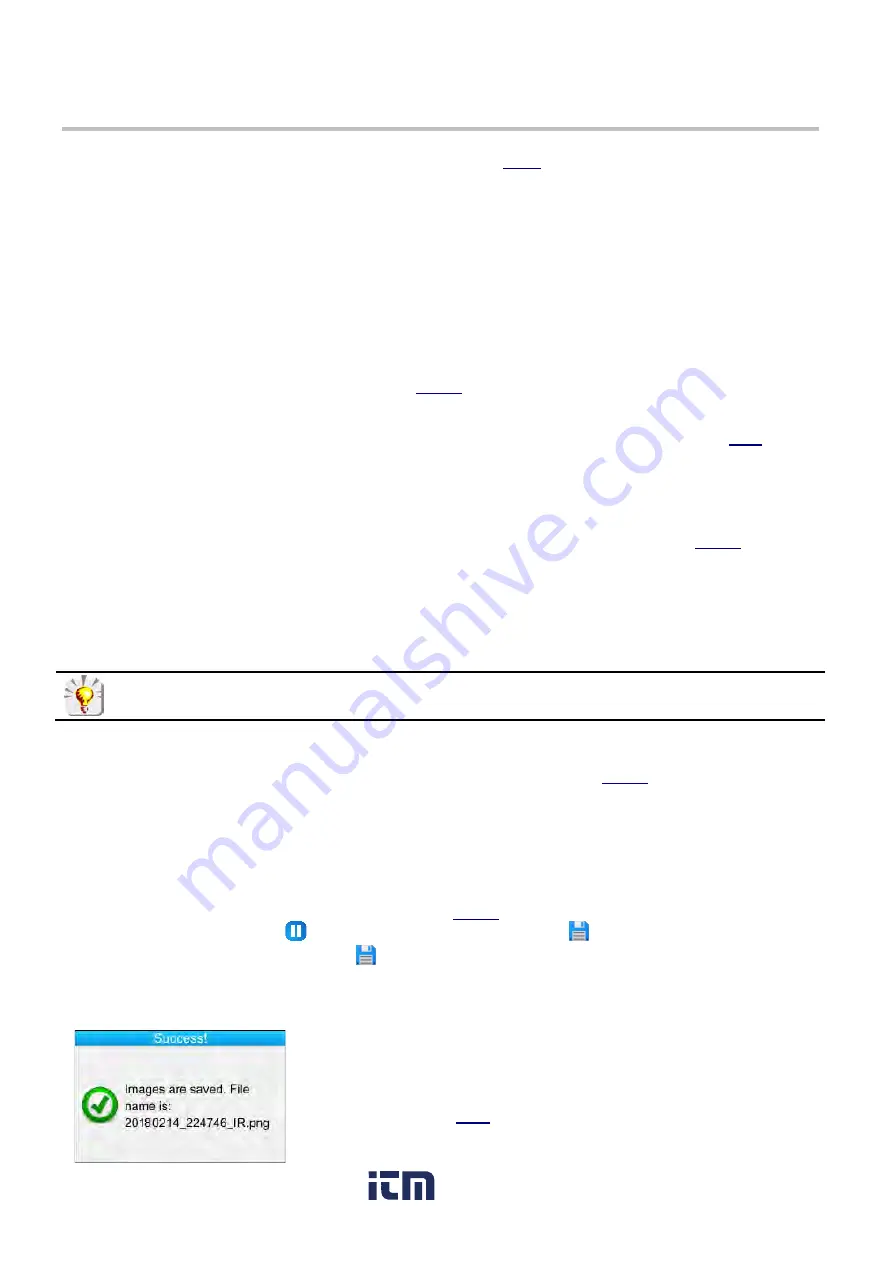
When the file has been saved to the micro SD card, a message displays the 

name of the file that has just been created (see the example on left). 

If acquisition is stopped, each additional press of the trigger creates a new 

"derived" image (same date of acquisition), differentiated by an index letter 

added to its name (see 

§ 4.1

)

In addition, you can create a new derived image from a recalled image, as 

explained i

§ 4.4.1


www.

.com

[email protected]

1.800.561.8187

Summary of Contents for 1954

Page 1: ...Model 1954 ENGLISH User Manual THERMAL CAMERA www com information itm com 1 800 561 8187 ...

Page 2: ...Displaying Points at the Same Temperature in an Image Isotherm 16 2 2 Freezing Palette Colors 16 3 ADVANCED OPERATION WITH MORE PRECISE MEASUREMENTS 17 3 1 Best Practices 17 3 2 Compensating for Influencing Parameters 17 3 2 1 Default Compensation Settings 17 3 2 2 Custom Compensation Settings 18 3 3 Tripod 18 4 SAVING AND RECALLING IMAGES 19 4 1 Image Files 19 4 1 1 Naming Conventions 19 4 1 2 Di...

Page 3: ... 32 8 1 IR Image is a Single Solid Color 32 8 1 1 Color Palette Frozen 32 8 1 2 Inconsistent User Influencing Parameters 32 8 2 Contrast of IR Image is Incorrect 32 8 3 Unable to Save Displayed Image 32 8 4 Slow Opening of Files 32 8 5 Headset Cannot Connect to Camera 32 8 6 Bluetooth Device Cannot Connect to Camera 32 8 7 Bluetooth Measurements Not Displayed Refreshed 33 9 MAINTENANCE 34 9 1 Came...

Page 4: ...st of its constituents WARNING Class 2 laser radiation output 1mW wavelength 645 655nm If the flap is open do not look into the beam Receiving Your Shipment Upon receiving your shipment make sure that the contents are consistent with the packing list Notify your distributor of any missing items If the equipment appears to be damaged file a claim immediately with the carrier and notify your distrib...

Page 5: ...ngs Avoid jolting or dropping the camera Do not point the camera s laser pointer at a person s eyes This can result in burns and other damage to the eyes Caution Observe all safety warnings Use of controls or adjustments or performance of procedures other than those specified herein may result in hazardous radiation exposure 1 2 Battery Installation The camera accepts four AA batteries alkaline or...

Page 6: ...e remains this icon appears as To change mode ensure the Advanced icon is selected If not use the arrow buttons to select it Press to edit the setting and use the up and down buttons to change the setting to the desired option Then press to confirm the change Type of batteries The camera is delivered with low self discharge NiMH rechargeable batteries with a capacity of approximately 2500mAh These...

Page 7: ... see 1 2 1 no icon Default Battery Management mode only Batteries OK Advanced Battery Management mode only Batteries OK Advanced Battery Management mode only Batteries low Both modes Batteries discharged Bluetooth 6 Bluetooth enabled no icon Bluetooth disabled Trigger function 1 5 4 TA TF TS TL Aim Freeze Save Laser Micro SD Card 1 3 Micro SD Card detected Micro SD Card not detected Emissivity cor...

Page 8: ...e image This can be either infrared thermogram or visible light At the bottom of the image area is the color palette This identifies the temperatures represented by the colors in the thermogram The colors used to create the thermogram are defined by the selected palette see 1 5 8 By default temperature color assignment is performed automatically as a function of the minimum and maximum temperature...

Page 9: ...older Opens the selected file or folder Exits from image recall Displays information from the selected file Freezes the color palette Edits the minimum or maximum value of the palette Restores automatic mode Displays the infrared image Displays the visible image Plays back the vocal message Records a new vocal message Stops playing or recording the vocal message Searches for new Bluetooth devices ...

Page 10: ...creen F2 either opens the corresponding sub menu for editable settings modifies the selected parameter F3 closes the current window without action and returns to the previous menu or screen When an editable parameter is selected it appears on a blue background with the symbol to the left This symbol allows you to view available options which you can scroll through using the up and down buttons Aft...

Page 11: ...when pressed 1 Open the Adjustments menu by pressing F1 in the Main screen and selecting Parameters Adjustments 2 Select Trigger to display the Trigger menu This lists the following options Aim the default configures the trigger to toggle the display from the infrared image to the visible camera image The laser lights when the trigger is pressed When this option is selected the TA icon is displaye...

Page 12: ...stments 2 Select to display the screen brightness setting Use the up and down buttons to change this setting Options are Automatic the camera automatically adjusts the screen brightness or a percentage of full screen brightness 15 25 50 75 or 100 3 When the desired setting is displayed press F2 to select it 1 5 7 Image Storage Directory The working directory in which image files are stored must be...

Page 13: ...t any combination of 256 files and directories The card will therefore very quickly be considered full even though its full capacity has not been reached 1 5 8 Color Palettes The camera has three color palettes that can be selected for displaying thermograms To select a new palette 1 Press F1 in the Main screen and select to open the Display menu 2 Select to display a list of available palettes Ch...

Page 14: ...lected 4 Save the cursor setting by pressing F2 2 1 1 Estimating Measurements Without a Cursor By default no measurement cursor is selected the icon in the Cursor menu is highlighted Note that even with no displayed measurements you can still estimate temperature from the color palette The color distribution between minimum and maximum palette temperatures is linear so simply interpolating based o...

Page 15: ...mperature range defined as the tolerance setting are displayed at the bottom of the screen In addition the palette graphically displays the temperature range All points in the image whose temperature falls within this defined range are displayed in the selected color 2 2 Freezing Palette Colors By default thermogram colors are calculated for each image based on the highest and lowest temperatures ...

Page 16: ...2 www com information itm com 1 800 561 8187 ...

Page 17: ...issivity of 0 95 and is suitable as a reference target The higher the relative humidity and the greater the distance the larger the effect relative humidity has on the measurement The relative humidity ambient temperature and distance are likely to vary more significantly outdoors The camera default settings may not be suitable for the present environmental factors resulting in possible measuremen...

Page 18: ...sivity value it appears in the status bar Allowable emissivity values are from 1 00 to 0 05 Distance can be set from 1 6 to 3280ft 0 5 to 999 9m Default is 6 6ft 2m Humidity can be set from 0 to 100 Default is 55 Temperature can be set from 5 to 132 F 15 to 55 C Default is 55 5 F 13 C Note that you can also use measurement data provided by compatible Metrix ASYC IV Multimeters to compensate for en...

Page 19: ... to z have been used the letter z is re used and the existing file with this name is overwritten Note that a visible image is not created for the derived file since the visible image associated with the original file also applies to the derived file When erasing visible images other than through the camera s file manager take care not to create orphan IR images for which no corresponding visible l...

Page 20: ...e of the new file if the headset is connected another message prompts you to record a vocal message as shown on the left Press F2 to display the Record vocal screen or F3 if you do not want to record a vocal message In the Record vocal screen F1 F2 and F3 perform the following functions starts recording stops recording or playback plays back the message closes the window without creating a file if...

Page 21: ...o lists folders for browsing the SD card directory tree A preview of the selected image appears to the right of the file list Images with an associated vocal message are identified by the icon Other images are identified by the icon In the Images menu F1 F2 and F3 function as follows F1 Deletes the selected file or directory Only empty directories can be deleted F2 Recalls the selected file or Ope...

Page 22: ...file since the visible image associated with the original file also applies to the derived file If a Bluetooth headset is connected 6 2 1 after you confirm the save a second message prompts you to add a voice recording to this file 4 3 1 4 5 Deleting an Image To delete an image select it in the Images menu and press F1 A message appears left asking you to confirm the deletion This action deletes t...

Page 23: ...he computer and paste them into the appropriate folder s on the computer Note the following If the Images menu on the camera is open and the computer modifies the content of the micro SD card the Images menu must be re opened before any changes are applied to the menu Conversely any modifications done on the camera requires disconnection reconnection of the USB cable to force an update on the comp...

Page 24: ...ain configuration menu 2 Select to open the Setup menu shown to the left 3 Select to open the User menu 4 Select When you press F2 a full qwerty style keypad appears on the screen 5 Use the directional buttons to navigate to the first character in the filename and press F2 to save the character 6 Enter the remaining characters in the filename as described above Do not include the CFG extension thi...

Page 25: ...ge appears asking you to confirm the deletion 5 4 Restoring Original Default Settings To restore the factory defaults follow the steps below 1 Open the Setup menu select Factory and press F2 2 Select the Default setup file by pressing F2 3 All camera configuration parameters are reset to their original default settings www com information itm com 1 800 561 8187 ...

Page 26: ...n disconnected Their identification data is stored in memory and upon the next activation the camera will attempt to reconnect them 6 2 Headset The camera comes with a headset for creating and or playing back vocal message Note that the camera can only connect to one headset at a time 6 2 1 Headset Connection To connect a headset Bluetooth must be activated on the camera see above The procedure fo...

Page 27: ... BT and 3293 BT 1 measurement read AEMC Power Clamp on Meter Model 607 3 measurements read AEMC Power Clamp on Meter 407 3 measurements read AEMC Environmental Data Logger Models 1110 1246 1247 1821 1822 1823 1 measurement read Measurement data from connected devices can be displayed on the screen and saved along with the image They can be viewed when the image file is recalled see 4 4 Measurement...

Page 28: ...ayed start a new search by pressing F1 This overwrites the list currently connected devices remain The new device should be included in this list 6 3 3 Device Polling Period The polling period defines the frequency with which the camera polls the device for measurement data To change this 1 In the Peripherals screen select the device in the list and press the right button The polling period is hig...

Page 29: ... measurement is added to the list of measurements displayed at the bottom of the main screen Influence the measurement is added to the list of measurements displayed at the bottom of the main screen and is used in the compensation for environmental factors as explained in 6 3 5 If a measurement is assigned Displayed or Influence it will appear in blue on the last line of the measurement display of...

Page 30: ... temperature humidity or distance you can select the option Influence by pressing the right button For other types of measurements this option is not available 3 Press F2 to save Only one measurement per type can be selected as an influence If a measurement of the same type is already assigned this setting its use is changed to Displayed and the new measurement becomes the Influence The measuremen...

Page 31: ...version line and open the Software and Firmware Updates l hich firmware is available including the camera If the version listed in the web site is more recent than the version in the camera download and install it per the instructions on the AEMC site The firmware update process should not be interrupted Before starting the update ensure the instrument batteries are fully charged www com informati...

Page 32: ...the image 8 3 Unable to Save Displayed Image Ensure that the micro SD card is correctly inserted in its slot and that the status bar indicates the card is present see 1 4 1 1 Check the micro SD card to see if it is full with FAT16 formatting check the number of entries in the root see 1 5 7 Ensure the micro SD card is not corrupted and that you can read modify its content on a computer via the USB...

Page 33: ...d only when there is a new acquisition If a device is connected but acquisition has been stopped its measurements will not be displayed until there has been another acquisition Following an incorrect reading the measurement read and the measurement expected may not be consistent This can prevent refreshing To eliminate this change the measurement function on the device and then change it back to t...

Page 34: ...d Optics Cleaning WARNING The infrared lens coating is very fragile Avoid leaving fingerprints on the lens Avoid rubbing the lens unnecessarily If there is dust on the lens if possible use non contact cleaning methods such as compressed dry nitrogen an air bulb and so on If you must wipe the lens first use air to blow away as much dust as possible Then clean the lens with a soft absorbent lint fre...

Page 35: ...35 APPENDIX A MENU TREE Display Files and Setup Menus www com information itm com 1 800 561 8187 ...

Page 36: ...36 Target Parameters and About Menus www com information itm com 1 800 561 8187 ...

Page 37: ...37 Recall Menus www com information itm com 1 800 561 8187 ...

Page 38: ...Pure lead without oxidation 257 437 125 225 0 06 0 08 Slightly oxidized 77 572 25 300 0 20 0 45 Magnesium Magnesia 527 1517 275 825 0 55 0 20 1652 3038 900 1670 0 2 Mercury 32 212 0 100 0 09 0 12 Nickel Polished by anodizing 77 25 0 05 Electrolyzed 68 20 0 01 Nickel wire 365 1850 185 1010 0 09 0 19 Nickel foil oxidized 388 1112 198 600 0 37 0 48 Nickel oxide 1202 2291 650 1255 0 59 0 86 Nickel all...

Page 39: ...ools Point cursor Area cursor Temperature profile Minimum maximum Isothermal Adjustment Automatic or manual adjustment of the minimum maximum palette Correction Emissivity target distance ambient temperature relative humidity Isotherms Display in color of a temperature range adjustable by the user Vocal message Via Bluetooth headset Software CAmReport Data analysis and report writing software Lase...

Page 40: ... CSA on the outside of the shipping container If the instrument is returned for calibration we need to know if you want a standard calibration or a calibration traceable to N I S T Includes calibration certificate plus recorded calibration data Or contact your authorized distributor Costs for repair standard calibration and calibration traceable to N I S T are available NOTE You must obtain a CSA ...

Page 41: ...may return the instrument to us for repair provided we have your warranty registration information on file or a proof of purchase AEMC Instruments will at its option repair or replace the faulty material REGISTER ONLINE AT Warranty Repairs What you must do to return an Instrument for Warranty Repair First request a Customer Service Authorization Number CSA by phone or by fax from our Service Depar...

Reviews: