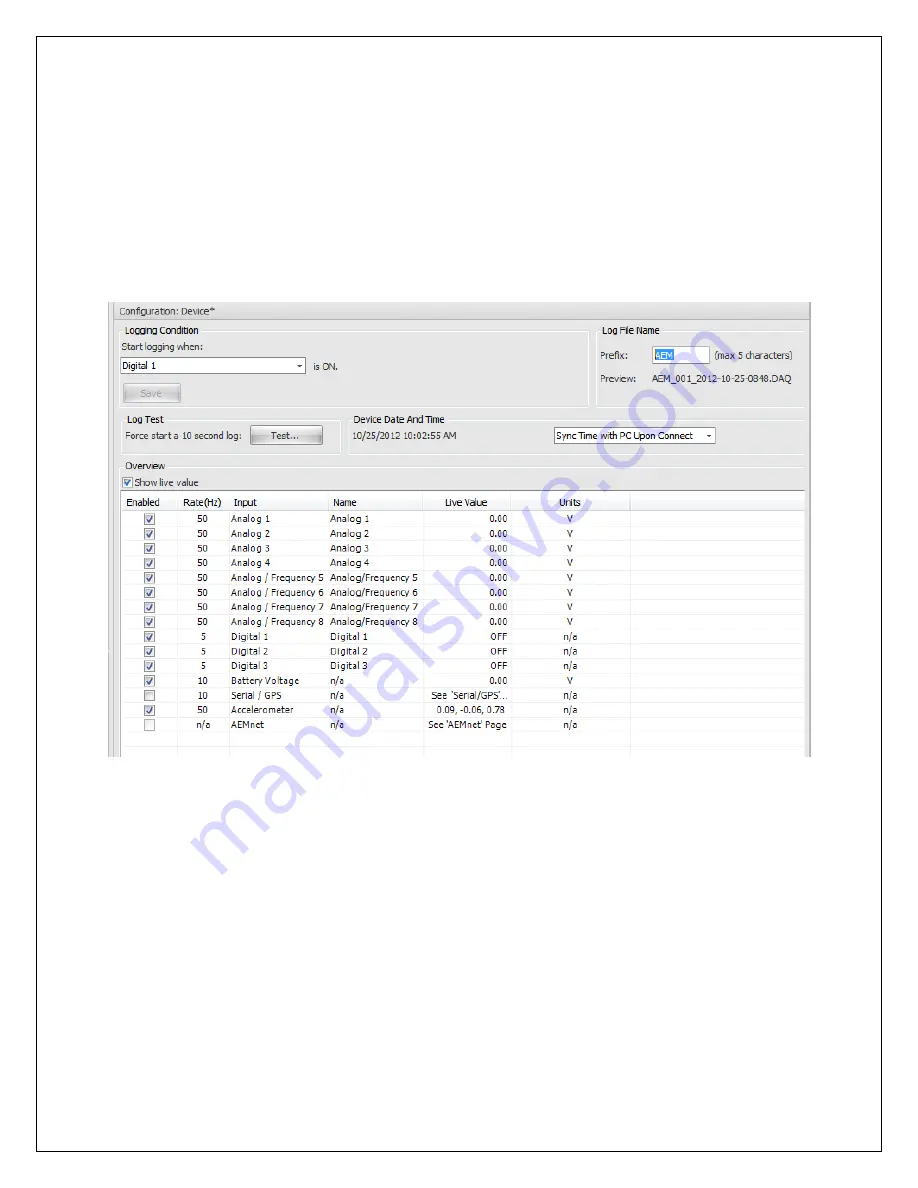
INPUT CHANNEL OVERVIEW
The input channel overview page shows an overview of the input channels and is used
for setting the logging condition, as well as naming log files. The Logging Condition
determines when the AQ1 Data Logger starts logging. In the example below, the AQ1
Data Logger will start logging when digital input 1 is turned on (grounded). Input
channels are enabled/disabled with the check box in the enabled column. The Sync
with PC button is used to sync the internal AQ1 Data Logger clock with the PC clock or
a GPS. The internal AQ1 Data Logger clock is used for the time stamp on log files.
The clock must be re sync’d after perm power has been removed. See Figure 10
below.
ANALOG 1-4 INPUTS
The pages for analog 1-4 are used to configure the analog 1-4 inputs, as well as show
live data for easy setup and troubleshooting. Channels are enabled by the enabled
check box. Both calibrated and raw (non-calibrated) live data are shown in the Live
Data section. The sample rate is selected in the Sample Rate box. Users are able to
name channels in the Name window. The optional 2200 ohm pullup resistor is enabled
by the Enable 2200 Ohm pull-up resistor check box. The 2200 ohm pullup resistor
should only be enabled when an input from an RTD or Thermistor type temp sensor is
being used. Sensors are selected by clicking on the browse button in the Wizard Name
box. A graph and table of the sensor calibration data are also shown at the bottom of
the page. The units can be changed by clicking on the browse button in the Units box.
Figure 11 below shows Analog 1 configured for a GM style water temp sensor. Figure
12 below shows the GM style water temp sensor in the sensor wizard.
Figure 10. Input Channel Overview Page


