background image


A drill template for the AQ1 Data Logger is provided on the last page of the instruction 
manual.  Drill the four mounting holes with a 3/16

” drill bit.  With the dust cover on the 

AQ1 Data Logger module, secure the module using the supplied 6-

32 x 1 ¼” stainless 

screws and nuts.  Some resistance will be felt when inserting the mounting screws for 
the first time as the screws will pierce the dust cover.   A sharp pick or paper clip can be 
used to make pilot holes in the dust cover if desired.  

Note: the dust cover is made of 

a specially selected material that allows the cover to be flexible, yet does not rip 
or tear.  


WIRING


Power Connections 
 

RED (PERM PWR)- Connect to a fused (5 Amp) constant 12 volt power source. 


RED (SWIGN) 

– Connect to a fused (5 Amp) switched 12 volt power source.   


BLACK (BATT GND) 

– Connect to a clean power ground.  (Do not connect to a sensor 

ground) 
 

AEMnet 
 

AEMnet is an open architecture software and hardware interface based on the CAN 2.0 
specification, which provides the ability for multiple enabled devices to easily 
communicate with each other through a single cable. The hardware connection is made 
through a Deutsch 4P DTM connector and contains 12 volt switched power and ground 
(2A max) as well as the CAN data lines. Devices connected to the AEMnet transmit 
data through this one connection and most of these devices receive power from this 
same connection as well. 
 

The following AEM products are currently AEMnet enabled: 
 

Series 2 Engine Management System 
 
EMS-4 Universal Standalone Engine Management System 
 
4-Channel Wideband UEGO Controller 
 
AQ-1 Data Logger 

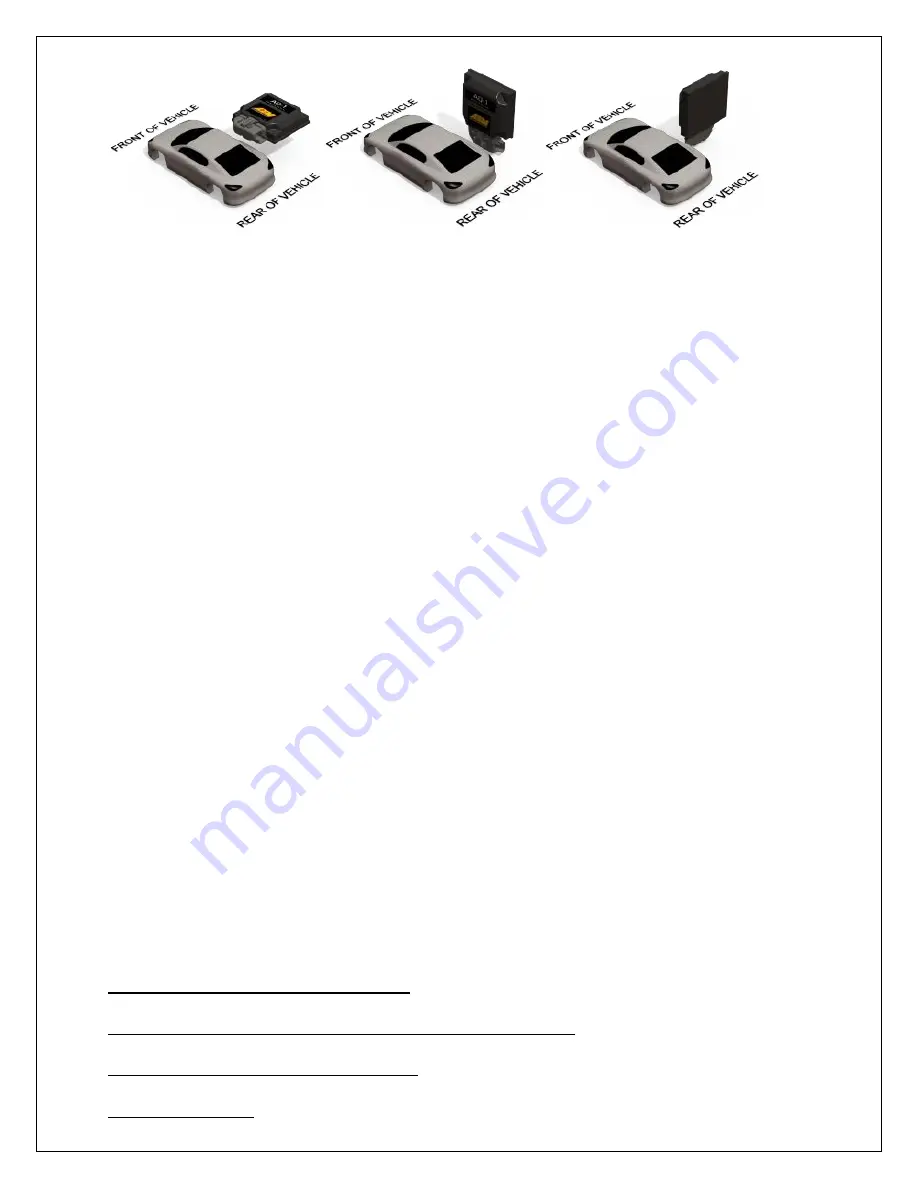
Figure 1.  Common Mounting Orientations 

Summary of Contents for 30-2500

Page 1: ...P N 30 2500 AQ1 Data Logger Instruction Manual...

Page 2: ...nstallation 2 Using the AQ1 Data Logger 7 Connector Pinout 17 Specifications 19 Notes 19 Recommended Parts 21 Replacement Parts 21 Warranty 21 Drill Template 22 INSTALLATION MOUNTING THE AQ1 DATA LOGG...

Page 3: ...RED SWIGN Connect to a fused 5 Amp switched 12 volt power source BLACK BATT GND Connect to a clean power ground Do not connect to a sensor ground AEMnet AEMnet is an open architecture software and har...

Page 4: ...orresponding wires in the harness for Analog 1 4 are Yellow and are labeled INPUT 1 INPUT 2 INPUT 3 and INPUT 4 Analog Frequency 5 8 are analog inputs for that can optionally measure frequency 0 5 V o...

Page 5: ...below shows wiring diagrams for an on off activation switch and a nitrous solenoid The corresponding wires in the harness for Digital 1 3 are Brown and are labeled SW 1 SW 2 and SW 3 SENSOR POWER The...

Page 6: ...S connection is shown below in Figure 5 AEM recommends using one of the Garmin GPS models listed below Garmin GPS 18x PC 1 Hz model with DB9 connector and 12 volt power adapter Garmin GPS18x 5Hz 5 Hz...

Page 7: ...r viewing and analysis of log files USING THE SOFTWARE Double click on the AQ1 Data Acquisition software icon and open the AQ1 Data Logger software The icon for the AQ1 Data Acquisition software is sh...

Page 8: ...the AQ1 Data Logger software provides a quick reference to detailed information about the options and functionality for each page in the software See Figure 9 below Figure 8 AQ 1 Dropdown Menu Figure...

Page 9: ...1 4 inputs as well as show live data for easy setup and troubleshooting Channels are enabled by the enabled check box Both calibrated and raw non calibrated live data are shown in the Live Data secti...

Page 10: ...Figure 11 Analog 1 Configured for GM Style Water Temp Sensor Figure 12 Selecting a Sensor...

Page 11: ...The Input Mode is user selectable from the following six options Analog Frequency Period Duty Cycle Vehicle Speed and Engine Speed Figure 13 below shows Analog Frequency 5 configured for engine speed...

Page 12: ...e is used for calibrating the accelerometer After mounting the AQ1 Data Logger module the accelerometer must be calibrated in order to display accurate data Click on the Choose and Calibrate button in...

Page 13: ...AQ1 Data Logger records the data When logging the data stream from an AEM EMS the input mode must be set to AEM EMS The baud rate must be set to 19200 Figure 17 below shows the AQ1 Data Logger configu...

Page 14: ...cted to the AEMnet are automatically detected and require no configuration The AEMnet page is shown below in Figure 18 LOG NOTES User notes can be entered in the Log Notes page Notes will be saved wit...

Page 15: ...used for converting and downloading LOG files from the SD card To convert and open a LOG file select a file and click the open button See Figure 20 below Selecting the Delete logs from AQ 1 checkbox...

Page 16: ...ining log time are shown as well as the device serial number and firmware version The status of the AQ1 Data Logger is also shown at the bottom left corner of the screen When the AQ1 Data Logger is co...

Page 17: ...ave a backup copy of any logger configuration files Go to AQ1 Update Firmware and the AQ 1 Bootloader pop up window will appear Click on the Open Firmware File button and follow the on screen instruct...

Page 18: ...16V Max INPUT 7 15 Analog Frequency 8 5V 16V Max INPUT 8 16 RS 232 Tx Output NOT APPLICABLE 17 RS 232 Rx Input NOT APPLICABLE 18 RS 232 USB GND NOT APPLICABLE 19 Power Ground BATT GND 20 Sensor 5V 5 V...

Page 19: ...te you should set for a particular channel since there is no reason to have a very high update rate for a sensor that cannot update at the same speed or faster For example a coolant temperature sensor...

Page 20: ...capability of the SD SDHC card An error message will be displayed during LOG file conversion if data has been lost Total Data Rate This is the data rate bytes second at which data will be written to t...

Page 21: ...terial and workmanship for a period of twelve 12 months from date of the original purchase Products that fail within this 12 month warranty period will be repaired or replaced at AEM s option when det...

Page 22: ...size The two vertical lines on the drill template are spaced one inch apart when the drill template is printed to the proper size Verify the two vertical lines are one inch apart on the printed drill...

Reviews: