background image

• While you load cutlery and dishes, do these steps:

– Load hollow items (e.g. cups, glasses and pans) with the opening down.

– Make sure that water does not collect in the container or in a deep base.

– Make sure that cutlery and dishes do not lie inside one another.

– Make sure that cutlery and dishes do not cover other cutlery and dishes.

– Make sure that glasses do not touch other glasses.

– Put small objects in the cutlery basket.

• Plastic items and pans with non-stick coatings can retain water droplets. Plastic items

do not dry as well as porcelain and steel items.

• Put light items in the upper basket. Make sure that the items do not move.

CAUTION!

Make sure that the spray arms can move freely before you start a washing program.

WARNING!

Always close the door after you load or unload the appliance. An open door can be dan

-

gerous.

Lower basket

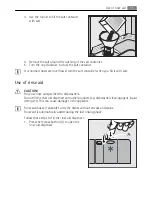
Put large and heavily soiled dishes and pans in the

lower basket.

The rows of prongs in the lower basket can be ad

-

justed flat to load large dishes, pots, pans and

bowls.

Loading cutlery and dishes

13

Summary of Contents for FAVORIT 88015 VI

Page 1: ...Favorit 88015 VI User manual Dishwasher ...

Page 2: ...e aid dosage 12 Loading cutlery and dishes 12 Helpful hints and tips 12 Lower basket 13 Cutlery basket 14 Upper basket 15 Adjustment of the height of the upper basket 15 Use of detergent 16 Multitab function 17 To activate the multitab function 18 To activate deactivate the rinse aid dispenser 18 Select and start a washing program 18 Select and start a washing program with delay start 19 Cancellin...

Page 3: ...repair this appliance Use only original spare parts Do not do repairs yourself to prevent injury and damage to the appliance Always contact the Customer Care Centre General safety Dishwasher detergents are very dangerous Be careful they do not touch eyes mouth and skin Keep the children away from the appliance when the door is open Obey the safety instructions from the manufacturer of the dishwash...

Page 4: ... not change the specifications or modify this product Risk of injury and damage to the appliance Do not use the appliance if the mains cable or water hoses are damaged if the control panel worktop or plinth area are damaged so that you can get access to the inner side of the appliance Contact your local Customer Care Centre Do not drill into the sides of the appliance to prevent damage to hydrauli...

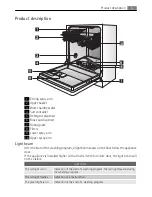
Page 5: ...ashing program a light beam shows on the floor below the appliance door If the appliance is installed higher with a flush kitchen furniture door the light beam will not be visible Light beam The red light is on Indication of the start of a washing program The red light stays on during the washing program The red light flashes Indication of a malfunction The green light is on Indication of the end ...

Page 6: ...r some hours but it does not have an unwanted effect on the operation of the appliance 1 The indicator light comes on when it is necessary to fill the rinse aid container Refer to Use of rinse aid End of program this indicator light comes on when the washing program is completed 1 The indicator light is off while a washing programme operates Digital display The display shows adjusted level of the ...

Page 7: ...e the detergent dosage when you use the half load option Press the half load button to set the option The half load indicator light comes on when the half load option is selectable Function buttons Use the function buttons for these operations to set the water softener Refer to Setting the water softener to deactivate activate the audible signals Refer to Deactivation activation oftheaudible signa...

Page 8: ...on buttons A B and C start to flash 4 Press the function button C Indicator lights for function buttons A and B go off Indicator light for function button C flashes The digital display shows the setting Audible signals deactivated Audible signals activated The audible signals are activated 5 Press the function button C again The digital display shows the new setting The audible signals are deactiv...

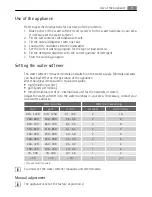
Page 9: ...ffect on the operation of the appliance Water hardness is measured in equivalent scales mg I millimol per litre ppm parts per million mmol l millimol per litre international unit for the hardness of water Adjust the water softener in to the water hardness in your area If necessary contact your local water authority Water hardness Water hardness setting mg l ppm mmol l manually electronically 910 1...

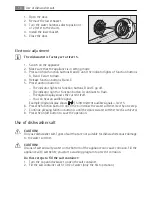
Page 10: ... can hear an audible signal Example digital display shows 5 intermittent audible signals level 5 6 Press the function button A one time to increase the water softener level by one step 7 Continue pressing function button A until the desired water softener level is achieved 8 Press the on off button to save the operation Use of dishwasher salt CAUTION Only use dishwasher salt Types of salt that are...

Page 11: ...aid CAUTION Only use rinse aid specified for dishwashers Do not fill the rinse aid dispenser with other products e g dishwasher cleaning agent liquid detergent This can cause damage to the appliance Rinse aid makes it possible to dry the dishes without streaks and stains Rinse aid is automatically added during the last rinsing phase Follow these steps to fill the rinse aid dispenser 1 Press the re...

Page 12: ... increase or decrease the dosage Increase the dosage if there are water droplets or limescale on the dishes Decrease the dosage if there are streaks whitish stains or bluish layers on the dishes Wash hands to remove any residue of rinse aid from skin Loading cutlery and dishes Helpful hints and tips CAUTION Only use the appliance for household utensils that are suitable for dishwashers Do not use ...

Page 13: ...sket Plastic items and pans with non stick coatings can retain water droplets Plastic items do not dry as well as porcelain and steel items Put light items in the upper basket Make sure that the items do not move CAUTION Make sure that the spray arms can move freely before you start a washing program WARNING Always close the door after you load or unload the appliance An open door can be dan gerou...

Page 14: ...n the cutlery basket For larger items use only one of the cutlery grids Put forks and spoons with the handles down Put knives with the handles up If the points of the knives or other thin items come out from the bottom of the basket they can pre vent the rotation of the lower spray arm Put knives and other thin items with the handles down Mix spoons with other cutlery to prevent them nesting toget...

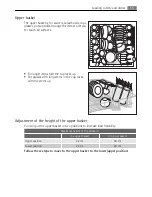
Page 15: ... long stems in the cup racks with the stems up Adjustment of the height of the upper basket You can put the upper basket in two positions to increase load flexibility Maximum height of the dishes in the upper basket the lower basket Upper position 22 cm 30 cm Lower position 24 cm 29 cm Follow these steps to move to the upper basket to the lower upper position Loading cutlery and dishes 15 ...

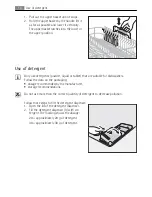
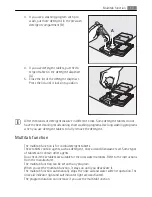
Page 16: ...are suitable for dishwashers Follow the data on the packaging dosage recommended by the manufacturer storage recommendations Do not use more than the correct quantity of detergent to decrease pollution Follow these steps to fill the detergent dispenser 1 Open the lid of the detergent dispenser 2 Fill the detergent dispenser A with de tergent The marking shows the dosage 20 approximately 20 g of de...

Page 17: ...e the detergent Multitab function The multitab function is for combi detergent tablets These tablets contain agents such as detergent rinse aid and dishwasher salt Some types of tablets can contain other agents Do a check if these tablets are suitable for the local water hardness Refer to the instructions from the manufacturer The multitab function can be set with any program When you set the mult...

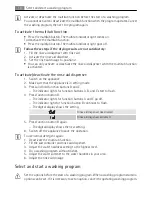
Page 18: ...ess and hold function buttons B and C The indicator lights for function buttons A B and C start to flash 4 Press function button B The indicator lights for function buttons A and C go off The indicator light for function button B continues to flash The digital display shows the setting Rinse aid dispenser deactivated Rinse aid dispenser activated 5 Press function button B again The digital display...

Page 19: ...e the door The countdown of the delay start starts When the countdown is completed the washing program starts automatically If you open the door during the countdown this will interrupt the countdown When you close the door again the countdown continues from the point of interruption Cancelling delay start 1 Press and hold function buttons B and C until the lights of the program selection buttons ...

Page 20: ...or some minutes before you remove the dishes Let the dishes cool down before you remove them from the appliance Hot dishes are easily damaged Standby mode If you do not switch off the appliance at the end of the washing program the appliance automatically goes into standby mode The standby mode decreases energy consumption Three minutes after the end of the program all indicator lights go off and ...

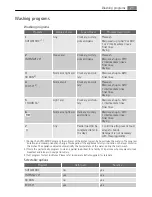
Page 21: ...y Main wash up to 45 C 1 intermediate rinse Final rinse Drying 7 Any Partial load to be completed later in the day 1 cold rinse to prevent food scraps to bond Detergent is not necessary with this programme 1 During the AUTO MATIC program the soil level of the dishes is given by how cloudy the water is The program duration and consumptions can change This depends if the appliance is fully or not an...

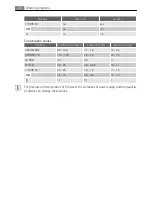
Page 22: ... in litres AUTO MATIC 90 130 1 1 1 8 12 25 INTENSIV 70 110 120 1 8 2 0 23 25 30 MIN 30 0 9 9 ECO 50 90 95 0 8 0 88 10 11 1 HOUR 55 45 55 1 0 1 2 11 12 65 75 0 8 0 9 14 15 12 0 1 4 The pressure and temperature of the water the variations of power supply and the quantity of dishes can change these values 22 Washing programs ...

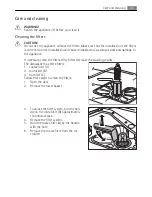
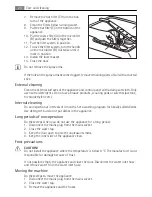
Page 23: ... If necessary clean the filters Dirty filters decrease the washing results The dishwasher has three filters 1 coarse filter A 2 microfilter B 3 flat filter C Follow these steps to clean the filters 1 Open the door 2 Remove the lower basket 3 To unlock the filter system turn the han dle on the microfilter B approximately 1 4 anticlockwise 4 Remove the filter system 5 Hold the coarse filter A by the...

Page 24: ...vents acetone trichloroethylene etc Internal cleaning Do an inspection at intervals of 3 months Set a washing program for heavily soiled dishes Use detergent but do not put dishes in the appliance Long periods of non operation Do these steps when you do not use the appliance for a long period 1 Disconnect the mains plug from the mains socket 2 Close the water tap 3 Keep the door open to prevent un...

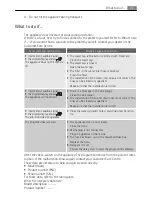
Page 25: ... The appliance will not drain There is a blockage in the sink spigot Clean the sink spigot The installation of the water drain hose is not correct The hose can be kinked or squashed Make sure that the installation is correct intermittent audible signal the digital display shows The anti flood device operates Close the water tap and contact your Customer Care Cen tre The program does not start The ...

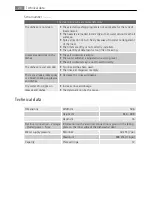
Page 26: ...ed on a wrong level The salt container cap is not closed correctly The dishes are wet and dull No rinse aid has been used The rinse aid dispenser is empty There are streaks milky spots or a bluish coating on glasses and dishes Decrease the rinse aid dosage Dry water drop signs on glasses and dishes Increase rinse aid dosage The detergent can be the cause Technical data Dimensions Width cm 59 6 Hei...

Page 27: ... water supply Cold water pressure 800 kPa max 50 kPa min Water flow rate 10 L minute min If cold water pressure is in excess of 800 kPa a pressure reducing valve should be used Check for leaks WARNING Make sure that mains plug is disconnected from the mains socket during installation CAUTION Obey the instructions in the enclosed template to build in the appliance install the furniture door connect...

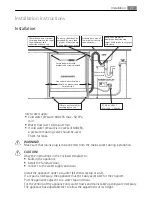
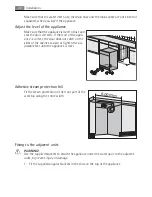
Page 28: ...door does not catch on the sides of the cabinet Loosen or tighten the ad justable feet until the appliance is level Adhesive steam protection foil Fit the steam protection on the front part of the worktop along the entire width Fixing to the adjacent units WARNING Use the supplied brackets to attach the appliance under the worktop or to the adjacent units to prevent injury or damage 1 Fit the supp...

Page 29: ...e Open and close the door slowly If the door touches the kick panel trim to prevent interference Attach the kick panel to adjacent cabinets so that if service is necessary you can remove it Water connection Water inlet hose Connect the appliance to a cold water supply Connect the inlet hose to a water tap with an external BSP thread spout of 3 4 CAUTION Always use new hoses when you connect the ap...

Page 30: ...t to shorten the inlet hose If the water inlet hose or the safety valve is damaged immediately turn off the power and remove the mains plug from the mains socket Only a qualified Service Engineer can replace the water inlet hose with safety valve WARNING Dangerous voltage In order to pass the safety valve through the kitchen cabinets an opening of at least 45mm x 90mm is needed Water drain hose Us...

Page 31: ... Prior to using the appliance for the first time ensure that the rated voltage and type of supply on the rating plate match that of the supply where the appliance is to be installed The fuse rating is also to be found on the rating plate Always plug the mains plug onto a correctly installed approved socket Do not use multi ways plugs connectors and extension cables This can constitute a fire hazar...

Page 32: ...AEG ELECTROLUX This document sets out the terms and conditions of product warranties for Elec trolux branded appliances It is an important document Please keep it with your proof of purchase documents in a safe place for future reference should you require service for your Electrolux appliance General Terms and Conditions 1 In this warranty Electrolux means Electrolux Home Products Pty Ltd ABN 51 ...

Page 33: ...0800 10 66 10 in New Zealand 7 Proof of purchase is required before you can make a claim under this warranty 8 You may not make a claim under this warranty unless the defect claimed is due to faulty or defective parts or workmanship Electrolux is not liable in the following sit uations which are not exhaustive The Appliance is damaged by i accident ii misuse or abuse including failure to properly ...

Page 34: ...ew Zealand loss or damage whether direct or indirect or consequential that is reasonably foreseeable Privacy You acknowledge that in the event that you make a warranty claim it will be necessary for Electrolux and its Authorised Service Centres to exchange information in relation to you to enable Electrolux to meet its obligations under this warranty Important Notice Before Calling a Service Techn...

Page 35: ...35 ...

Page 36: ...www electrolux com www aeg electrolux com au 117960280 00 102008 ...

Reviews: