background image


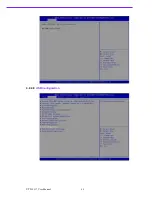
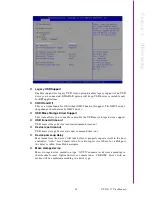
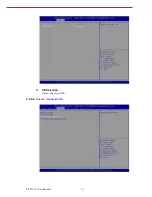
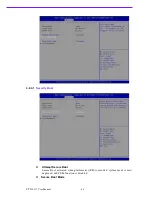
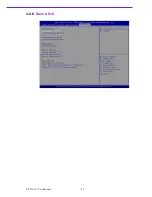
Secure Boot mode - Custom & Standard, Set UEFI Secure Boot Mode to STAN- 
DARD mode or CUSTOM mode, this change is effect after save. And after eset, 
the mode will return to STANDARD mode.


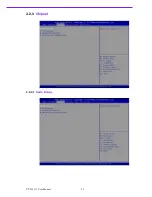
4.2.5  

Boot


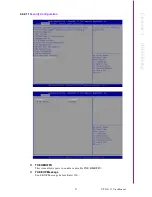
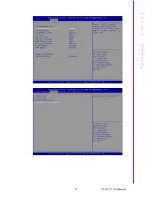
Bootup NumLock State


Select the keyboard NumLock state.


Quiet Boot


Enables or disables Quiet Boot option.


61


UTX-3117 User Manual


C

h

a

p

te

r


4


B

IO

S


S

e

tu

p


Summary of Contents for UTX-3117

Page 1: ...iate or consequential resulting from the use of the information provided herein Our products are not intended for use in systems in which failures of product could result in personal injury All trademarks mentioned herein are property of their respective owners All specifications are subject to change without notice Manual ADVANTECH UTX 3117 Embedded BOX PC with Intel Apollo Lake Prozessor ...

Page 2: ...User Manual UTX 3117 ...

Page 3: ...mes no liability under the terms of this warranty as a consequence of such events Because of Advantech s high quality control standards and rigorous testing most of our customers never need to use our repair service If an Advantech product is defec tive it will be repaired or replaced at no charge during the warranty period For outof warranty repairs you will be billed according to the cost of rep...

Page 4: ...r more of the following measures Reorient or relocate the receiving antenna Increase the separation between the equipment and receiver Connect the equipment into an outlet on a circuit different from that to which the receiver is connected Consult the dealer or an experienced radio TV technician for help Warning Any changes or modifications made to the equipment which are not expressly approved by...

Page 5: ... must be located near the equip ment and must be easily accessible 5 Keep this equipment away from humidity 6 Put this equipment on a reliable surface during installation Dropping it or letting it fall may cause damage 7 The openings on the enclosure are for air convection Protect the equipment from overheating DO NOT COVER THE OPENINGS 8 Make sure the voltage of the power source is correct before...

Page 6: ...oth 20 Contact information No 1 Alley 20 Lane 26 Rueiguang Road Neihu District Taipei Taiwan 114 R O C TEL 02 27927818 Industry Canada Statement This device complies with RSS 210 of the Industry Canada Rules Operation is sub ject to the following two conditions 1 This device may not cause harmful interfer ence and 2 this device must accept any interference received including interference that may ...

Page 7: ...dpovídá požadavkům evropských směrnic 2004 108 EC 2006 95 EC 1999 5 EC a 2011 65 EU Dansk Dette produkt er i overensstemmelse med det europæiske direktiv 2004 108 EC 1999 5 EC 2006 95 EC 2011 65 EU Dutch Dit product is in navolging van de bepalingen van Europees Directief 2004 108 EC 1999 5 EC 2006 95 EC 2011 65 EU Eesti Antud toode vastab Euroopa direktiivides 2004 108 EC ja 2006 95 EC ja 1999 5 ...

Page 8: ...da Diretiva Européia 2004 108 EC 1999 5 EC 2006 95 EC 2011 65 EU Español Este producto cumple con las normas del Directivo Europeo 2004 108 EC 1999 5 EC 2006 95 EC 2011 65 EU Slovensky Tento produkt je v súlade s ustanoveniami európskych direktív 2004 108 EC 1999 5 EC 2006 95 EC a 2011 65 EU Slovenščina Izdelek je skladen z določbami evropskih direktiv 2004 108 EC 1999 5 EC 2006 95 EC in 2011 65 E...

Page 9: ...5 E3940 4C 2M 1 6GHz 32GB 4GB X 1 NA NA NA 4 NA UTX 3117FSW S6A1N PENTIUM N4200 4C 2M 1 1GHz 32GB 4GB X 1 NA NA NA 4 WIN 10 UTX 3117FSP S6A2N CELERON N3350 2C 2M 1 1GHz 32GB 4GB X 1 NA NA NA 4 Pulsar 8 UTX 3117C S6A2N CELERON N3350 2C 2M 1 1GHz NA NA NA NA NA NA NA UTX 3117C S6A2E Atom X5 E3940 4C 2M 1 6GHz NA NA NA NA NA NA NA UTX 3117C S6A1N PENTIUM N4200 4C 2M 1 1GHz NA NA NA NA NA NA NA UTX 31...

Page 10: ... power adapter 1757004096 01 170203183C Power Cable 3 pin 180cm Europe type For power adapter 1757004096 01 170203180A Power Cable 3 pin 180cm UK type For power adapter 1757004096 01 1700008921 Power Cable 3 pin 183cm PSE Mark type For power adapter 1757004096 01 Optional Items ix UTX 3117 User Manual ...

Page 11: ...UTX 3117 User Manual x ...

Page 12: ...et SIM1 13 2 2 7 Low Pin Count Header LPC1 13 2 2 8 MINIPCIE and mSATA Connector MINI PCIE2 14 2 2 9 SPI Programming Pin Header SPI_CN1 15 2 2 10 COM Port COM1 16 2 2 11 General Purpose I O Pin Header GPIO1 16 2 2 12 HD Analog Audio Interface AUDIO1 17 2 2 13 COM Port COM2 17 2 2 14 Next Generation Form Factor M 2_1 18 2 2 15 SATA Signal Connector SATA1 19 2 2 16 USB 3 0 Connector USB1 19 2 2 17 U...

Page 13: ...4 2 1 Main Menu 3 1 4 2 2 Advanced BIOS Features 32 4 2 3 Chipset 5 2 4 2 4 Security Boot 59 4 2 5 Boot 61 4 2 6 Save Exit 6 2 UTX 3117 User Manual xii ...

Page 14: ...Chapter 1 1 This Chapter briefly introduces the UTX 3117 product Introduction ...

Page 15: ...terprise Yocto Linux and Wind River Pulsar OS Furthermore UTX 3117 has Advantech intelligent software WISE PaaS integrated and is certificated with AWS Greengrass IoT solution to offer a total solution for bridging connectivity from edge sensors to the cloud Benefits Ultra Thin ITX embedded system with CE FCC certification Fanless wide temperature operation with high performance and flexibility De...

Page 16: ...xx SoC TDP 5 5 13W PCIE x1 USB2 0 PCIE x1 USB2 0 SATA 3 0 GbE 2 RTL8111G F S mini PCIE w SIM hold 3G LTE module H S mini PCIE Colay mSATA M 2 E key WIFI GPS BT Zigbee module PCIE x1 USB2 0 Power DCIN12 24V LPC Bus TPM Infineon SLB9660 Super I O NCT5523D 1 RS 232 1 RS 422 485 8bit GPIO WDT H Wmoitor Button I O arrangement USB 3 0 LAN HDMI DP HDD LED Power Bu on WSN ANT Audio Jack RS 422 485 RS 232 ...

Page 17: ... F S miniPCIE support 3G LTE card 1 H S miniPCIE support mSATA WIFI card 1 M 2 E key support WiFI card Storage housing 1 2 5 slim SSD Audio output Combo Audio Jack Video output 1 HDMI 1 Display port 1 3 2 Power Environmental Power adaptor AC DC Input voltage 100 Vac 240 Vac 50 60 Hz 1 5 A Output voltage 12 V 3 A 24V 3A 1 4 Mechanical Specifications 1 4 1 Mechanical Specifications Terminal System D...

Page 18: ...re 20 60 C with RF module Storage Temperature 40 60 C Relative Humidity 40 95 RH Non condensed Safety CE UL CB CCC BSMI EMI FCC class B approved for USA Canada and EU Vibration With SSD 3Grms 60068 2 64 random 5 500 Hz 1 hr axis 5 UTX 3117 User Manual Chapter 1 Introduction ...

Page 19: ...UTX 3117 User Manual 6 ...

Page 20: ...Chapter 2 2 Connector List Jumper and ...

Page 21: ...2 1 Connectors Jumpers Figure 2 1 Top View UTX 3117 User Manual 8 ...

Page 22: ...mming Pin Header SPI_CN1 10 COM Port COM1 11 General Purpose I O Pin Header GPIO1 12 HDAnalog Audio Interface AUDIO1 13 COM Port COM2 14 Next Generation Form Factor M 2_1 15 SATA Signal Connector SATA1 16 USB 3 0 Connector USB1 17 SATA Power Connector SATA_PWR1 18 USB 3 0 Connector USB2 19 RJ45 Connector LAN2 20 RJ45 Connector LAN1 21 High Definition Multimedia Interface HDMI1 22 DisplayPort DP1 2...

Page 23: ...22 Table 2 1 RS485 RS422selection pin header J485 422 Function Setting RS485 Default 1 2 3 1 2 3 1 and 2 RS232 2 and 3 Table 2 2 AT ATX Mode Selection PSON1 Function Setting AT Mode 1 2 3 1 2 3 1 and 2 ATX Mode Default 2 and 3 2 2 Connectors 2 2 1 CPU System on chip SOC1 UTX 3117 User Manual 10 ...

Page 24: ...I_Z_CS0 6 SPI_Z_CLK 2 SPI_Z_MISO 7 SPI_Z_IO3 3 SPI_Z_IO2 8 V1 8SB_SPI 4 GND 5 SPI_Z_MOSI 2 2 3 DDR3L SO DIMM Socket DIMMA1 2 2 4 DC input Connector DCIN1 Pin Signal 1 Power input 2 GND 3 GND 11 UTX 3117 User Manual Chapter 2 Jumper and Connector List ...

Page 25: ... GND 16 SIM_SPU1 17 Reserved 18 GND 19 Reserved 20 DISABLE 21 GND 22 RESET 23 Reserved 24 3 3Vaux 25 Reserved 26 GND 27 GND 28 1 5V 29 GND 30 Reserved 31 Reserved 32 Reserved 33 MINI PCIE1 _RESET 34 GND 35 GND 36 USB_D 37 GND 38 USB_D 39 3 3Vaux 40 GND 41 3 3Vaux 42 Reserved 43 Reserved 44 Reserved 45 Reserved 46 Reserved 47 Reserved 48 1 5V 49 Reserved 50 GND 51 Reserved 52 3 3Vaux UTX 3117 User ...

Page 26: ...2 GND C3 SIM_CLK1 H3 GND C5 GND H4 GND C6 SIM_SPU1 2 2 7 Low Pin Count Header LPC1 Pin Signal Pin Signal 1 SOC_LPC_AD1 2 CLKOUT_25M_LPC 3 SOC_LPC_AD0 4 PM_PLTRST 5 V3 3 6 SOC_LPC_FRAME 7 GND 8 SOC_LPC_AD3 9 X 10 SOC_LPC_AD2 13 UTX 3117 User Manual Chapter 2 Jumper and Connector List ...

Page 27: ...LE 21 DETECT 22 RESET 23 PCIE_RX 24 3 3Vaux 25 PCIE_RX 26 GND 27 GND 28 1 5V 29 GND 30 SMB_CLK 31 PCIE_TX 32 SMB_DATA 33 PCIE_TX 34 GND 35 GND 36 USB_D 37 GND 38 USB_D 39 3 3Vaux 40 GND 41 3 3Vaux 42 Reserved 43 V1 2_DETECT 44 LED_WLAN 45 Reserved 46 Reserved 47 Reserved 48 1 5V 49 Reserved 50 GND 51 MSATA_DETECT 52 3 3Vaux mSATA Pin Signal Pin Signal 1 Reserved 2 3 3V 3 Reserved 4 GND 5 Reserved ...

Page 28: ..._CLK 31 TX 32 SMB_DATA 33 TX 34 GND 35 GND 36 Reserved 37 GND 38 Reserved 39 3 3V 40 GND 41 3 3V 42 Reserved 43 Reserved 44 Reserved 45 Reserved 46 Reserved 47 Reserved 48 1 5V 49 Reserved 50 GND 51 MSATA_DETECT 52 3 3V 2 2 9 SPI Programming Pin Header SPI_CN1 Pin Signal Pin Signal 1 CS 2 3 3V 3 MISO 4 X 5 X 6 SCK 7 GND 8 MOSI 15 UTX 3117 User Manual Chapter 2 Jumper and Connector List ...

Page 29: ... Pin Signal 1 DCD 6 DSR 2 RXD 7 RTS 3 TXD 8 CTS 4 DTR 9 RI 5 GND 2 2 11 General Purpose I O Pin Header GPIO1 Pin Signal Pin Signal 1 GPIO0 2 GPIO4 3 GPIO1 4 GPIO5 5 GPIO2 6 GPIO6 7 GPIO3 8 GPIO7 9 3 3V 10 GND UTX 3117 User Manual 16 ...

Page 30: ...CONN_FRONT_L 6 GND_A 2 CONN_FRONT_R MS1 GND_A 3 GND_A MS2 GND_A 4 CONN_MIC1_L H1 x 5 FRONT_SENSE_A H2 x 2 2 13 COM Port COM2 Pin Signal 1 COM2_422_485_TX 2 COM2_422_485_TX 3 GND 4 COM2_422_RX 5 COM2_422_RX 17 UTX 3117 User Manual Chapter 2 Jumper and Connector List ...

Page 31: ...FF_I2S3_Z_SDI 54 NGFF_BT_DISABLE 13 SDIO_WIFI_D0 55 PCIE_NGFF_WAKE2 14 NGFF_I2S3_Z_SDO 56 NGFF_WIFI_DISABLE 15 SDIO_WIFI_D1 57 GND 16 x 58 x 17 SDIO_WIFI_D2 59 x 18 GND 60 x 19 SDIO_WIFI_D3 61 x 20 NGFF_CONN_UART_WAKE 62 x 21 SDIO_WIFI_WAKE 63 GND 22 NGFF_UART0_Z_RXD 64 x 23 SDIO_WIFI_RST 65 x 32 NGFF_UART0_Z_TXD 66 x 33 GND 67 x 34 NGFF_UART0_Z_CTS 68 x 35 NGFF_PCIE_TX3 69 GND 36 NGFF_UART0_Z_RTS...

Page 32: ..._Z_TX 8 x 4 GND 9 x 5 SATA0_Z_RX 6 SATA0_Z_RX 2 2 16 USB 3 0 Connector USB1 2 2 17 USB 3 0 Connector USB2 Pin Signal Pin Signal 1 USBV1 7 GND 2 USB_D0 8 USB3X0_Z_TX 3 USB_D0 9 USB3X0_Z_TX 4 GND H1 GND_F1 5 USB3X0_Z_RX H2 GND_F1 6 USB3X0_Z_RX x 19 UTX 3117 User Manual Chapter 2 Jumper and Connector List ...

Page 33: ... LAN1 2 2 20 RJ45 Connector LAN1 RJ45 Pin Signal Pin Signal R1 LAN2_TCT R10 LAN2_MDI3 R2 LAN2_MDI0 R11 LAN1_TCT R3 LAN2_MDI0 H1 GND_LAN R4 LAN2_MDI1 H2 GND_F1 R5 LAN2_MDI1 L1 LAN2_LED1_Z_ACT R6 LAN2_TCTG L2 V3 3_LAN2 R7 LAN2_MDI2 L3 LAN2_LED2_Z_1G R8 LAN2_MDI2 L4 LAN2_LED0_Z_100M UTX 3117 User Manual 20 ...

Page 34: ...1_Z_D1 16 HDMI1_SDA 7 HDMI1_Z_D0 17 GND 8 GND 18 V5_HDMI 9 HDMI1_Z_D0 19 HDMI1_HPD 10 HDMI1_Z_CLK 2 2 22 DisplayPort DP1 Pin Signal Pin Signal 1 DP1_0 11 GND 2 GND 12 DP1_3 3 DP1_0 13 DP1_AUX_EN 4 DP1_1 14 GND 5 GND 15 DP1_AUX 6 DP1_1 16 GND 7 DP1_2 17 DP1_AUX 8 GND 18 DP1_DP_HPD 9 DP1_2 19 GND 10 DP1_3 20 V3 3_DP1 21 UTX 3117 User Manual Chapter 2 Jumper and Connector List ...

Page 35: ...2 2 23 DDR3L SO DIMM Socket DIMMB1 2 2 24 SATA LED D10 2 2 25 Power Button PWRBTN1 UTX 3117 User Manual 22 ...

Page 36: ...Chapter 3 3 Peripheral Installation ...

Page 37: ...3 1 HDD Installation 1 Unscrew the bottom cover screws 2 Secure 2 5 SATA HDD onto the bottom cover The screws are in the accessory box UTX 3117 User Manual 24 ...

Page 38: ...3 Connect SATA signal and power cable to the 2 5 SATA HDD 4 Secure the bottom cover in its original position 25 UTX 3117 User Manual Chapter 3 Peripheral Installation ...

Page 39: ...3 2 Mini PCIe Module Installation 1 Unscrew the bottom cover screws 2 Insert Mini PCIe module into the slot and secure the screw to fix the module UTX 3117 User Manual 26 ...

Page 40: ...3 Connect the antenna cable to module 4 Secure the bottom cover in its original position 27 UTX 3117 User Manual Chapter 3 Peripheral Installation ...

Page 41: ...UTX 3117 User Manual 28 ...

Page 42: ...Chapter 4 4 BIOS Setup ...

Page 43: ...retains the Setup information when the power is turned off Note Default BIOS is supported for 64 bit OS installation if you have any BIOS setting requirement please contact with sales representative for details Control Keys Move select item Enter Select item Esc Main Menu Quit without saving changes to the CMOS Sub Menu Exit current page and return to the Main Menu Page Up Increase the numeric val...

Page 44: ...can The right frame displays the key legend Above the key legend is an area reserved for a text message When an option is selected in the left frame it is highlighted in white Often a text message will accom pany it System time System date Use this option to change the system time and date Highlight System Time or System Date using the Arrow keys Enter new values through the keyboard Press the Tab...

Page 45: ... the left frame of the screen such as CPU Configuration to go to the sub menu for that item You can display an Advanced BIOS Setup option by highlighting it using the Arrow keys All Advanced BIOS Setup options are described in this section The Advanced BIOS Setup screen is shown below The sub menus are described on the following pages UTX 3117 User Manual 32 ...

Page 46: ...4 2 2 1 Realtek PCIe GBE Family Controller Status Check the status of Realtek LAN port 4 2 2 2 Check Intel I201 Gigabit Network connection Status 33 UTX 3117 User Manual Chapter 4 BIOS Setup ...

Page 47: ...4 2 2 3 Trusted Computing UTX 3117 User Manual 34 ...

Page 48: ... Security Device Support Enable or disable BIOS support for security device 4 2 2 4 APCI Settings 35 UTX 3117 User Manual Chapter 4 BIOS Setup ...

Page 49: ...auto configuration Enable Hibernation This item allows users to enable or disable hibernation ACPI Sleep State This item allows users to set the ACPI sleep state Lock Legacy Resource This item allows users to lock legacy device resources UTX 3117 User Manual 36 ...

Page 50: ...4 2 2 5 NCT5523D Super IO Configuration 37 UTX 3117 User Manual Chapter 4 BIOS Setup ...

Page 51: ...ial Port 1 2 Configuration This item allows users to enable or disable serial Ports 1 2 Change Settings This item allows users to change the serial port 1 2 4 2 2 6 Hardware Monitor UTX 3117 User Manual 38 ...

Page 52: ...Bit This item allows users to enable or disable the No Execution page protection Intel Virtualization Technology When enabled a VMM can utilize the additional hardware capabilities provided by Vanderpool Technology 39 UTX 3117 User Manual Chapter 4 BIOS Setup ...

Page 53: ... Digital I O Configuration This item will allow users to set up Digital I O 1 8 to input or output UTX 3117 User Manual 40 ...

Page 54: ... Wake System From S5 Enable or disable system wake on alarm event 41 UTX 3117 User Manual Chapter 4 BIOS Setup ...

Page 55: ... Console Redirection This item allows users to enable or disable console redirection 4 2 2 7 CPU Configuration This page shows CPU Information Active Power Cores UTX 3117 User Manual 42 ...

Page 56: ...e or disable VT d Bi directional PROCHOT When a processor thermal sensor trips either core the PROCHOT will be driven If bi direction is enabled external agents can drive PROCHOT to throt tle the processor Thermal Monitor Enable or disable Thermal Monitor Monitor Mwait Enable disable Monitor Mwait P STATE Coordination Change P STATE Coordination type 43 UTX 3117 User Manual Chapter 4 BIOS Setup ...

Page 57: ...T Enabled or disabled Intel Speed Step function Turbo Mode Enabled or disabled Turbo Mode Boot performance mode Select the performance state that the BIOS will set before OS handoff UTX 3117 User Manual 44 ...

Page 58: ...State Auto Demotion Configure C State Auto Demotion C State Un Demotion Configure C State Un demotion Power Limit 1 Enable Enable Disable Power Limit 1 Power Limit 1 Clamp Mode Enable Disable Power Limit 1 Clamp Mode Power Limit 1 Power Power Limit 1 in Watts Auto will program Power Limit 1 based on silicon default support value Power Limit 1 Time Window Power Limit 1 Time Window Value in seconds ...

Page 59: ... Network Stack Enable or disable UEFI Network Stack UTX 3117 User Manual 46 ...

Page 60: ... CSM Support Enable or disable CSM Support 4 2 2 8 NVMe Configuration 47 UTX 3117 User Manual Chapter 4 BIOS Setup ...

Page 61: ...4 2 2 9 USB Configuration UTX 3117 User Manual 48 ...

Page 62: ...port USB transmit time out USB mass storage device transmit command time out Device reset time out USB mass storage device start unit command time out Device power up delay Maximum time the device will take before it properly reports itself to the host controller Auto uses default value for a Root port it is 100ms for a Hub port the delay is taken from Hub descriptor Mass storage device Mass stora...

Page 63: ...4 2 2 10 Platform Trust Technology fTPM Enabled or disabled fTPM UTX 3117 User Manual 50 ...

Page 64: ...4 2 2 11 Security Configuration TXE HMRFPO This item allows users to enable or disable TXE HMRFPO TXE EOP Message Send EOP Message before Enter OS 51 UTX 3117 User Manual Chapter 4 BIOS Setup ...

Page 65: ...4 2 3 Chipset 4 2 3 1 North Bridge UTX 3117 User Manual 52 ...

Page 66: ...53 UTX 3117 User Manual Chapter 4 BIOS Setup ...

Page 67: ... OS Selection Select the target OS 4 2 3 2 Uncore Configuration UTX 3117 User Manual 54 ...

Page 68: ...55 UTX 3117 User Manual Chapter 4 BIOS Setup ...

Page 69: ...ort Port 1 This item allows users to enable or disable the Serial ATA Port 1 device Spin Up Device This item allows users to enable or disable the Spin Up Device SATA Device Type Identify the SATA port is connected to Solid State Drive or Hard Disk Drive Port 2 This item allows users to enable or disable the Serial ATA Port 2 device Spin Up Device This item allows users to enable or disable the Sp...

Page 70: ...57 UTX 3117 User Manual Chapter 4 BIOS Setup ...

Page 71: ...UTX 3117 User Manual 58 ...

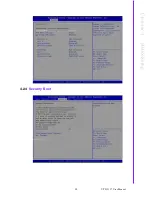
Page 72: ...4 2 4 Security Boot 59 UTX 3117 User Manual Chapter 4 BIOS Setup ...

Page 73: ...4 2 4 1 Security Boot Attempt Secure Boot Secure Boot activated when platform key PK is enrolled system mode is user deployed and CSM function is disabled Secure Boot Mode UTX 3117 User Manual 60 ...

Page 74: ...ARD mode or CUSTOM mode this change is effect after save And after eset the mode will return to STANDARD mode 4 2 5 Boot Bootup NumLock State Select the keyboard NumLock state Quiet Boot Enables or disables Quiet Boot option 61 UTX 3117 User Manual Chapter 4 BIOS Setup ...

Page 75: ...4 2 6 Save Exit UTX 3117 User Manual 62 ...

Page 76: ...63 UTX 3117 User Manual Chapter 4 BIOS Setup ...

Page 77: ...ations are subject to change without notice No part of this publication may be reproduced in any form or by any means electronic photocopying recording or otherwise without prior written permis sion of the publisher All brand and product names are trademarks or registered trademarks of their respective companies Advantech Co Ltd 2018 ...

Page 78: ...tec at Internet www fortec at Germany Distec GmbH Augsburger Str 2b 82110 Germering Phone 49 89 894363 0 E Mail info distec de Internet www distec de Switzerland ALTRAC AG Bahnhofstraße 3 5436 Würenlos Phone 41 44 7446111 E Mail info altrac ch Internet www altrac ch United Kingdom Display Technology Ltd 5 The Oaks Business Village Revenge Road Lordswood Chatham Kent ME5 8LF Phone 44 1634 672755 E ...

Reviews: