UBX-310F User Manual
6
2.1 Quick Tour of the Device
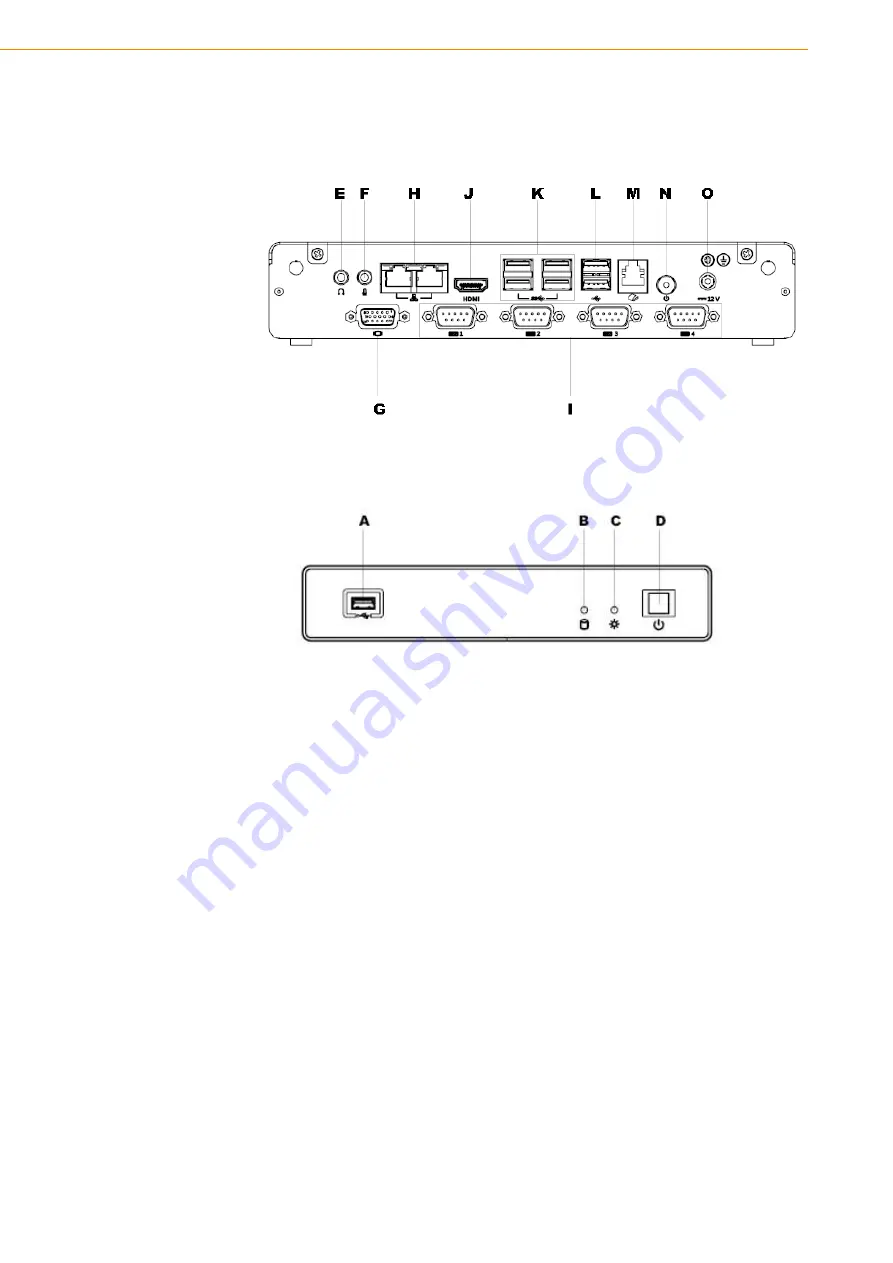
Before setting up the device, take a moment to familiarize yourself with the functions
of the controls, drivers, connectors, and ports located on the front panel, as illustrated
in Figure 2.1.
Figure 2.1 Front view of UBX-310F
Turn the computer to view the I/O, as shown in Figure 2.2.
(The I/O interfaces include serial ports, USB slots, audio-in jack, etc.)
Figure 2.2 Rear view of UBX-310F
2.2 Installation Procedures
2.2.1 Connecting the Power Cord
This product only supports DC power (12 VDC, max. 60 W). Be sure to hold the plug
end when plugging or unplugging the power cord.
2.2.2 Connecting the Mouse and Keyboard
Connect the mouse and keyboard via the USB ports located in the I/O section at the
rear of the computer.
2.2.3 Activating the Power Source
Verify that the power cord is connected to the power input port of the device. Then
connect the plug end of the power cord to the wall power outlet.
A.USB
G. VGA
M. RJ11
B.HDD LED
H.LAN
N. POWER BUTTON
C.Power LED
I. COM
O.DC IN
D. Power Switch
J.HDMI
E. MIC
K.USB3.0
F. LINE OUT
L.USB 2.0
Summary of Contents for UBX-310F
Page 1: ...User Manual UBX 310F Fanless Embedded Box PC...
Page 6: ...UBX 310F User Manual vi...
Page 8: ...UBX 310F User Manual viii...
Page 11: ...3 UBX 310F User Manual Chapter 1 General Information 1 3 Dimensions...
Page 12: ...UBX 310F User Manual 4...
Page 17: ...9 UBX 310F User Manual Chapter 2 System Setup...


