background image


10 


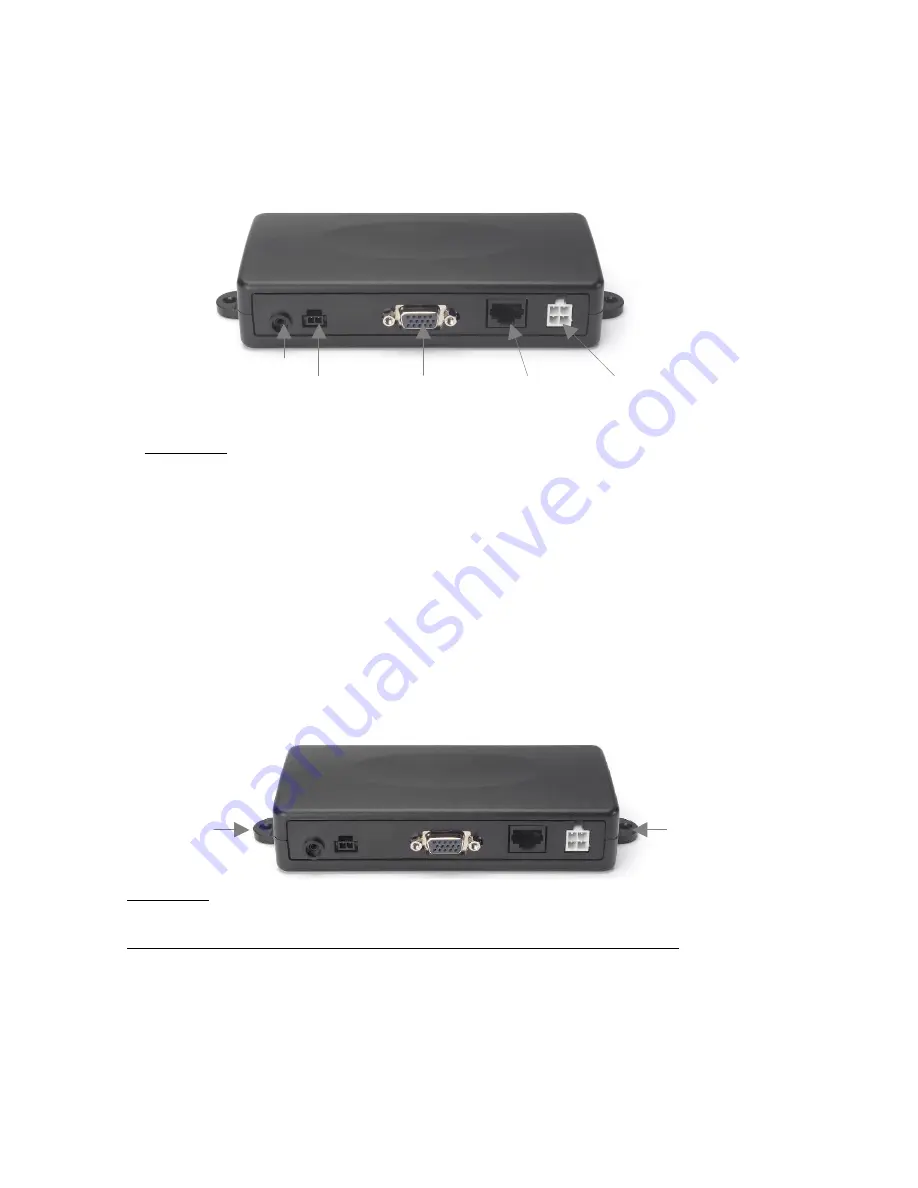
      Mic.                           Speaker                     Control   Module                        Optional                           Power   

                                                                                                                                                                                                                                                                                                                                                Palm   Mic/.                     
                                                                                                                                                                                                                                                                                                                           Handset   w/Cradle   

            Diagram   6   
                                                                                                                        
3.    Connect    the    coaxial    antenna    cable    to    the    corresponding    connector    on    the   
opposite   side   of   the   Junction   Box.         
4.   After   connecting   the   power   cable's   connector   to   the   Junction   Box,      
cut   in   half   the   red   wire   attached   to   the   fuse   housing   supplied.   Cut   the   long   red   
power   lead   to   the   desired   length   and   connect   (crimp)   it   to   the   one   end   of   the   
wire   to   the   fuse   housing.   

5.   Connect   the   other   end   of   the   wire   from   the   red   fuse   housing   to   the   positive   
(+)    side    of    the    ignition.    The    fuse    housing    can    be    secured    in    place    by    using    a   
plastic   tie   or   screw   through   the   hole   in   the   fuse's   plastic   housing   
6.   Mount   the   junction   box   in   place   using   the   2   mounting   screws   supplied.   


Diagram   7   
   

Registering the AdvanceMobile™ QC1 and Programming Numbers 
 
1.  Once  the  AdvanceMobile™  QC1  is  powered,  it  will  begin  the  registration 
process  onto  the  Sprint  Direct  Connect  Network.  The  initial  registration  can 
take up to 3 minutes. 
2.  Once  the  registration  is  successful,  5  short  pulses  will  be  heard  through 
the speaker.  
3.  After  registration,  the  phone  numbers  with  which  the  AdvanceMobile™ 
QC1 will communicate must be loaded. This can be done manually or with the 
Utility  software  available  from  AdvanceTec,  which  will  be  loaded  onto  the 

Mounting 
 holes 

Mounting 
holes 

Summary of Contents for AdvanceMobile QC1

Page 1: ...AdvanceMobile QC1 Installation User Manual Part AT3557A AdvanceTec Industries Inc 1150 NW 163rd Drive Miami FL 33169 T 305 623 3939 F 305 623 3996 Toll Free 1 800 881 8211 www advancetec com ...

Page 2: ... 8 Installation of Power Cable 8 9 Installation of Antenna and GPS Antenna 9 Connecting cables to Junction Box 10 Registering AdvanceMobile QC1 and Manual 11 12 AdvanceMobile QC1 Control Module Programming 13 Navigate through the Channels 13 Adjusting the Volume 13 Making and answering a call 13 14 Turning off the AdvanceMobile QC1 14 AdvanceMobile QC1 LED indicators Optional Extra Accessories 14 ...

Page 3: ...ular installation Before beginning the installation process determine the locations for the mounting of the Visor Microphone Speaker Junction Box PTT and Magnetic Mount Antenna Consider the following guidelines when planning the installation DO use all mounting hardware provided DO ensure that cables are not placed under stress DO follow proper and connections DO crimp connectors securely DO NOT a...

Page 4: ...formation for the vehicle make model and front compartment configuration involved in your communication equipment installation WARNING VEHICLES WITH ANTI SKID BRAKING SYSTEMS For vehicles with electronic anti skid braking systems refer to the Anti Skid Braking Precautions Motorola publication 68P81109E34 This publication can be ordered from Motorola Worldwide Systems and Aftermarket Parts Departme...

Page 5: ...Speaker on the mounting bracket and secure it by tightening the thumbscrews The mounting bracket is used to permanently mount the Speaker in place while permitting it to be tilted to a desired angle 5 Feed the cable out of sight to the location where you intend to mount the junction box 6 The speaker should be located at least 3 ft 1m from the visor microphone Avoid placing the speaker where it fa...

Page 6: ... of the cable to reach the Junction Box 5 Feed the cable to the location where you intend to mount the junction box Note The microphone should not be mounted near a window or in a spot where road and ambient background noise would be substantially high above 85dB SPL C Mounting of the PTT 1 To attach the PTT to the gear lever strap the PTT around the gear lever using the Velcro strip attached with...

Page 7: ...e to open Check the ground polarity before you begin the installation to prevent wasted time and effort 12V DC or 24V DC automotive systems are directly supported Determine the best cable route to the vehicle ignition for the Power Cable from the location where you intend to mount the Junction Box Diagram 3 1 Route the black lead of the main power cable to a convenient chassis ground and the red l...

Page 8: ...wer cable and the desired positive voltage connection point 9 Route and connect the green lead to a convenient ignition switch supply point in the vehicle If the green lead is not being connected to the ignition it MUST be connected together with the red lead Note An ignition switch accessory terminal can be verified by measuring the terminal while operating the vehicle s key switch With the ignit...

Page 9: ...o the external antenna connector on the junction box See Diagram below 5 Feed the antenna cables out of sight to the location where you intend to mount the junction box Connecting cables to Junction Box 1 Locate a position for the junction box beneath the dashboard on the pas senger s side of the vehicle or on the center side post between the front seats It must be protected from dirt and moisture...

Page 10: ...ousing can be secured in place by using a plastic tie or screw through the hole in the fuse s plastic housing 6 Mount the junction box in place using the 2 mounting screws supplied Diagram 7 Registering the AdvanceMobile QC1 and Programming Numbers 1 Once the AdvanceMobile QC1 is powered it will begin the registration process onto the Sprint Direct Connect Network The initial registration can take...

Page 11: ... short beeps through the speaker 5 End the call by pressing the red END button 6 Repeat this process until all the Direct Connect PTT numbers with which the AdvanceMobile QC1 will communicate have been loaded against the open channel numbers of the Control Module Diagram 8 NOTE The Programming button and the Direct Connect PTT must be kept depressed until the programming has been successfully made...

Page 12: ...anceMobile QC1 Control Module is used to A Program the Direct Connect PTT numbers with which the AdvanceMobile QC1 will communicate via the Utility Software available from AdvanceTec NOTE The PTT must be in the same format as the cell phone of the phone 1 Connect the USB connector of the USB Micro USB cable supplied to a USB slot of a computer 2 Connect the Micro USB connector to the Micro USB rec...

Page 13: ...nking dot will disappear to indicate that the unit is back in the channel mode The Channel and Volume selected will be saved when the AdvanceMobile QC1 is powered off provided it was powered for 3 minutes after the selection was initially made The selection saved will resume when it is next powered up If the Control Module looses communication with the main unit 3 horizontal lines will show in the...

Page 14: ...art AT7107A Diagram 14 1 To use a Privacy Handset with the AdvanceMobile QC1 plug the connector on the end of the coil cord into the corresponding RJ45 receptacle on Junction Box See Diagram 9 above 2 To answer an incoming call lift the handset out of the cradle and use as you would a regular phone handset 3 To terminate the call replace the handset into the cradle 4 To transfer and active call fr...

Page 15: ...isor Mic 3 Release the side button of the Palm Mic to transfer the outgoing audio from the Palm Mic back to the Visor Mic 4 To terminate the call press the red END button on the Control Module Specifications Input Output Input voltage 10 5Vdc to 32V dc Ignition detection Ignition ON 2 5Vdc to 32Vdc Ignition OFF 0V to 2 5V or OPEN Outputs Entertainment Mute Open Drain Continuous current capacity 50...

Page 16: ...uisition 0 01 max 220 Hz RF input Blocking Immunity 10 max Antenna connector Mini USB connector with a female center contact Use this connector for the Antenna provided with the unit 50 Ohms impedance Environmental Specifications Operational Temperature 20 to 60 C Storage Temperature 40 to 85 C Shock MIL STD 810E METHOD 516 4 Proc 1 18 shocks 40 G half sine 6 9 msec 18 Shocks 2500g s 0 00075 secon...

Page 17: ...17 Tel 305 623 3939 Toll Free 1 800 881 8211 www advancetec com ...

Reviews: