14
Step 4
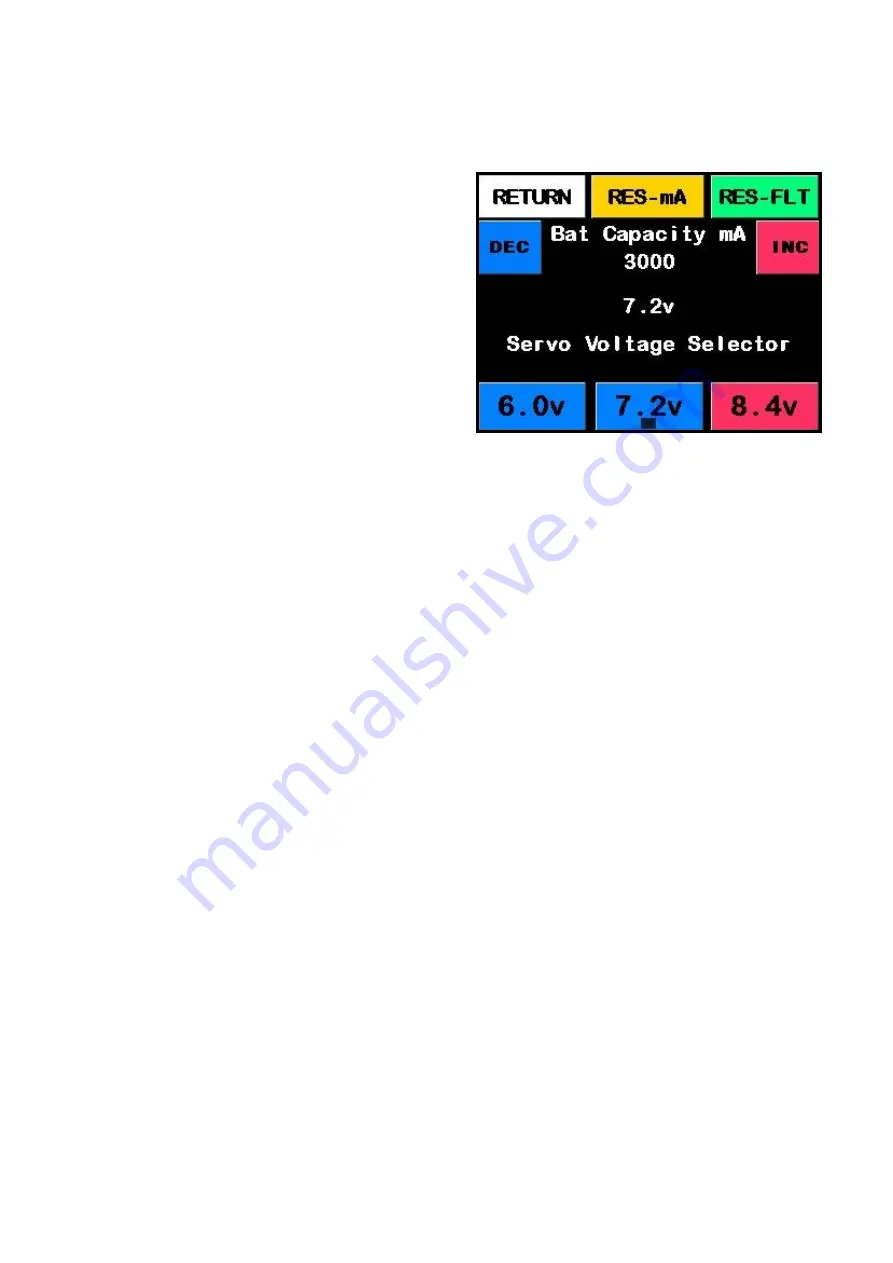
This is the battery setup screen. Using the arrows
(
DEC
,
INC
) next to
Bat Capacity mA
cycle through
until you see the correct capacity that matches
your battery packs.
Note: Step 4 is extremely important, Please en-
sure the capacity is set correctly to the battery
packs you are using.
The Smart Bus uses this capacity value to show
the remaining battery capacity on the main
screen. If you set this value incorrectly then the
remaining capacity indicators may not show the
correct remaining battery capacity.
Important
The Smart display main Screen shows how much capacity you have left using
the battery indicators on the left and right of the battery screen It is important
that the capacity you enter is correct and accurate. If you are unsure about the
capacity of your batteries or if your packs are not new. We recommend cycling
your packs by discharging them and recharging them to full. This will give you
the best possible result for the battery packs you are using
.
Step 5
Using the 6.0v, 7.2v and 8.4v buttons, select the regulator voltage of your choice. This will change
the output voltage to your servos. The regulator may take some time, please wait until the volt-
age you select is the same as the number on the screen.
Note: Please ensure your servos are capable of the voltage you select. Selecting a higher volt-
age than your servos are capable of might cause damage the them.
Step 6
Once you have setup these parameters, press the
RETURN
button to save and return to the main
menu. Press
RETURN
again to go back to the Smart Screen. You have successfully setup the Smart
Bus Battery monitoring.


