


61200770E1-42C
Copyright © 2008 ADTRAN, Inc.
5
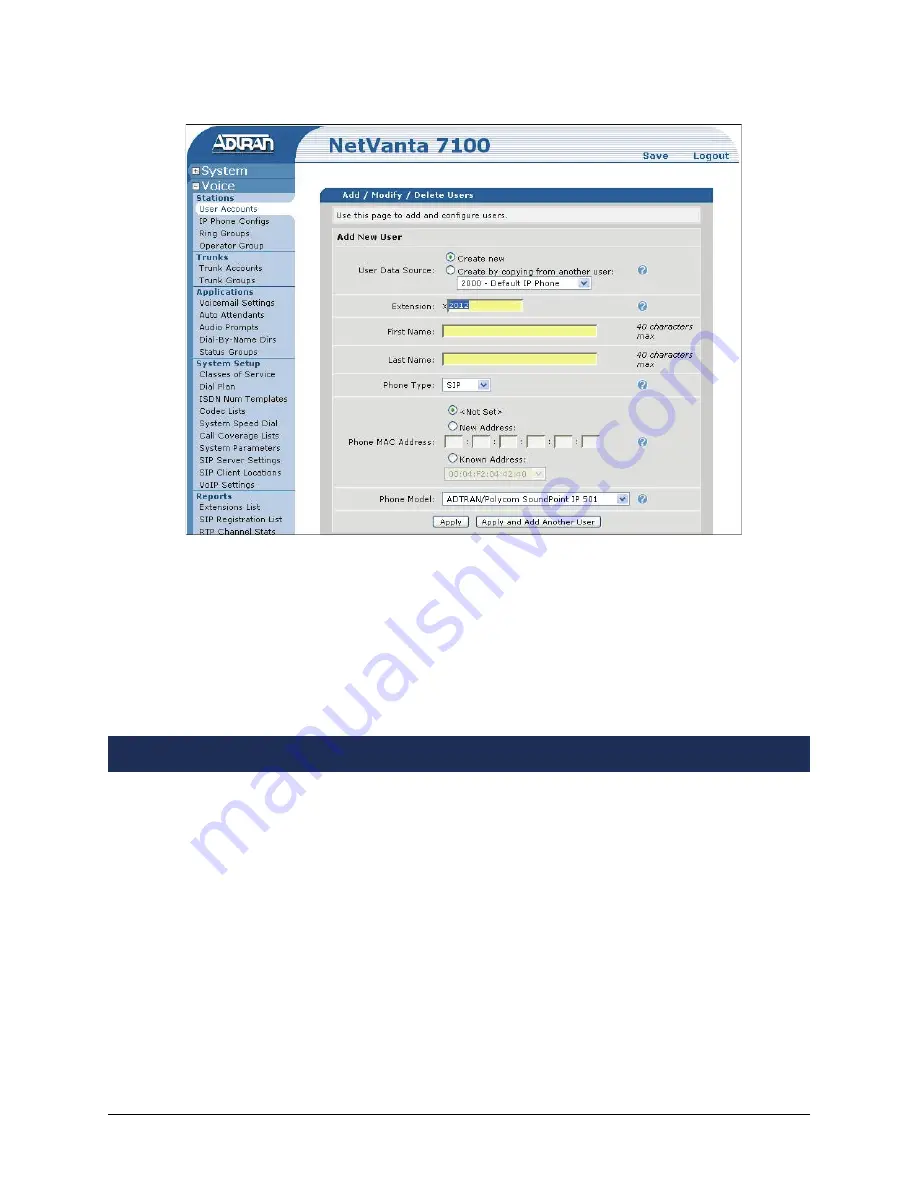
3. Enter the
Extension
,
First Name
, and
Last Name
. Leave the
Phone Type
as
SIP
and the
Phone MAC Address
as
<Not Set>
. This prevents the NetVanta server from attempting to
generate a Polycom configuration file for this account.
4. Select
Apply
to complete this task.
5. Select
Save
at the top right of the current menu. A confirmation message appears if the save
is successful. Select
OK
to close the window and return to the previous menu.
Included in the zipped installation file you received were several configuration files (refer to
Step 5
on page 6 for the list of configuration files). These files must be loaded into the ADTRAN
directory on the NetVanta server. This can be accomplished using any FTP program.
1. If you haven’t already done so, unzip the installation file provided by ADTRAN and save the
files locally.
2. Make a copy of the
adtran_000000000000.txt
file for each phone you are installing. Replace
the zeros portion of the file name with the MAC address of the phone. The MAC address can
be found on the label on the back of the phone, as well as on the phone’s box.
3. Open the newly created file and edit it by following the instructions provided in the file.
4. If an
ADTRAN
directory does not already exist on your NetVanta server, create a directory
titled
ADTRAN
using your FTP program.
Uploading Configuration Files


