


15
1.1.5.2 Changing the Image Drums
NOTE:
Never expose the image drum to light for more than 5 minutes and never expose the
image drum to direct sunlight. If you are going to leave the drums out for 5+ minutes, cover them.
Never touch the surface of the green drum inside the image drum unit as they are extremely sen-
sitive and can affect print quality.
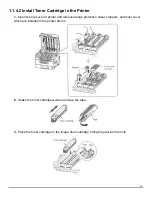
Remove the toner cartridge:
1. Turn off the printer and open the top cover.
2.
Select the relevant image drum (C, Y, M or K). The toner cartridge sits on top of the image
drum and has a blue locking lever at the front. Move the toner locking lever counter clockwise to
unlock the toner cartridge from the image drum and seal its base so that toner does not escape.
3.
Lift the toner cartridge up at the front, then pull towards the front of the printer to release it from
the image drum. Keep this toner cartridge safely stored as it will be returned to the printer once
the new drum is installed.
4.
Lift the image drum from the printer. Take precautions not to spill any toner that is still inside
the drum.
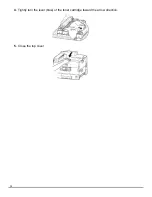
Note:
The printer has a special mechanism that allows all of the image drums to be lifted together
to allow easier access for clearing paper jams, please ensure that this mechanism is fully seated
before removing any of the image drums.
Removing the used drum:
Place the old image drum into the recycling bag provided with the new image drum and follow
your local recycling protocol.
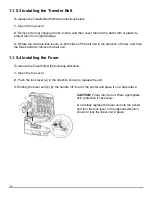
Installing the new drum:
Remove the new drum from its bag. An orange protection sheet has been included to ensure that
the image drum surface is not damaged whilst in transit. To remove this sheet: release the tape at
the top of the sheet and then pull the sheet firmly upwards. Remove the orange protective clips.
The image drum has a special alignment pin to ensure that it is correctly installed. This should be
slid into the appropriate color coded slot.
Reinstalling the toner:
Reinstall the toner cartridge by sliding forward into the top of the image drum and then pushing
down at the front. Complete the toner cartridge installation by moving the locking lever clockwise
to lock into place.
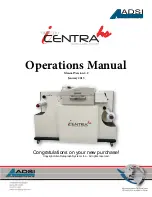
Summary of Contents for iTech Centra HS
Page 2: ...02...