


Getting Started
29
CT-61
5
Getting Started
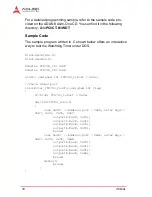
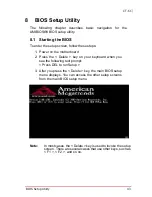
This chapter describes the installation of the following components
to the CT-61.
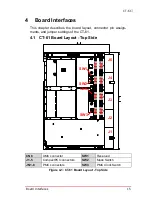
X
CT-61 Blade installation
X
PMC/XMC module installation
5.1
CT-61 Blade Installation
1. Carefully align the edges of the blade with the edges of
the slot.
2. Check that all the wedge locks lie flat against the board.
3. Slide the blade into the slot.
4. Tighten the wedge locks using a hex torque screwdriver
set to 6.0 ±0.5 kgf·cm (0.59 ±0.05 N·m).
To remove the conduction-cooled blade, use the following steps:
1. Loosen the wedge locks using a hex screwdriver.
2. Use the ejection levers to disengage the lock.
3. Carefully remove the blade from the conduction-cooled
chassis.
Summary of Contents for CT-61
Page 8: ...viii List of Tables This page intentionally left blank ...
Page 10: ...x List of Figures This page intentionally left blank ...
Page 20: ...10 Specifications This page intentionally left blank ...
Page 38: ...28 Board Interfaces This page intentionally left blank ...
Page 42: ...32 Driver Installation This page intentionally left blank ...
Page 52: ...42 Utilities This page intentionally left blank ...
Page 64: ...54 BIOS Setup Utility PC Health Configuration ...
Page 74: ...64 BIOS Setup Utility This page intentionally left blank ...